How do you propagate gloxinia using tubers? The method is actually very simple
The joy of growing gloxinia lies not only in admiring its dazzling flowers and cute leaves, but also in the considerable sense of achievement gained from propagating it yourself. Unlike most plants, which are grown either from seed or from cuttings, gloxinia has a truly varied range of propagation methods: it can be grown from seed, from stem cuttings, and from leaf cuttings, and the tuber can also be divided. Below, let us introduce how to propagate gloxinia using tubers!
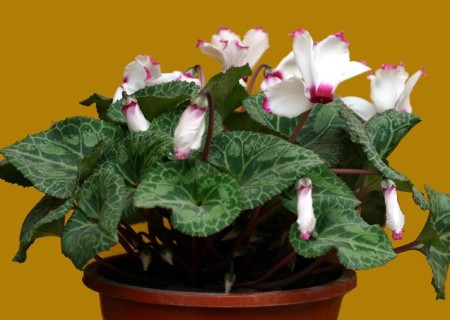
Propagating gloxinia from tubers means cutting the tuber at the appropriate time and planting the pieces in pots. That is, in early spring, when new shoots grow after the old tuber has been dormant, cut it into several pieces, making sure each piece has one shoot, coat the wounds with sulfur powder or charcoal powder, and after they have dried, plant them in pots.
The method of propagating gloxinia from tubers is relatively simple:
1. Choose a plant that has grown for 2-3 years, and propagate it in spring before repotting.
2. After the tuber sprouts, use a sharp knife to cut the tuber into pieces, making sure each piece has a growth bud; otherwise it will only produce roots and cannot form growing shoots.
3. After cutting, apply some plant ash to the cuts to prevent the tuber from rotting.
4. After decapitation, the tuber usually sends up multiple shoots at once. If you are not propagating it, you can keep only one of the shoots and remove the weak ones, which helps concentrate nutrients and produces more numerous and fuller flowers.
Relatively speaking, double-flowered types have smaller tubers, upward-facing types are a bit larger, large side-facing flowering types are even larger, and small side-facing flowering types are the largest.
For large tubers, it is best to plant them with 1/6 exposed above the soil surface, as this makes tuber rot less likely. It is also said that tubers older than three years will age, so you can consider cutting them again at the growth buds into pieces, drying them briefly, and replanting them.
Decapitating gloxinia is exactly the opposite of African violet: keep the lower part and not the upper part. It is best to do this on a sunny day after the flowers have completely finished blooming, leaving 1-2 cm of stem. Do not water for 3 to 5 days after decapitation, to avoid wound infection causing tuber rot. After decapitation, new shoots generally emerge within ten days. Once the shoots have four true leaves, you can change the soil and repot or transplant them, or continue growing them in the original pot. Try not to repot and change the soil right after decapitation, as this easily causes tuber rot.
Generally, gloxinia needs to be transplanted twice to grow quickly. I still do not understand the reason for this. Transplant once when there are four true leaves, and then transplant once more when a single true leaf has grown longer than 10CM; this way it grows very fast. When planting in the final position, you can apply some base fertilizer appropriately to help fully build up its flowering capacity.