How to sow Gloxinia seeds? Sowing method step-by-step illustrated guide
How to sow Gloxinia seeds is not a difficult thing to understand, but compared with theoretical articles, the practical experience of flower lovers is even more precious. This article is a summary of tips compiled by a flower lover based on years of sowing Gloxinia, and it might just surprise you!
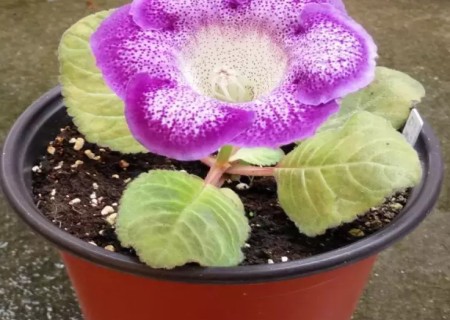
Before sowing Gloxinia, flower lovers must understand the habits of Gloxinia seeds. They are light-loving seeds, so never cover them with soil when sowing. Another characteristic is that the seeds are very tiny: each gram contains more than 20,000 seeds, which can grow into 6,000~7,000 Gloxinia plants, so usually only 1/3~1/4 can successfully grow to flowering.
With such tiny seeds, no matter how careful you are, most of the seeds will wash into the soil after watering, and without light they will not germinate. So what should you do? The answer is to water thoroughly first, then sprinkle the seeds. How do you ensure it stays very moist for two weeks? Sow in a transparent covered container; you can use a transparent disposable bowl, a jelly or tea jelly cup, a biscuit box, a disposable cup, or various transparent vessels.
Another special point is that although the seeds are very small, the medium must be very moist when sowing. Water until it is saturated to nearly liquefied. They will germinate within 7 to 14 days. If it is not moist enough, they may still germinate after a longer time, but the risk is great. Once you understand the seeds' habits, just sow according to those habits! Try it, it is very easy to succeed.
Gloxinia sowing method/steps:
1. Prepare a sowing container without drainage holes, new sowing peat, and an adjustable spray bottle. All tools that need to be used should be washed clean, including your hands.
2. Put the peat into the container.
3. Spray the peat placed in the container until wet.
4. Stir the moistened peat evenly.
5. Spray the medium you just stirred until wet once again.
6. Finally, stir it into a swamp-like state like this.
7. Prepare a clean piece of paper and fold it.
8. Place the seeds and prepare a toothpick.
9. Use the toothpick to sow the seeds to the desired positions.
10. After sowing, spray once more. Pay special attention to one point: do not spray directly at the sowing pot; instead, spray above the sowing pot and let the water mist fall naturally onto the surface of the sowing soil. This way the seeds will not be blown away.
11. Label the outer wall of the pot——write the name clearly.
12. Put it in a zip-lock bag, then write the sowing date on it.
13. Place it under bright indirect light or a supplemental grow light.
14. For Gloxinia sowing, the seed germination temperature is around 25 degrees. Because I need to control the temperature for Streptocarpus, the room temperature cannot be higher than 22 degrees. So I place the sowing box directly above the next layer of the energy-saving lamp to increase the temperature.
15. After a period of time, you will be able to see germination.