How to sow coleus? Detailed sowing method
Coleus leaves are delicately colorful and varied, making it not only an excellent choice for windowsills and indoor greening, but also an ideal foliage plant for patterned flower beds and decorating venues. Currently, common varieties grown in pots include Red Rainbow, Velvet Red, and Dwarf Peach Red; it is best to select 1-2 year old plants with brightly colored and glossy leaves for cultivation. Choosing wooden flower pots or clay pots is better.
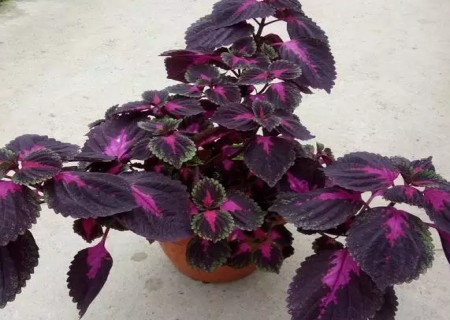
The daily management of coleus is relatively simple; you only need to pay attention to timely pinching to promote new branches, form a full spherical shape, and develop a bushy plant. Once flower spikes form, they should be removed to avoid affecting the leaf ornamental effect.
Coleus can produce excellent plants through sowing, generally using the pot-sowing method:
1. Under conditions with a high-temperature greenhouse, coleus can be pot-sown all year round. Generally, it is done in a greenhouse in mid-March. You can mix thoroughly decomposed humus soil with plain sandy soil, then put it into a seedling pot, and sow according to the method for small seeds.
2. The sowing soil is a mixture of 1 part peat soil and 1 part fine sand; broadcast sowing is sufficient. Coleus seeds are light-loving seeds, so no soil covering is needed after sowing. The suitable germination temperature is 20-25°C. Keep the substrate moist, and they will germinate in 8-10 days.
3. Because the seeds are relatively small and need light to germinate, the soil covering should be thin. Place the sown seedling pot in water to soak thoroughly, cover with a glass plate or plastic film, keep the pot soil moist, and provide water and management.
4. Then place the seedling pot containing fine sandy soil into water to soak and moisten thoroughly. After that, sow according to the method for small seeds, cover with a thin layer of soil, and then cover with a glass plate or plastic film.
5. During this period, keep the pot soil moist and water reasonably. After a period of time, they will take root, sprout, and grow into seedlings, after which they can be divided and transplanted.
6. When the sown seedlings grow 1 pair of true leaves, pot them up. The potting soil is 2 parts peat soil, 1 part loam, and 1 part river sand, with sufficient base fertilizer added. During the growing period, fertilize frequently, including topdressing with superphosphate and bone meal.
7. Keep the temperature above 20°C. During the seedling stage, whether to pinch depends on the cultivation purpose. If you want to cultivate a plant with a full shape, remove the main stem to promote side branch growth. If you want to cultivate a conical plant shape, there is no need to remove the main stem.
8. After emergence, thin the seedlings 1-2 times, and at the same time select the superior and remove the inferior. When the seedlings propagated by sowing grow 6-8 true leaves, pot them for final planting. After potting, water thoroughly once, then place them in a slightly shaded place to recover. Keep the temperature between 16°C and 22°C. After about 10 days of recovery, they can enter normal management.