How to propagate geraniums by cuttings? Detailed explanation of cutting methods and steps
Recently, the potted geraniums at the editor's home have started blooming again. Due to the continuous high temperatures, the editor's home has lost many rather precious geranium varieties, and of course many friends' potted plants have also suffered heavy losses. Alas, better not to blame heaven and others, after all, this is an era of living at the mercy of the weather! Because geraniums are plants that are relatively easy to keep alive through cuttings, friends can share with one another, so let's all contribute the quality resources from each home!
1. Time and temperature
Our region is located in the middle and lower reaches of the Yangtze River. March to June is suitable for cuttings, and of course September to November is also quite good for cuttings, because cutting is more suitable when the temperature is around 20-plus degrees, and roots form quickly.
2. Soil preparation
For the cutting medium, it is best to choose a mix of peat, perlite and vermiculite. In low temperatures, you can choose to use all vermiculite; in high temperatures, you can use all perlite. For the cuttings, both make rooting very easy. You can also go by the actual conditions around you; as long as it is clean loam soil with little fertility, it will also work.
3. Choosing containers
When choosing cuttings, any healthy and sturdy branch will do. Generally, take a branch keeping 3-4 nodes from the top downward, and cut about 0.5 cm from the previous node, taking care to keep the cut smooth. Then remove the stems and leaves on the lower two nodes, and keep just 2-3 leaves at the top of the branch.
4. Inserting the cuttings
The trimmed branches cannot be inserted immediately; they need to be placed in a cool, shaded spot to dry for a few hours until the wounds dry. Once the wounds are dry, they can be inserted into a pre-prepared disposable cup. When inserting, first use a small wooden stick of suitable size to poke a hole in the growing medium that fits the branch, and then insert the branch. Next, firm the soil around the branch and water it.
5. Placement
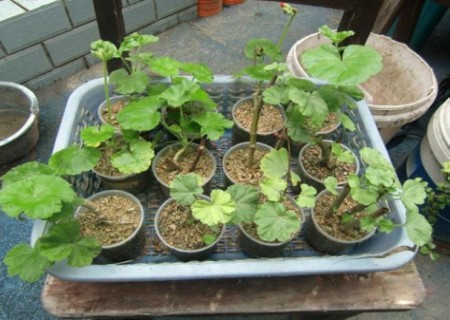
After inserting the branches, place the seedling pots in a bright spot where they can receive diffused light. After about half a month, you can see the seedlings beginning to grow roots. After that, you can appropriately increase the light for them, which is more helpful for the plants to root, sprout and grow quickly.
6. Care and management
After the plants return to normal growth, you can place the seedling pots on a tray with a small amount of water just to keep them moist. Of course, you can also mist the plants appropriately. After about 1 month or more, they can be potted up and planted in their final spot. For those plants that still have not rooted when the time comes, as long as the inserted part of the branch remains in good condition and has not rotted, we can use the above method to repeat the cutting.
7. Transplanting and potting up
By around November, we will find that the inserted branches have not only developed abundant roots, but the branches and leaves are also relatively lush. At this time, we can take out the seedlings and transplant them into pots. For the specific method of transplanting and potting up, you can refer to the related articles the editor has published; they were posted before.