Geranium cutting propagation method illustrated, a step-by-step guide for you
Since geranium is a semi-succulent plant with stems that contain a relatively large amount of water, a slight mistake during cutting can easily lead to root rot, thus affecting the survival rate of the cuttings. In view of this, a gardening friend combined practical experience and improved the measure of heavy pruning of geranium plants after flowering; the branches cut from them were used for cuttings, greatly improving the survival rate of the cuttings. Below, the editor will share this method with everyone, hoping it will help gardening friends who need to propagate geraniums by cuttings.
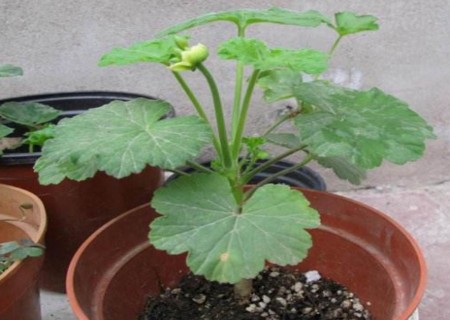
1. First select healthy branches from the plant that need to be cut, from the top tip of the plant downward, every 4-6 true leaves, or cut 7-10 cm of branch as one section, until reaching the height position for the plant's routine heavy pruning after flowering. Before cutting the cuttings, you must plan in advance the pruning positions and the number of cuttings to be taken.
2. At 0.5 cm below the stem node, use pruning tools to carefully cut a ring around it (similar to the ring-barking technique), or peel off the surface layer of the branch, with a width of about 0.2-0.4 cm. It should be noted that when making the ring cut, only the epidermis of the branch is removed, and it must be ensured that the branches and leaves can still remain safe and sound on the plant. In this way, the branch does not separate from the mother tree, and several sections of future cuttings can be formed; moreover, because the ring-shaped wound regulates nutrients and hormones during self-healing, after two or three weeks you can see that the tips of most of the cuttings below the top shoot have already sprouted axillary buds under stimulation, and the ring-shaped wound has also healed.
3. After the wound heals on its own, we can begin cutting the cuttings. At the same time, the cut cuttings should be placed in a ventilated place to dry for several hours; after the cut surface of the cuttings forms a film and dries, we can insert these branches into the potting soil in the pot for cutting propagation.
4. After inserting these cuttings, sufficient clean water should be poured into the pot at this time, and appropriate watering should be carried out in future daily management, following the principle of letting the soil in the pot dry before watering again. After more than half a month, it is not hard to find that by this time all the cuttings have taken root, and the survival rate may be as high as 100%.
Through the above improved method of geranium cutting propagation, it is very meaningful for expanding the propagation of excellent and rare geranium varieties as well as for effectively using mother plant branches.
Technical points:
By using ring-barking on the branches of the mother plant and removing the surface bark, the semi-succulent cut surface area of the cutting is reduced, and at the same time the flow of products produced by photosynthesis in the mother plant's leaves is isolated, allowing the base of the cutting to accumulate nutrients before cutting and promoting the formation of healing tissue at the wound edges to avoid wound infection, promote rapid rooting, and achieve the regulation of internal nutrients.
The above is the technical improvement we made in obtaining cuttings in order to increase the success rate of geranium cutting propagation. After we obtain high-quality cuttings, next we begin cutting propagation.
Operation method/steps:
1. First choose several disposable cups or transparent plastic cups, and at the same time punch some drainage holes of moderate size in the bottom. Then add the prepared potting soil; the cutting medium can mainly be river sand.
2. According to the above method, cut several cuttings from the geranium mother plant, about 15 cm in length, then set them aside to dry for a period of time, preferably until the cut surface forms a film and dries.
3. Insert the prepared cuttings into the previously prepared soil-filled containers. Pay attention to adjusting the position of the cuttings; it is best for the cuttings to stand vertically upright in the potting soil.
4. After about half a month, the geranium cuttings will take root and sprout, and we can clearly see the white root system through the plastic containers.
5. Wait until the geranium cuttings have taken root and sprouted, and the branches and leaves have grown to a certain extent; then we can transplant them into pots. First, what we need to do is prepare to remove the plants from the pots and clean off the sand.
6. Since the cutting medium we chose earlier was sand, the process of removing them from the pots is relatively simple. The method is to directly soak the plants together with the plastic containers in a bucket full of water.
7. After the sand in the plastic containers is completely penetrated by water, it will quickly become loose, and the plants can also be taken out very easily. After taking out the plants, we need to wash the sand off their roots thoroughly.
8. After washing all the plants, lay these plants out smoothly together to dry, and at the same time you can find that both the branches and leaves and the root systems of the young seedlings are growing very vigorously. This shows that our earlier improved technique for the cuttings was very successful.
9. Plant the geranium seedlings that have been dried of excess water into flower pots prepared with potting soil. When planting, note that you should gently pinch the seedling with your fingers, observe and adjust the plant's position, and try to place the plant upright. Then cover with soil and firm the soil around the plant to secure it.
10. Next is watering the plants to settle them in. After that comes the care and management work during the seedling stage. At this point, our process of geranium cutting propagation is finished.
The editor has explained so much; have you all learned it? In the process of potting the geranium seedlings, the editor added illustrations to the text, hoping to help everyone understand. Gardening friends who have learned it might as well try it themselves!