Illustrated Guide to Bonsai Branch Development Methods: A Step-by-Step Tutorial to Grow Beautiful Shapes
Everyone knows that the beauty of a bonsai's shape must be achieved through pruning, the most commonly used technique, but before pruning, we must first grow the plant's branches strong and vigorous. So how do you develop and grow branches on a bonsai? Below, the editor shares an article with an illustrated guide to bonsai branch development methods, hoping it will give everyone some understanding and inspiration for creating beautiful bonsai.
Before we start talking about branch development, let's first look at the bonsai work below. I wonder how everyone feels about it?
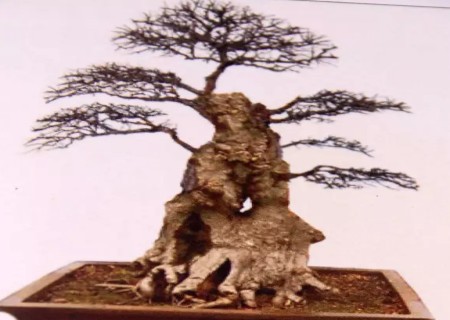
Actually, looking at this bonsai work's branches and trunk separately, their presentation is quite good, but when viewed as a whole, it feels somewhat uncoordinated. Why? It's obvious that the transition from the trunk to the branches appears a bit unnatural. Why does this happen? This is clearly because the creator over-pruned the branches. Looking carefully, you can see that pruning was started before the primary branches had grown thick and strong. The consequence of pruning at this time is that the primary branches cannot later grow into a thick, sturdy form and cannot reach a thickness matching the trunk, so it looks uncoordinated.
So how can the primary branches be made to match the trunk? Please see the illustration below:
This is the initial state of the stump material. After we dig it out and bring it back, we will definitely need to trunk-chop it. The image below shows the form after trunk chopping; this is the result after tidying up the branches and root system:
Speaking of root treatment, next let's talk about how to tidy the root system of a collected wild stump. After we collect the wild stump and bring it back, we need to prune away all its fibrous roots, otherwise it can easily appear to be falsely alive. Also, roots growing downward should be kept as short as possible, because we need to consider the depth of the pot to be used. Of course, works with high exposed roots are naturally excluded.
Next, we begin developing the primary branches, which usually takes about 1-3 years. When the new shoots have grown to a certain thickness and appear to blend naturally with the trunk portion, we choose to heavily prune them before bud break in early spring. Usually we keep only 1-2 buds, with the purpose of making them grow secondary branches. In fact, of the primary branch cultivated over 1-3 years, the part that is truly useful is still just the small section after heavy pruning. This is also a period that tests our patience.
Of course, before heavy pruning, we must first envision how the secondary, tertiary, and even quaternary branches should be distributed and whether there is enough space for them to extend. Also, what form the crown should present, how long the branches should be left, and how many buds should be kept - we should weigh all this in our minds in advance, so that later we do not leave several levels of branches too long and then have to prune again, which not only wastes time but may also harm the plant.
The method for cultivating secondary branches is basically the same as for primary branches: after the heavily pruned primary branch sprouts, excess buds likewise need to be removed. At the same time, to promote the growth of secondary branches, we also need to wire them as necessary, adjusting the growth direction and presentation posture of the secondary branches in good time. When the secondary branches have grown to closely match the primary branches, we need to prune the secondary branches just as we previously heavily pruned the primary branches.
Generally, branches at each lower level are thicker and longer than those at the level above, so that the branches grown in this way look more coordinated and form our triangular branch shape, which is usually the effect we want. That is, primary branches are thicker and stronger than secondary branches, secondary branches are thicker and stronger than tertiary branches…… Only by avoiding that kind of large-span connection can the join be more natural and look more coordinated.
When pruning branches and trimming roots, we generally recommend using heavy pruning. Do not find it hard to part with things; only with giving up can there be gain. Because once the primary and secondary branches are well managed, the plant will take shape faster and faster in the future.
As long as we adopt the correct handling methods, branch development will yield twice the result with half the effort. From the trunk to the tip of the tree, there will be more and more branches, finer and denser, and the time needed for branch development will be greatly shortened. The branches obtained through this cultivation method will have well-proportioned thickness and natural, coordinated joins, and compared with branches that rely purely on wiring or twisting, they have greater ornamental value and artistic effect.