How to divide bromeliads (Tillandsia)? Detailed explanation of the division method
Bromeliads, also known as Tillandsia, are difficult to propagate from young plants by sowing seeds, so division is mostly used for propagation. When the purple or red flower spike in the center of the mother plant begins to wither, the plant will sprout young plants from the leaf axils. When they grow slightly larger, they can be pulled off with their roots by division and potted. With proper subsequent care, they will generally bloom after 2-3 years.
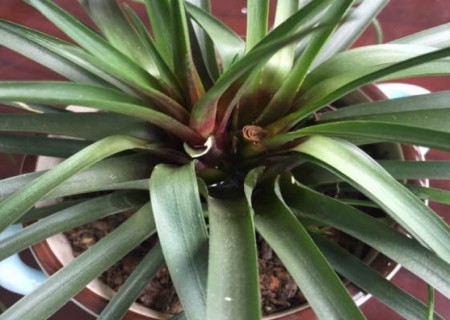
In recent years, as people pursue a better quality of life, more and more gardening enthusiasts have joined the ranks of growing potted Tillandsia. This potted flower has become a popular indoor foliage and flowering plant. If you place a few pots at home, what a wonderful thing it would be! As mentioned above, Tillandsia is mostly propagated by division. Today I will talk about this propagation method.
1. Division time
Tillandsia division is best carried out during February-March each spring. Dividing at this time not only means the soil has begun to thaw, but the divided plants also survive more easily.
2. Division method
Division is meticulous work that requires care and caution. During operation, avoid causing as much damage to the plant as possible. The specific steps are as follows:
1) First, obtain a pot of mature Tillandsia, then carefully take the mother plant out of the flowerpot, remove the potting soil adhering to the root system, and then straighten and comb through the mother plant's roots so they are spread out.
2) Next, use a sterilized sharp knife to cut the mother plant apart together with its roots. Usually, one mature plant can be divided and cut into more than 2 planting seedlings, and the divided seedlings each carry corresponding roots.
3) After dividing the mother plant into planting seedlings, the leaves need to be properly pruned. This can reduce excessive water consumption and evaporation, which is more conducive to the plant surviving. At the same time, the old, weak and thin roots should be properly trimmed away, keeping only the thick and strong roots.
4) After the planting seedlings have had their roots trimmed and leaves pruned, it is recommended to apply carbendazim or plant ash to the wounds on the roots, so as to sterilize and disinfect and promote wound healing
3. Potting and planting
Pot the treated planting seedlings one by one, cover with loose and breathable culture soil, then water each thoroughly once. After that, do not water in the short term to keep the potting soil on the drier side; then place them in a cool, moist place for care. After about half a month, the young plants will sprout new roots, and then gradually resume normal growth, after which they can enter the normal care and management process.
When dividing Tillandsia, the safest method is to turn the flowerpot upside down, gently tap the bottom and outer wall of the pot, and support the plant with the other hand, waiting for the plant to come out of the pot together with the soil ball. Next, gently shake off the attached soil, separate the mother plant from the side plants, and then plant them separately.
For Tillandsia division, in addition to being careful, we also need to be precise. With a few more tries, practice makes perfect.