Detailed Explanation of Camellia sasanqua Cutting Methods and Technical Points
Camellia sasanqua is a high-quality flowering shrub species, widely used in landscaping and with broad development potential. As long as it is grown well, this species not only has a very graceful tree form but also presents a scene of abundant flowers and lush foliage. More importantly, growing Camellia sasanqua in pots also offers very high ornamental value, making it excellent for decorating interiors and beautifying the home environment.
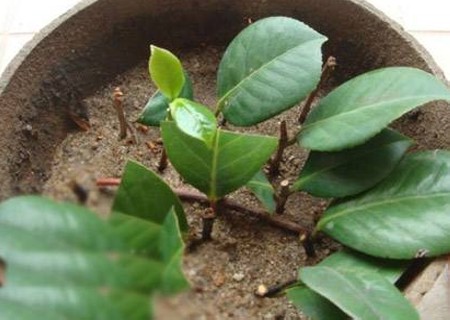
Camellia sasanqua can be propagated by cuttings, usually carried out in March-April each spring. Of course, if you are not sure whether the current time is suitable for cuttings, it is recommended that you check the ambient temperature in advance. If the average temperature can reach above 12°C over a continuous week, cuttings can be taken, except during hot summer weather. Under this temperature condition, the plant's cell tissues generally become more active only above 10°C and begin to divide, making it easier for cuttings to sprout at this time. According to the temperature requirements, we can also propagate by taking cuttings in autumn.
So, how do you take cuttings from potted Camellia sasanqua? Below, the editor will share with you the cutting method for Camellia sasanqua (technical sharing).
First, we need to prepare the branches used for cuttings. The requirement for the cuttings is that they need to have 2-3 buds. The end of the branch used for insertion into the soil should be cut into a horseshoe shape with a sterilized sharp tool, which can increase the contact area between the cut surface and the soil. The upper end of the cutting should be cut cleanly and flatly, making the cut surface round. At the same time, the upper cut surface should be sealed with wax to avoid water and sap transpiring from the wound, and also to avoid wound infection, which is more conducive to the survival of the cutting. It is recommended to keep half a leaf on the branch.
Next is preparing the flower pot and cutting bed. In order to achieve the dual effects of air permeability and water absorption, it is recommended to use an unglazed clay pot, and it should be soaked in water one day in advance before use. For potted cuttings of Camellia sasanqua, it is advisable to choose fertile, loose, and slightly acidic soil with excellent drainage and air permeability, often using leaf mold or peat soil as the main culture medium. After the cuttings survive, the first repotting and transplanting can use sandy loam or fertile, loose mountain soil as the culture soil.
Next is the cutting process. After filling an appropriate amount of culture soil into the unglazed clay pot, it can be used as a cutting bed; then gently insert the horseshoe-shaped end of the prepared cutting into the soft cutting bed. The insertion depth should not be too shallow or too deep; as with cuttings of most plants, moderate depth is sufficient. After completing the cuttings, check which cuttings are not in full contact with the soil, and gently press the soil around these cuttings so that the soil contacts the cuttings as fully as possible. This not only stabilizes the cuttings but also makes them more likely to survive.
After completing all the cutting steps for Camellia sasanqua cuttings, the next step is care and management. First, move the pot with the inserted Camellia sasanqua cuttings to a cool and ventilated place. After the cuttings gradually take root and survive, you can appropriately increase some weak light exposure to promote photosynthesis and speed up the plant's growth process. During the entire period of cultivating young plants, pay attention to the dry and wet condition of the soil in the cutting bed, keeping the culture soil in a moist state, so timely watering measures should be taken. After that, we just wait quietly for the plant to grow robustly. (Writer: Xiaoshu 21:44)