How to propagate nerve plant (Fittonia) by cuttings? A step-by-step guide
Nerve plant has a light, delicate posture and a small, dainty form. Although its leaf color appears somewhat understated and elegant, the veins on its leaves are very clearly defined and extremely beautiful, giving a fresh feeling. Grown as a potted plant, it has very high ornamental value. Placing a potted nerve plant on a balcony or indoors can bring a special decorative and accent effect to the environment.
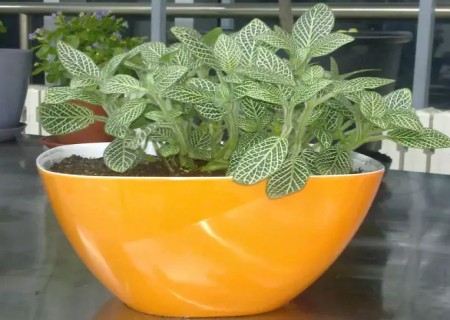
Nerve plant is very well suited to indoor foliage display, so using it to decorate indoor home environments has a special charm. If it is made into a bonsai, its ornamental value is even more outstanding, so more and more gardening enthusiasts like to keep it at home. Nerve plant is generally propagated by cuttings. As long as the temperature is suitable, cutting propagation can be done in all four seasons, though May to September is the best propagation period. So how do you propagate nerve plant by cuttings? Below, the editor will explain the cutting propagation method for nerve plant.
1. Making the cuttings
First, select a pot of well-grown mature nerve plant, then choose from it robust branches with terminal buds and 3-5 stem nodes as cuttings, cutting them to a length of more than 5 cm. After cutting the cuttings, remove all the leaves at the lower end of the branch, keeping two leaves on the upper part. You can also cut each of the two retained leaves in half to reduce unnecessary consumption of nutrients by the leaves.
2. Preparing the growing medium
Before taking cuttings, we first need to prepare the growing soil. First place a layer of large expanded clay pebbles about 2 cm thick at the bottom of the pot as a drainage layer, then spread a layer of fully decomposed organic fertilizer about 2 cm thick on top of the large clay pebbles as a base fertilizer, and finally cover it with a mixed growing medium made of garden soil, river sand and sawdust.
3. The cutting process
After completing the above preparation work, insert the prepared cuttings into the potting soil. To increase the number of surviving young plants, you can appropriately increase the number of cuttings according to the size of the pot. In each small pot with a diameter of about 10 cm, generally 8-10 cuttings can be inserted. After completing the cuttings, you can proceed with the care and management of the young plants.
4. Care and management
After all the cuttings have been inserted, move the pot together with the cuttings to a cool, well-ventilated place for care and management. After 1-2 days of acclimatization, we can then provide appropriate light for them. As long as you manage them attentively, roots and sprouts will generally appear within 2-3 weeks. When the young plants sprout new leaves, you can apply a small amount of slow-release fertilizer to the pot and water appropriately, and thereafter carry out pinching and pruning as needed.
It should be noted that nerve plant quite likes light, so during care and management it should be given sufficient light. If the plant is kept for a long time in a shaded environment lacking light, it will easily become leggy in stems and leaves, thereby losing its original ornamental effect. More importantly, once this plant becomes leggy, its plant shape is very difficult to control, and restoring it to a normal growth state is very difficult, so it also loses the ornamental value of a bonsai and the meaning of growing it as a potted plant. (Author: Xiaoshu 2017-09-10 22:27)