Detailed Explanation of Cutting Propagation Techniques for Potted Chrysanthemums
The chrysanthemum is not only one of the four famous flowers of our country, but also one of the four major cut flowers in the world today, and it has quite many varieties. It can not only adorn garden flowerbeds, flower borders, and so on, but can also be grown as a potted plant or made into a bonsai, with extremely high ornamental value. As a kind of potted flowering plant resistant to viewing, the chrysanthemum can also be eaten and has certain health benefits.
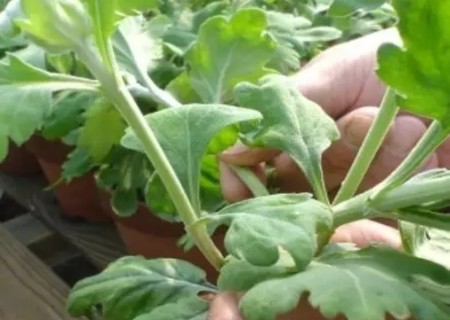
So, how are chrysanthemums propagated? Usually, chrysanthemums mostly use asexual propagation, mainly manifested in four propagation methods: cutting, layering, root division, and grafting. But among all these methods, propagating young plants by cutting is the most common, and it is highly practical, simple and easy to learn, and easy to survive. Today the editor will share with you the cutting techniques for potted chrysanthemums.
1. First prepare a mature chrysanthemum plant, then cut some branches from the mother plant to make cuttings. Usually, the branches cut from the mother plant mostly keep the upper half, cutting them off at a position about 20 cm from top to bottom.
2. When making the cuttings, we need to consider that at least 1-2 leaf buds need to be retained on the cutting, and the top bud also needs to be retained at the tip of the branch. After that, soak the cut cuttings in rooting solution; generally they need to be soaked for more than 2 hours before they can be used.
3. Chrysanthemums also like loose, breathable, well-drained fertile loam, preferably soil rich in humus. After preparing the culture soil, first water the soil once to keep the culture soil in a certain moist state; then use chopsticks or a branch to poke holes of suitable size with a depth of 6-8 cm in the culture soil, and finally insert the cuttings into the holes, then press the soil around the cuttings firmly.
4. After all the branches have been inserted as cuttings and the soil around the cuttings has been pressed firm, we likewise need to water once, but this time we need to spray the culture soil thoroughly wet, then move the pot together with the cuttings to a cool and ventilated place for maintenance and management.
5. Next, what we need to do well is shading work. It is recommended to make a sunshade for the cuttings. During the day, cover the pot together with the cuttings, and only remove it at night. At the same time, take timely water replenishment measures to maintain the humidity of the cutting bed and ensure that the cuttings sprout as expected.
6. When you find that the leaf buds on the cuttings have turned green, from this point on, we must properly provide light conditions for them. The best time for light is usually in the early morning and evening, because the light at these two time points is relatively weak and will not sunburn or kill the cuttings. Never expose them to light or the scorching sun at noon.
7. After the cuttings have taken root and turned green, we should gradually increase light for them and promptly do the work of potting and transplanting. During this period, watering should not be too much or too frequent, so as to avoid causing the plants to grow too fast, which is not conducive to survival after transplanting. (Author: Xiaoshu 2017-08-28 21:37)