How to graft a tree-standard rose? Detailed methods and steps
The rose is a clumping shrub that does not grow an obvious main trunk, and to cultivate a rose bonsai with tree-standard characteristics, grafting is often the means used to achieve it. The tree stock used for grafting roses is mostly rose rootstock (Rosa multiflora), and the rootstock is required to grow vigorously, have a well-developed root system, and be free of pests and diseases. Tree-standard roses cultivated on this basis are often more ornamental once made into bonsai.
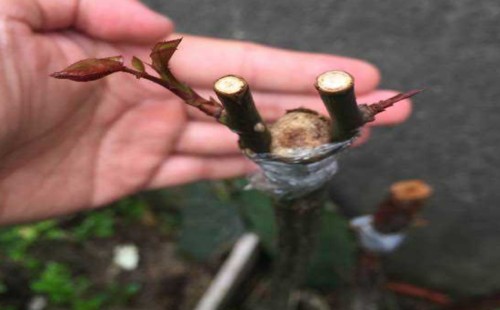
Moreover, if a rose rootstock tree is used as the rootstock for grafting roses, multiple varieties of roses can be grafted onto a single old stump at the same time, making the rose bonsai bloom larger, with more colors, more luxuriant branches and leaves, and a longer flowering period, so it is more appealing than ordinary rose bonsai, and both its ornamental value and economic benefit are often higher. So, how do you graft a tree-standard rose?
I. Choosing the rootstock
To make a tree-standard bonsai through grafting, the choice of rootstock is very important. Because a tree-standard rose bonsai requires the tree stock to have a well-developed root system, a thick main trunk, a rounded crown, numerous branches, and large, brightly colored flowers, a robust rootstock must not only support the entire crown but also have enough capacity to supply nutrients, which is the key to successful grafting and the smooth creation of a tree-standard rose bonsai. At present, the relatively suitable and most widely used rootstock is mainly the old stump of Rosa multiflora, and among Rosa multiflora, the two varieties most widely used are the American thornless multiflora rose and the Japanese thornless multiflora rose.
II. Making the scion
To graft and cultivate a high-quality tree-standard rose bonsai, in addition to choosing a good rootstock, we also need to be able to make a high-quality scion. Making a high-quality scion often requires meeting two conditions: one is that the scion variety has extremely strong growth vigor and the ability to sprout branches, so as to form a rounded crown later; the other is that the characteristics of the scion should be as close as possible to the chosen rootstock, which not only allows it to inherit the advantages but also makes grafting more likely to succeed.
III. Grafting timing
The grafting time for tree-standard roses is often determined according to the temperature environment, grafting materials, and grafting method, and is especially greatly affected by the temperature environment. Because our country has a vast territory, the temperature differences between the north and south regions vary greatly; usually the four seasons are not very distinct in the south, while in the north the four seasons are often clearly distinguished, so the temperature environment differs with the region. But the grafting process often requires the local temperature to be suitable and stable, so an appropriate time must be chosen for grafting, and grafting should especially be avoided when the temperature fluctuates too much in a short period. In the south of our country, spring grafting is generally suitable, while in the north of our country, autumn grafting is generally suitable. But specifically, it still has to be considered as appropriate according to local conditions.
IV. Grafting preparation
Before grafting, we must prepare in advance, especially preparing all the tools that may be used, such as a paper cutter, special branch shears, a grafting knife, grafting tape, and other tools. Grafting work generally needs to be carried out when the rootstock and scion have the most abundant stored nutrients, because in this case both the rootstock and the original plant of the scion are in a state of full energy and readiness to grow, and if the temperature and humidity are both suitable, the grafting survival rate will be higher.
V. Grafting process
Tree-standard rose grafting generally adopts the bud patch method. First, cut the rootstock on the main branch of the rootstock, with the cut depth preferably just enough to see the woody part, and the size of the cut should match the size of the scion bud patch. Because if the two are not coordinated, insufficient or loose contact may occur, which easily leads to grafting failure. Then cut a 1-2 cm long bud patch from the scion, with a little woody material attached at the lower end, and press it tightly onto the grafting cut of the rootstock so that the cambium layers align and press tightly against each other, and finally wrap and cover the grafting site with grafting tape.
VI. Care and management
After completing the grafting, the subsequent care and management work is also very important. Because after the bud patch and rootstock are pressed together during grafting, they have not yet merged into one, and the rootstock's own leaf buds will sprout in large numbers, which will inevitably consume a lot of nutrients, thereby reducing the survival effect of the bud patch, weakening its growth, and even possibly causing the bud patch to die. So during this period we cannot let it grow wildly; we need to promptly remove the new buds on the rootstock, and at the same time also do a good job in preventing and controlling pests and diseases on the rootstock. Through careful care, if all goes well, generally in about 1 month you can see tender green young buds beginning to emerge from the bud patch, and healing tissue will gradually grow at the contact point, and the grafting work has basically succeeded.