How to make a root-on-rock bonsai? Detailed step-by-step illustrated guide to the whole process
Generally, stump bonsai are made by planting the tree stump directly in the potting soil, which makes them relatively easy to create and care for. But if the stump looks as if it grew on and from the rock, that is a distinctive root-on-rock style stump bonsai. There are many kinds of ornamental stones, but hard, non-absorbent mountain rocks are generally not used, because otherwise they are not only difficult to work, but even if completed, they are hard to maintain. Therefore, to make a root-on-rock style stump bonsai, you must choose soft mountain rocks that absorb water easily, such as sandstone-accumulated stone, reed-pipe stone, pumice, and so on.
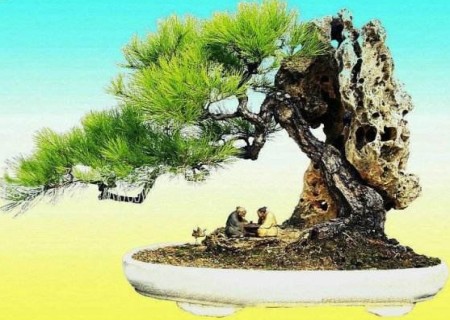
There are two specific methods:
One is to carve a cavity from the waist or top of the mountain rock toward its inner core. When carving, try to make the opening small and the belly large, like a bottle. Then, while slowly putting in the growing medium, put in the fibrous roots of the tree stump and keep stirring them so the stump roots do not curl up; the roots and soil should fit closely together. It is best to slightly modify the outer shape of the mountain rock and level the bottom of the rock. At this point it can be placed in a shallow basin filled with water, and a water root-on-rock bonsai with mountain, water, and a tree stump extending from the rock is complete. If making a dry root-on-rock bonsai, then the basin is filled with soil rather than water, and the mountain rock can be pierced through from top to bottom so the tree stump passes through the stone hole. Part of the tree roots grows in the soil inside the stone hole, while most of the roots still develop and grow in the potting soil. From the outside, it looks as if the tree stump grew right out of the stone.
The other method is to carve several to a dozen or more grooves on each side of the mountain rock. The grooves may run straight or slanting, and their spacing should be fairly even, while the depth and width of the grooves should be determined by the thickness of the tree roots. After the grooves are carved in the mountain rock, soak it in water for several days. Then embed the lateral roots of the tree stump one by one into the grooves of the mountain rock, temporarily fixing them with adhesive tape as you go. After the tree roots are all embedded in the grooves, wrap fine lead wire around the outside a few times for final fixing, and remove the adhesive tape.
Next, use river mud or a thick slurry to seal and coat the tree roots together with the mountain rock, then wrap the outside with green moss. The fine root portions at the root ends must still be straightened out and planted in the potting soil. After that, it needs frequent misting and appropriate shading. After about 1 year of careful care, the outer wrapping of green moss can be removed. After another 1 year of care, the river mud on the surface of the stone and roots will gradually wash away through watering and rain. By then the tree roots have already clung tightly to the mountain rock, and the original fixing copper wire can also be removed.
As the tree stump grows and adapts, the tree roots gradually thicken. Although the main absorbing parts of the root system all grow in the potting soil, the tree roots grip and embrace the mountain rock tightly like dragon claws and grow tenaciously, full of power, with beautiful form and deep meaning.
What will be shown today is the process of making a root-on-rock bonsai.
1. Above are the materials to be used, a small ficus and a selected stone.
2. Choose a pot of suitable size, put a small amount of soil in the bottom, and place the stone into it.
3. Then take the ficus out of its pot and carefully clean off the soil, being careful not to damage the roots.
4. After observing, place the ficus in a suitable position.
5. Arrange the roots well and embed them into the grooves and cavities of the stone.
6. Use fine aluminum wire to fix the roots at each part. Hemp twine can also be used; the advantage of hemp twine is that it will rot over time and will not leave constriction marks on the roots.
7. Fixing completed.
8. Surround with a barrier.
9. Fill the barrier with soil, then water thoroughly.
The root-on-rock style bonsai reflects the natural appearance of trees growing on stone. It is an exaggeration and close-up of the image of trees growing tenaciously in cliff crevices or on peak summits and rock tops, rich in content and profound in artistic conception. At the same time, it can also compensate for some natural defects of tree bonsai (for example, bonsai material with an overly tall trunk), and it is also a form deeply loved by bonsai enthusiasts.
Root-on-rock bonsai attach and plant trees among stones, with roots extending into stone crevices to grow, and branches and trunks winding into stone holes——either growing in clusters on the stone, or hanging down from the stone, or slanting sideways beside the stone, making curious stones and ancient trees set each other off beautifully. With graceful modeling, ingenious conception, diverse forms, simple production, easy mastery, and a short cultivation cycle, it is very popular with the public.