Detailed Explanation of the Transplanting Methods and Operation Steps for Collected Bonsai Deciduous Trees
Collected trees, that is, wild tree stumps dug from the mountains, used as bonsai material. Generally, such material possesses a strange, perilous, quaint and elegant effect that is very difficult to achieve by artificial means. Perhaps your firewood is someone else's bonsai material. Based on my more than ten years of understanding of bonsai stump transplanting, combined with my own cultivation experience, I will offer a few humble views to discuss with colleagues in the bonsai field, hoping to improve and progress together and make a modest contribution to the prosperity of bonsai art.
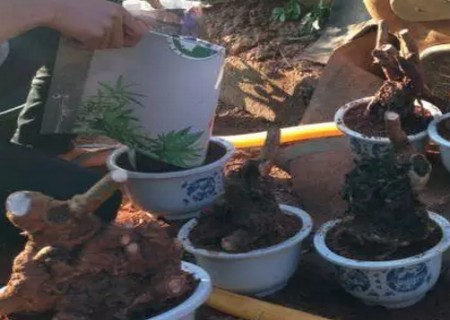
1. Transplanting Time
The transplanting time for bonsai stumps can be after the weather warms up in early spring, with the best time being from early March to late April. When transplanting, try to retain the fibrous roots, as this is the lifeline for whether the stump will survive and whether it can normally transport nutrients in the future. Therefore, understanding the ecological habits of various tree species and the climate conditions of each region to choose the transplanting time is the key to whether a new stump can survive.
2. Planting Preparation
After all transplanted new stumps and mountain stumps purchased from mountain farmers at the market are transported back, the first thing is to place the new stumps in a water pool or a large water vat and soak them for about twenty-four hours. This can reduce the probability of stump death caused by dehydration of the new stumps. During soaking, be sure not to submerge the entire stump underwater, as this will cause the stump head to completely suffocate and die. Submerging the lower two-thirds of the new stump is enough, and the soaking time should not be too long; letting it fully absorb enough water is sufficient.
3. Stump Material Treatment
1) First, examine the stump. You must first picture in your mind the finished design of this stump, so that you have a well-thought-out plan.
2) After making a rough draft, you can boldly and carefully cut the stump, striving to complete it in one go, cleanly and neatly, without sloppiness.
3) After cutting the stump, be sure to smooth the cut surfaces, ensure that the uneven parts of the stump body and the sawed branch points are treated smooth, and that no cracks remain in the bark and xylem.
4) After smoothing the wounds on the stump body, evenly apply white latex or wound healing agent, then cover it firmly with black plastic film to ensure that water in the stump body does not flow out from the wounds, preventing branch shrinkage and invasion by pathogens.
5) Choose a suitable purple clay pot or an ordinary unglazed earthen pot for planting, or heel in with mounded soil. The pot can be a bit larger, which helps the root system spread out and survive.
4. Watering
Reasonable watering when cultivating new stumps is one of the keys to stump survival. Watering mainly depends on the degree of dryness or moisture of the potting soil. Generally, the potting soil should be kept moist, and the characteristics of the tree species should also be considered. For moisture-tolerant species, watering a little more is not a problem, such as boxwood and red nanmu. Moisture-fearing species cannot be watered too much; just keep the potting soil moist, such as pine, elm and cudrania. For these species, you can spray the trunk more and water less. Especially if you use soil that does not drain well, you must not water too much.
5. Fertilizing
Under normal circumstances, new stumps are not fertilized in the same year. For some tree species with fast growth and high fertilizer consumption, a small amount of fertilizer can be applied after autumn, such as elm and Chinese fringe tree. Fertilizing should mainly be light fertilizer, and concentrated fertilizer should be avoided. Some tree species, because few new roots sprout in the same year, cannot be considered completely survived, and the new roots have poor fertilizer-bearing capacity, so they cannot be fertilized in the same year, such as pine, cypress, rhododendron and Chinese loropetalum.
6. Branch and Bud Thinning
Generally speaking, within the first two years, no branch pruning is done to the stump; let the branches grow vigorously as much as possible, to achieve the early-stage goals of growing length, growing thickness and growing strength. According to the requirements of styling, excess branches can be appropriately thinned, but at the positions of useful branches, be sure to keep several spare branches, waiting for the next year to keep the most robust branches and cut off the excess branches.
For potting collected new stumps, several points should be achieved:
1. New stumps should be sprayed moist with a spray bottle more than ten times a day, until the stump body sprouts and the new shoots are completely lignified, so as to prevent the branches and trunks from dehydrating and shrinking.
2. Spray or sprinkle water around all pots of transplanted new stumps to fully maintain air humidity, so as to help the stump head survive as soon as possible.
3. Transplanted new stumps are best placed under tree shade where they can naturally receive some scattered sunlight. If such conditions are not available, a frame with shade netting and straw curtains can be set up for appropriate shading. New stumps must not be placed directly under strong sunlight.
4. Remember that transplanted new stumps must not be placed in a drafty spot where strong air currents blow directly on them, as this easily causes dehydration, branch shrinkage and death.