A Detailed Guide to Sourcing and Cultivating Deciduous Bonsai
In bonsai study, the deciduous category refers to using ancient mountain trees in nature as models, subjecting bonsai to artistic processing and shaping so as to achieve the goal of condensing a dragon into an inch, cultivating them into artworks that originate from nature yet surpass nature; they are a non-renewable resource. Below, let us introduce the sourcing and cultivation methods for deciduous bonsai.
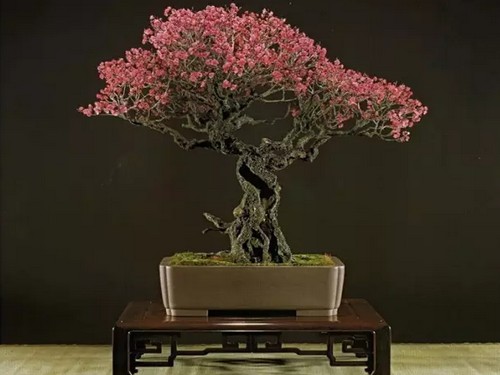
Collecting stumps:
Tree stumps must be dug at the right time, generally after leaf fall; digging may be done from late autumn until before April 20 of the following year. When digging a stump, dig in a ring extending outward to 1.5 times the thickness of the stump's root flare, with a trench 15 cm wide, cutting whenever roots are seen: saw through thick roots and cut small roots with shears, going all the way to the bottom, hollowing out on all four sides, then sawing the anchoring roots. Never use a large pickaxe to pry and hack randomly. After lifting the stump, leave the branches and trunk a little longer, just enough for transport; the stump must be kept moist, wrapped and packed well in plastic bags to prevent dehydration.
Trimming the stump:
Before trimming the stump, observe the stump material carefully, turning and tilting it back and forth from multiple angles to examine and deliberate; whichever style it suits, trim it according to that style. The height and length of the trimmed stump should be one bud point longer than the reserved standard, and it must be precise and accurate. This includes the roots, which should all be done in one step to avoid the time and risk of a second operation. All cut ends should be smoothed flat and coated with healing agent, then sprayed with insecticide.
Planting the stump:
If you have ground-planting conditions, plant it in the ground; for ground planting, it is best to plant shallowly with a high mound, and the mound of soil should be as large and thick as possible to help prevent freezing and preserve moisture. If you have no ground-planting conditions, you can make your own wooden box or use a large foam box or large pot. The soil is best as plain soil or granular soil; garden soil, pond mud, or old potting soil with fertilizer must never be used. When planting the stump, plant it at the chosen angle and with the chosen orientation. This is crucial for setting the branches during the stump-growing period. After the new stump is planted, wrap it well with cling film to keep it moist.
Setting the branches:
After the stump survives, basically there is no need to change the originally chosen tree form and tree momentum. When the branches grow to 15 to 20 cm, you can keep the useful branches according to the tree shape and remove the useless ones; you may also appropriately keep some spare branches. If some ideal positions have no buds, you can use spare branches for pulling and grafting in. When the branches grow to 40 to 50 cm, you can rub and shake the base of the branches to encourage them to thicken. At the same time, apply wire and bend them to adjust the branch angles. When setting the branches, arrange the positions of the main branch, the cascading branch, and the drooping branch, and position them according to the branch-setting method of bonsai. Achieve branching in four directions and distribution in eight directions, with successive rotation so the upper does not press down on the lower, and with mutual response and yielding, wanting to rise yet first bowing. Never keep only the left and right branches, lest the tree form be thin. You should achieve the main branch, left-front branch, right-front branch, back branch, right-back branch, and left-back branch, covering every side. This makes it easy to create and reshape later should the orientation ever need to be adjusted.
Free growing:
After the branches are positioned, give plenty of water and fertilizer and let them grow wild. During the free-growing period, strictly control the vigorous growth of the top branches; even if the thickness ratio is insufficient, they must be pruned frequently. Focus on cultivating the lower main branches and side branches. Whichever branch needs to thicken, let that branch grow wild; after the free-grown branches are bent, the rear half will produce some small lateral angle branches, and these lateral angle branches can be used to reserve future secondary branches. Lateral angle branches growing on secondary branches can be used to cultivate tertiary branches. Each time you change levels, reserve suitable bud points according to the needs of the design and the direction of the branch veins for keeping branches and free growing. When controlling the top branches, also prune according to the direction of the top branch and the changes in its nodes and buds. The finished top should form a responding posture with the main branches. During the free-growing period, the roots must also be adjusted. After three to four years of free growing, it can be potted to cultivate fine roots and fine branches. Growing stumps this way, as long as the stump is not over 20 cm thick, it can basically take shape in four to five years. Beginners may as well give it a try.
What has been said above is actually basic common knowledge, a familiar refrain. The key to bonsai lies in creating branches; branch technique is the method of making branch pads. However, different tree species have different natural characteristics, so the techniques and methods of creating branches also differ. This will be discussed and exchanged in detail later. I hope teachers will point out and correct any inappropriate points.