How to grow Spring Orchids? Master the cultivation methods and precautions
As a lofty object in people's aesthetic appreciation, what is observed and what is pondered accumulate over time and become a concept. When this concept is given form in language and writing, it becomes a word. Through the long course of history, out of closeness to and reverence for orchids, people created many beautiful words to express the beautiful things around them.
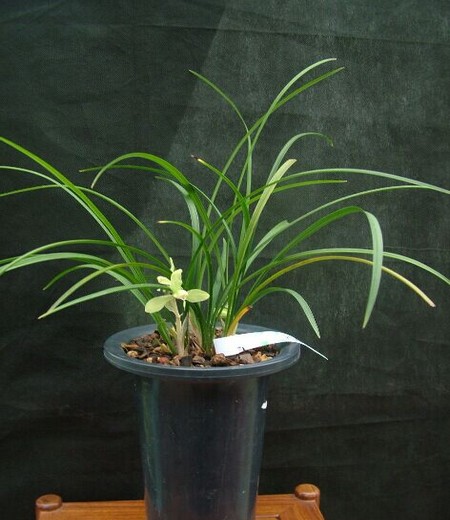
Since ancient times, orchids have always been loved and praised by people. The ancients praised them, saying, “The fragrance of the orchid covers a whole nation,” hence the alternate name “national fragrance.” With its unique leaves, flowers and fragrance, the orchid possesses the four purities, giving people an extremely noble, elegant and refined beautiful image. So today what we mainly introduce is the Spring Orchid, one of the finest among orchids. So how do you grow Spring Orchids? And when is the flowering period of Spring Orchids? Now let us step together with the editor into the world of Spring Orchids!
Spring Orchid is also called Cao Lan or Shan Lan. One flower or two per stem, the leaves are narrow and slender, the flowers are dark green with a faint delicate fragrance. It is mostly produced in warm regions, with its main producing areas in China, in Zhejiang. In places such as Jiangsu, Spring Orchid is highly valued, and it has a long history of cultivation. It is mostly grown in pots and used for indoor display, and when it blooms it has a particularly elegant fragrance. It is an excellent choice for indoor arrangement, and its roots, leaves and flowers can all be used as medicine.
How do you grow Spring Orchids?
1. Remember that the soil used for cultivating Spring Orchids must not be alkaline soil. The best soil for growing Spring Orchids is special orchid soil, or a mix of leaf mold and sandy loam.
2. Spring Orchids are suitable for growing in warm regions. The suitable temperature is 15°C to 25°C. In spring and summer they require good shading and good ventilation, while in autumn and winter they need sufficient sunlight, and must absolutely not be exposed to scorching sun.
3. The key to growing Spring Orchids well is watering. Generally in winter the frequency of watering should be low; in summer, when growth is vigorous and the temperature is higher, they can be watered more. For orchid water, rainwater and river water are generally best; tap water must be put into a water tank before use.
4. Fertilizing is essential for Spring Orchids. Spring and summer are the vigorous growth periods, so more fertilizer can be applied, once a week. In autumn growth is slower, so less fertilizer should be applied, once every half month. In winter, during the dormant period, no fertilizer is needed.
The flowering period of Spring Orchids:
The flowering period of Spring Orchids is from February to March. If abnormal weather occurs, the flowering period is delayed or the flowers open early. Spring Orchid is a flower of extremely high ornamental value, with plump petals and a delicate fragrance. It is an excellent choice for office or home interior decoration, and also a good helper for purifying indoor air. Its value is extremely high, and it is likened to a gentleman among flowers.
Warm tip: After Spring Orchids bloom, when the flowers are about to wither, cut off the flowers together with the flower scapes. Do not wait until the flowers naturally fall off before cutting, so as to reduce nutrient consumption; this is beneficial for flowering the following year.
Appendix: Common orchid leaf conditions
1) Leaves yellowish, growth normal: excessive light.
2) Leaves turning yellow, new shoots smaller: excessive light, lack of nitrogen fertilizer and necessary humidity.
3) Old leaves yellowing and falling off: normal aging or caused by repotting.
4) Old leaves rapidly yellowing and falling off: too much and too frequent watering, improper repotting and planting.
5) Tips of new leaves scorched: excessive fertilizing, unclean planting material.
6) Both new leaves and old plants have scorched black tips: excessive damp heat in the pot, with rotten roots among the root system.
7) New shoots emerge from the soil and then stop growing: there are rotten roots or unclean matter beside the new shoots. Turn over the growing material around the new shoots and remove the unclean matter, and growth will resume.
8) Scorch spots on the leaves with no yellow around the edges: scorch spots from burning sun.
9) Leaf tips appear scalded and shrunken: the water temperature for watering is too high; the air temperature is too high when watering; exposure to sudden rain during high summer temperatures, etc.
10) New shoots rot at the core: after water is poured into the shoot core, the water cannot evaporate or be absorbed, and the growing material in the pot is unclean, causing leaf rot disease, etc.
11) Spots on the leaves with water-soaked edges: excessive humidity, with pot moisture and air humidity combining to cause suffocation, accompanied by leaf rot pathogens. Poor ventilation and air circulation.
12) Yellow-brown spots on the leaves: caused by the root system being heated.
13) Irregular yellow spots on the leaves, with leaf mesophyll tissue necrotic and sunken: caused by viral disease, also called “Baras.”
14) Small yellow spots on the leaves: caused by scale insects.
15) Purple-black appears on the leaves while the underside is still green: caused by low-temperature frost. It can also occur with phosphorus deficiency.
16) Leaves dehydrated, pseudobulbs shriveled: caused by long-term excessive dryness and dehydration in the pot.