Vanda Orchid Growing Methods and Daily Care Essentials
In spring, Vanda orchids are about to enter their vigorous growth period, making it a good time to repot. For Vanda orchids that have grown for many years, their roots cling tightly to the inner wall of the pot. Therefore, if they are grown in a clay pot, it is best to break the pot before repotting, so as to avoid damaging the roots when removing the plant. Vanda orchids are not only dignified and beautiful in appearance, but also have tenacious vitality, and can still release fragrance under harsh conditions, which is why they were chosen as the national flower of Singapore. Below, the editor will introduce the growing methods for Vanda orchids for your reference.
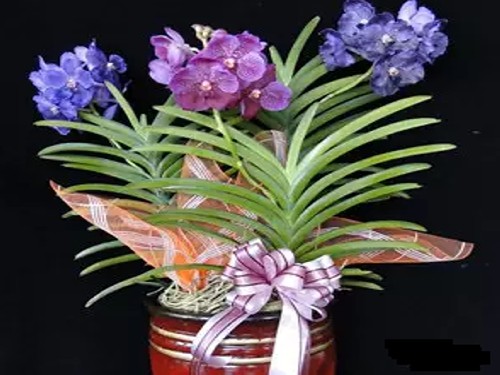
Growing methods for Vanda orchids:
Vanda orchids require more fertilizer than other tropical orchids. Therefore, during the vigorous growth period, diluted fertilizer can be applied once every 7 to 10 days. The best fertilizer has a nitrogen, phosphorus, and potassium ratio of 10:10:5. Because Vanda orchid roots are aerial roots, any well-draining medium can be used, such as tree fern fiber, broken brick pieces, charcoal, coarse gravel, and so on. Whether used alone or mixed together, they all make very good potting soil. In addition to the medium, the pot itself must also be quite carefully chosen when growing Vanda orchids. Among pots of various materials, wooden slatted baskets and clay pots are superior, and drilling a few more holes in the pot is even more helpful for good drainage and air circulation. In addition to wooden slatted baskets and clay pots, Vanda orchids can also grow well on tree fern boards or tree trunks. Vanda orchids should not be repotted frequently. Unless they are disturbed by pests or diseases, they should be repotted only once every 3 years at the least.
In spring, Vanda orchids are about to enter their vigorous growth period, making it a good time to repot. For Vanda orchids that have grown for many years, their roots cling tightly to the inner wall of the pot. Therefore, if they are grown in a clay pot, it is best to break the pot before repotting, so as to avoid damaging the roots when removing the plant.
Finally, no matter which cultivation method is used, remember that the potting medium must have very good drainage and aeration.
Vanda orchids can be propagated by tissue culture or by keikis. However, the former is not suitable for doing at home because it requires more specialized technical skills. In late autumn, Vanda orchids produce keikis in the leaf axils. When the keikis grow to 5 to 7.5 cm, use a sharp and sterilized knife to cut the keikis from the mother plant and plant them in a pot containing tree fern fiber; they can later be transplanted into a larger pot. Remember that the cut surface must be treated with medicine to prevent infection by pathogens.
In addition, when a plant cultivated for many years grows to more than 1 m, you can cut off the top growth about 30 to 46 cm long, disinfect both cut surfaces with medicine, and then plant it in a pot, keeping it moist. Pest and disease control: The tough leaves are the main reason Vanda orchids are not prone to pests and diseases. Apart from snails and slugs, the common pests generally appear less often on strong and healthy Vanda orchid plants. However, when water remains on the leaves for too long, or when the plant is infected by a virus, dark markings or patches often appear and gradually rot. If the situation is mild, the affected area can be cut away. If the rot covers too large an area, then the entire orchid must be discarded to avoid infecting other orchid plants.
Key care points for Vanda orchids:
Perennial evergreen epiphytic herbaceous plant. The flowers are large and rich in color, with a great many varieties. Those currently cultivated are all excellent hybrid varieties. They are usually planted in flowerpots or wooden boxes with many holes on all four sides and hung in greenhouses; charcoal, broken brick pieces, and similar materials are used as the substrate. The roots must have excellent aeration. They like high temperatures and humidity; the normal growing temperature is above 20°C. They like abundant sunlight; in northern greenhouse cultivation, provide 30% to 50% shade. Maintain relatively high air humidity. During the growing period, spray fertilizer on the leaves once every 1 to 2 weeks. Spray water on the plant 1 to 2 times daily.
1. Placement
Vanda orchids require high temperatures, high humidity, and relatively strong sunlight. At all times, place Vanda orchids in a bright location (but not in direct sunlight). If possible, supplemental artificial lighting is needed in winter.
2. Temperature
Vanda orchids are suitable for cultivation in tropical regions. In the north, they need to be grown in a high-temperature greenhouse, with the room temperature kept above 20°C.
3. Watering
Vanda orchids need to be watered heavily, and the potting medium must never be allowed to dry out, but do not let the flowerpot sit in water.
4. Fertilizing
At every other watering, add standard liquid fertilizer at 50% concentration for Vanda orchids.
5. Cultivation and repotting
When planting, be careful that the base of the Vanda orchid stem is not buried in the soil. Every spring, move it into a pot one size larger. When it has been moved into the largest pot size, it can be cut apart for propagation.