How to remedy and handle orchids after root rot?
Some beginners who grow orchids often do not understand orchid habits well and find it difficult to grow them successfully, with burned tips and seedling collapse, leaving only a few dried stumps after a year or two. The cause, in most cases, is orchid root rot. As the saying goes, to grow orchids, first grow the roots; when the roots are good, the leaves flourish and the flowers are fragrant.
To cultivate a good pot of orchids, you must first start by growing the orchid roots well. Only when the root mass develops vigorously and the root system functions strongly can the absorption and transport of water and nutrients, photosynthesis, respiration, and energy storage and accumulation proceed normally, and only then do growth speed, reproductive capacity, and flowering rate increase. Otherwise, if the root system is poor or rots and is lost, the absorption and transport of water and nutrients are blocked, photosynthesis, respiration, and other capacities decrease, and the orchid will gradually decline and die.
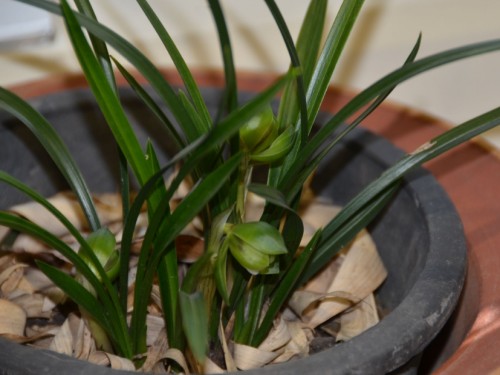
Orchid root rot is a very troublesome problem. If the cause is not found, it will recur every year. Root rot indicates that there is a problem with the environment or with management. Only by finding the cause of root rot can the environment or cultivation techniques be improved and the orchids grown well.
[Environmental causes]
1. Temperature too high:
High temperature + direct sunlight + dryness = orchid dehydration = heat damage = orchid leaf scorched tips, black spots, or root rot; high temperature + humidity + poor ventilation + watering = physiological disorder = scorched tips or root rot.
2. Temperature too low:
Temperature below zero = water freezes = orchid root frost damage.
3. Insufficient light (below 1000 lux) + stuffy hot environment + potting material too wet = physiological disorder (root rot)
[Growing material causes]
1. Temperature above 30 degrees + incompletely fermented organic material + sufficient moisture = orchid root rot
2. Organic material with fertilizer strength too high, exceeding the orchid roots' tolerance = orchid root rot
3. Growing material cannot match the local climate and environment (according to the environment → choose suitable growing material → appropriate watering management)
[Watering causes]
1. Water retention: orchid pot material stays wet for a long time without drying = affects air exchange for the orchid and causes root rot
2. Air permeability: orchid roots are aerial roots. The lower the temperature, the slower the respiration, and the longer the watering interval; the higher the temperature, the faster the respiration, and the more waste gas is produced. Therefore, when the temperature is high, the watering interval should be shorter. Use heavy watering to replace the waste gas in the pot. In addition, ventilation can be strengthened to let fresh air enter the pot.
[Pot causes]
1. Do not let sunlight shine directly on black plastic pots, as this will create high temperatures inside the pot and cause root rot.
2. In a high-temperature, dry, and windy environment, it is best to use black plastic pots without holes; in a humid, low-temperature, and windless environment, it is best to use black plastic pots with holes.
[Causes related to fertilizing and spraying]
1. Fertilizing and spraying should avoid high temperature, strong light, and dry environments, as they easily cause fertilizer burn and pesticide burn that lead to orchid root rot. Therefore, fertilize or spray only after a certain time following watering, which can prevent fertilizer burn or pesticide burn.
2. A small number of antifungal drugs can cause root rot. The main reason is that some orchid pathogens are fungi, and the orchid root fungus is also a fungus. Therefore, adverse effects can occur. Thus, senior Wei Chang put it very well: many old medicines have very good effects and no phytotoxicity, but new medicines must be tested before use and can only be used if there is no phytotoxicity.
In response to those causes, how should orchid root rot be remedied? The following are remedial measures for orchid root rot:
1. Control sunlight
For a period after repotting, do not expose the orchid to scorching sun. Place it in a shaded, airy place, but note that the wind should not be too strong to avoid adverse effects.
2. Water reasonably
In cultivation management, strictly regulate water use. The potting soil is best kept semi-moist and beginning to dry. It should neither turn white and dry nor be obviously too wet. If there is rainy weather, move it to a rain-sheltered place, and control the potting soil moisture as well as possible to ensure normal root development.
3. Stop fertilizing
Switch to a smaller pot: a large pot tends to accumulate water.
Excessive sphagnum moss: loose when soaked, breathable, free of fertilizer, neutral in nature.
Replace old soil with new: new soil has no fertilizer content; weak orchids cannot tolerate fertilizer, so this benefits growth.
Plant deep and keep dry: the process of seedlings emerging from the soil is lengthened, nutrients are sufficient, and after emergence they grow steadily.
Increase the sandy portion: enhance the drainage and air permeability of the soil layer and avoid the danger of new seedlings encountering water.
Immortal soil to stabilize roots: using immortal soil to plant weak seedlings effectively maintains the orchid roots.
Avoid applying fertilizer: if the root system is poor, how can it take up fertilizer? Therefore, fertilizing weak seedlings is not rejuvenation but death. (Weak orchids can be saved; new soil benefits weak orchids; dry soil comforts weak orchids; avoiding fertilizer keeps weak orchids alive.)
4. Repot early
When orchid root rot is discovered, replace the soil, repot, and add growing medium. The growing medium should be noted for quality and water drainage and absorption performance. Fired soil or dry soil, charcoal, and similar growing media are better. You can also appropriately mix and cover some coarse sand around the root crown area, which gives better results.
5. Pay attention to planting
In addition to ensuring that the potting soil drains water, the growing medium from below the pseudobulb down to near the outside of the roots should be firm. The pseudobulb should be planted somewhat deep, which both protects it and prevents the pseudobulb from shaking or floating away from the soil surface. Leaves that are rotted at the roots and shrunken and yellowing should be cut off to reduce nutrient loss, allow the pseudobulb's nutrients to be stored, and maintain root development.