How to repot a Japanese zelkova (Zelkova serrata) bonsai? Master the correct repotting method
When a bonsai tree grows too long in a limited potting-soil environment, the fertility gradually runs out over time, and the potting soil also becomes increasingly compacted, so air and water permeability are both seriously affected. Therefore, repotting a bonsai tree at the right time is the foundation for ensuring it continues to grow well. Japanese zelkova bonsai is no exception; usually after a certain number of years it needs to be repotted in time. So how do you repot a Japanese zelkova bonsai?
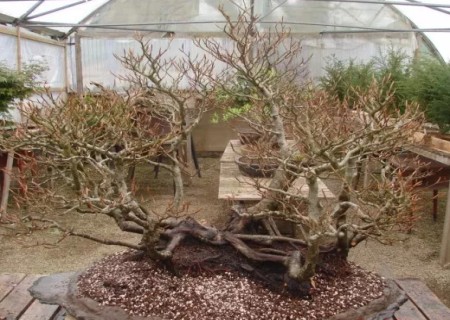
Repotting a bonsai tree is a time-consuming and labor-intensive job, but in order to reap the joy that repotting brings, let us turn the dull repotting process into an enjoyment! Today, the editor will introduce the repotting process for Japanese zelkova bonsai.
1. This is a Japanese zelkova bonsai waiting to be repotted. Judging by its appearance, the bonsai is relatively large, so we used a four-wheeled handcart and also installed a lifting platform to make handling easier.
2. Move the bonsai onto the handcart, then move it indoors to a place convenient for repotting. Note that the lifting platform should be kept at the same height as the workbench, which makes moving the bonsai easier.
3. Since this bonsai work is relatively large, it is difficult to lift it directly, so we need to use ropes to get it done. Then hoist the entire bonsai until it reaches a suitable height for handling.
4. Next, prepare a small root hook, then carefully clear away the moss and other covering materials on the surface of the potting soil.
5. Then use tools such as the hook and a small trowel in combination to separate the bonsai's root system from the bonsai pot, so that it can be removed from the pot.
6. Hoist the entire bonsai tree so that the trunk separates from the bonsai pot; in this way we can carry out soil removal for the Japanese zelkova bonsai.
7. Next is removing the excess old soil clinging to the root system of the Japanese zelkova bonsai. We can see that some of the fibrous roots are already exposed.
8. Prepare a new bonsai pot, place a stone slab underneath to catch falling soil, then place the soil-cleared Japanese zelkova into the newly prepared bonsai pot.
9. Then simply fill the Japanese zelkova bonsai with new potting soil. But note that the height of the newly added soil should be slightly lower than the rim of the pot, so that water will not spill over when watering.
10. After repotting is complete, do not forget to water it thoroughly once in time; only then is the whole repotting process truly finished.