How to properly repot a yew (Taxus) after root rot
The yew bonsai is elegant and beautiful, very pleasing to look at, but daily care and management must be done well, otherwise it may adversely affect growth and thus reduce its ornamental value. One of the more common problems is root rot, and the causes of root rot are often varied, generally due to improper water and fertilizer management. For mild cases of root rot, we generally only need to adjust our care and management strategy to save the plant, but if the root rot is relatively severe, often the only option is to repot it. So, how do you repot a yew after root rot?
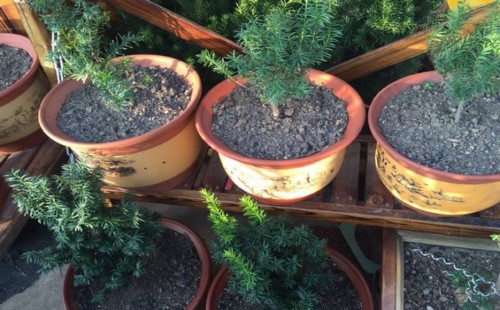
Root rot in yew bonsai is mainly caused by overwatering or overfertilizing. Since the yew is drought-tolerant but not waterlogging-tolerant, if overwatering causes water to accumulate in the pot, it will inhibit root respiration, leading to oxygen deprivation and root rot. And if too much fertilizer is applied, especially at too high a concentration or as raw manure, it can easily cause fertilizer burn, with the direct consequence being root rot. If root rot caused by improper water and fertilizer management is relatively severe, it may endanger the yew's life, so in such cases we need to repot it promptly to save it.
1. Removing from the pot
First we need to take the yew out of its original pot. The simplest and most direct method is to gently break the original pot, after which the yew can easily be removed. But if you feel it is a waste to break the original pot, you can also gently tap the outer wall of the pot a few times on all sides and then turn it upside down, holding the pot with one hand and supporting the yew with the other, then gently take it out.
2. Removing the soil
After taking the yew out of its original pot, we need to promptly remove the moist soil or overly rich soil clinging to the roots. But be careful when removing the soil; since the plant's root system is already rotting, handle it gently to avoid causing secondary damage to the roots, and protect the roots as much as possible.
3. Washing the roots
After cleaning the soil off the yew's roots, rinse the roots with clean water to wash away any remaining soil, debris, and even leftover fertilizer, in preparation for the next step of root trimming. Continue until the yew's roots are clearly visible and washed clean.
4. Trimming and air-drying the roots
After washing the yew's roots clean, use sterilized scissors to cut away the damaged and rotted parts of the root system, until all the rotted parts on the roots have been removed. Then set it aside to let the roots air-dry briefly.
5. Disinfection and sterilization
After trimming and air-drying the roots, apply some substances such as wood ash to the yew's roots to prevent infection by pathogens, which also helps the wounds heal. Of course, you can also dip the roots in a sterilizing agent such as carbendazim. Then set it aside, ready to be replanted in a pot.
6. Preparing the soil
The yew likes a fertile, loose, breathable, well-draining acidic sandy soil environment, and the pH value can be kept between 5 and 6.5. You can use ordinary loam mixed with peat soil, perlite, etc. in a certain ratio. Before use, you can moisten the mixed substrate to keep the soil at a certain humidity, so that when the yew is replanted there is no need to water it to provide the moisture needed for growth, thereby avoiding the risk of infection at the root wounds caused by watering during planting.
7. Planting in the pot
Once all the preparatory work is done, we can replant the rescued yew back into a pot. The planting process is basically the same as for many other tree species; after repotting, simply place it in a cool place to recover. During this period, especially avoid direct sunlight, and when the potting soil dries out, spray the plant with water more often to maintain humidity. As long as everyone manages it strictly according to the standard steps, it won't be long before the yew grows new roots and sprouts again.
But note that because the yew's roots are severely damaged, the root system cannot promptly transport nutrients and water to the tree, and repotting also requires the plant to readjust to a new environment, which takes a period of settling in, so in the short term the yew's roots will basically lose their ability to absorb. In view of this, to reduce the burden on the roots, we need to promptly thin out the branches and leaves, especially cutting away withered branches and leaves to reduce the consumption of water and nutrients. This treatment will greatly help the yew's recovery from the brink of death.