A detailed guide to making forest-style bonsai, easy for beginners to learn
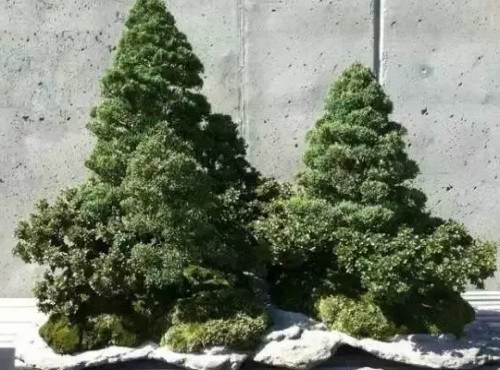
Forest-style bonsai mainly reflects the composite image of the beauty of a group of trees. Although the selection of plant forms is not as strict as with other bonsai, the image of group beauty is expressed through the combination of individual trees. Therefore, each tree in a forest-style bonsai must also be able to show its individual beauty within a unified composition. So a single tree should also have special value in posture, color and ornamental appeal. Furthermore, according to the basic principle of unity and variation, the trees must have similarities as well as differences. Achieve a clear distinction between primary and secondary, with the main scene prominent, and avoid planting at equal spacing; there should be both sparseness and density.
1. Planting the trees
Before planting, first cover the drainage hole at the bottom of the pot with a plastic mesh or thin tile, then spread a layer of soil, place the trees according to the positions determined during the trial placement, and try to spread the roots out evenly. Then add soil and firm it to plant the trees securely. The soil surface can be made somewhat uneven, which looks more natural.
2. Choosing trees
In forest-style bonsai, it is not required that every tree be very beautiful; what matters is natural posture and unified style. Some trees are not attractive when viewed individually, and may even have obvious defects, but after combination they can maximize strengths and avoid weaknesses, producing an excellent ornamental effect. The selected trees are best plants that have been cultivated in pots, because such trees have good roots and are easy to keep alive after being planted into a new ornamental pot. The trees should include large and small ones, tall and short ones, thick and thin ones, so that an ideal composition can be designed.
3. Choosing a pot
Forest-style bonsai often uses shallow rectangular pots, waist-round pots, oval pots, etc., which help reflect the breadth and depth of the landscape. The bottom of the pot generally has drainage holes, but extremely shallow pots may be an exception. The texture and color of the pot should harmonize with the bonsai tree species. Commonly used pots include stone pots, glazed ceramic pots, purple clay pots, etc.
4. Removing from the pot and clearing soil
Organize the root system: take the selected trees out of the pot, carefully remove part of the soil with a bamboo stick so that they can fit into the new ornamental pot. Roots that hinder assembly and planting may be pruned appropriately if survival is not affected; roots that hinder planting but should not be cut off can be bent and fixed with palm fiber or metal wire before being planted into the pot.
5. Tree layout
The layout of the trees is the key to the success or failure of forest-style bonsai. Try arranging several trees that have been cleared of soil in the pot, and by observing, deliberating and adjusting the positions of the trees, achieve a clear primary-secondary relationship, sparseness and density, and height variation; the trees should yield and contend with one another in due measure and echo each other, forming a beautiful layout.
6. Pruning branches and leaves
After the layout is determined, each tree should be pruned and tidied one by one according to the composition requirements. Cut off branches that affect the overall effect, overlapping branches, excessively dense branches and excess leaves, etc., simplifying the complex to achieve an artistic effect of clear picture and distinct rhythm.
7. Placing ornaments
In order to enrich the artistic conception and highlight the theme, sometimes it is necessary to place ornaments such as figures, animals and houses in the bonsai. The size of the accessories must conform to proportion, and their placement should be appropriate.
8. Embellishment
In rock-and-forest-style bonsai, rocks are often added to enhance the wild charm of mountain forests and also make the picture more vivid. The type and shape of the stones selected should connect with the spirit of the trees in the pot, making the artistic conception more profound. After arranging the accent stones, moss also needs to be placed on the soil surface. Green moss, like a lush green lawn, can add vitality to the scene. If moss transitions between the trees and the stones, it appears more natural and harmonious.
9. Watering
A newly completed bonsai should be sprayed with a fine watering can over both tree and pot until the pot soil is completely saturated with water. This allows the roots of the newly planted trees to bind closely with the soil, which helps survival, and at the same time cleans the entire bonsai.