How to make an Osmanthus root-over-rock bonsai? Detailed method shared
The making of an osmanthus bonsai, in principle, requires a profound conception and composition; truly learning from nature; enhancing strengths and avoiding weaknesses to build momentum; combining movement and stillness with agility; being unified and harmonious to please the eye; perceiving the grand from the small; having appropriate density and sparseness; and having clear primary and secondary elements that catch the eye. The osmanthus root-over-rock bonsai inherits and carries forward the Lingnan school tradition, using techniques such as learning from nature, shrinking the dragon to an inch, and trunk chopping and branch training. The biggest characteristic of a root-over-rock bonsai is the rigidity of the stone and the softness of the tree, the blending of hard and soft, forming a vivid and lively, “form and spirit both present” fine masterpiece.
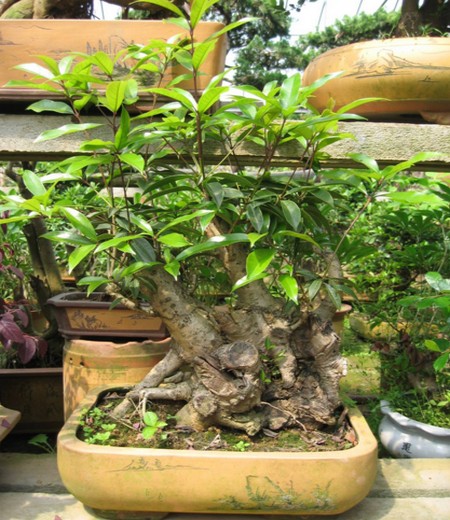
1. Selection of the stone for the osmanthus root-over-rock bonsai
Choose stones that are tall and thin in form, with grooves, pits, and hollows, striving for “thin, wrinkled, leaky, transparent.” “Thin” means the stone material has edges and corners, suitable for configuring arc-shaped peaks; “wrinkled” means the texture is clear, wrinkled but not chaotic, like the folds of mountain ridges; “leaky” means the stone has pores, able to ventilate and drain water; “transparent” means the stone has internal channels that connect through, like natural mountain rock caves, giving a sense of quiet seclusion. Commonly used are soft stones with loose texture; another type is harder stone, including Ying stone, stalactite, sandy limestone, turtle-vein stone, yellow wax stone, and others. Most stone materials for root-over-rock bonsai have relatively deep textures or caves and many stone crevices, able to express the beauty of ugly, strange, and bizarre forms. They can be processed by cutting, sawing, carving, and cement bonding.
2. Selection of the shaped osmanthus tree
For a root-over-rock osmanthus, choose an osmanthus tree with soft and well-developed roots that grows thickly and easily. Choose an osmanthus tree whose roots grow fast, whose trunk is long, and whose thickness is suitable. The planting posture can be upright or slanting, mostly single-trunk. The production time is March-June or September-October. Planting should use a shallow-mouthed pot. In addition, in the combination of tree and stone, the image and size of the stone body are required to coordinate with the posture and height of the tree.
3. Making the osmanthus root-over-rock bonsai
(1) Making principles. The making techniques of root-over-rock bonsai should follow the principles of sticking, clinging, attaching, and laying. In shaping, it varies according to the stone, with the tree's exquisite body bending on the stone. First, avoid the root system separating from the stone, neither sticking nor clinging, loose and powerless; second, avoid the root system not being embedded firmly in the stone crevices, neither sticking nor laying, having roots but no momentum; third, avoid the root system being messy and disorderly, artificial and contrived, losing natural beauty; fourth, avoid the branch and trunk shaping being far-fetched and forced, losing the characteristic of the root-embracing-stone style. (4)
(2) Making techniques. The main methods for making an osmanthus root-over-rock bonsai include top-planting stone-wrapping style, riding-stone clamping style, winding cliff-climbing style, leaning-stone attaching style, cave embedding style, and others. The forms include: first, the roots are exposed, clinging to and growing on the mountain stone, with the trunk tall and straight; second, the tree roots are rooted in the crevices of the rocky mountain, the main trunk [untranslatable], dancing in the wind; third, the tree roots grow between the stone and the cliff wall, the trunk twisted and bent straight toward the cliff, majestic and powerful.
(3) Making process. After the stone and tree materials are selected, first plant the selected 3-5 trees with well-developed lateral roots in a relatively deep and tall pot, cultivating with loose semi-mud coarse sandy loam. After determining the theme and layout, carve several grooves according to the natural texture and the number of thick roots. Fix the bottom of the stone steadily with cement, use the stone to set the form, take the momentum from the appearance, and determine the viewing side for the shaping and standing posture. Then fix the trunk in a suitable position, bind it with glue rope, correcting and leveling while binding, to adapt to it, embracing the mountain stone, with branch pads evenly distributed, making the roots and stone stick tightly. Finally, place the entire group scene in a clay pot, surround the stone with thin plywood or hard cardboard, surrounding up to the junction of the tree and stone, add mud and fill well, use bamboo branches to insert the mud firmly, making the pond mud stick firmly to the root system, facilitating the absorption of water and nutrients, water thoroughly to settle the roots, and the making is complete. Place in half shade for maintenance. After two years, when the tree is strong and the roots are thick, scrape away the mud, move the root-over-rock to a suitable shallow pot for viewing, prune away messy roots, let the root system be exposed to sunlight and dew, accelerating its development and growth, making the root system partly hidden and partly visible, having support and reliance, embedded firmly in the stone crevices; the trunk's flowing and falling direction and the positioning and shaping of branch pads should be continuously pruned according to the tree's growth conditions. The longer the time, the more refined the work.