Illustrated guide to making bonsai moss: detailed steps that are easy to understand at a glance
Moss is generally used in bonsai only as a layer spread over the potting soil to retain moisture, but growing moss separately in a water-stone pot and viewing it as a moss bonsai in its own right actually has a distinctive charm. As the saying goes, “three parts cultivating the plants, seven parts cultivating the person.” Every morning, bend down and feel the primal wild breath together with the moss!
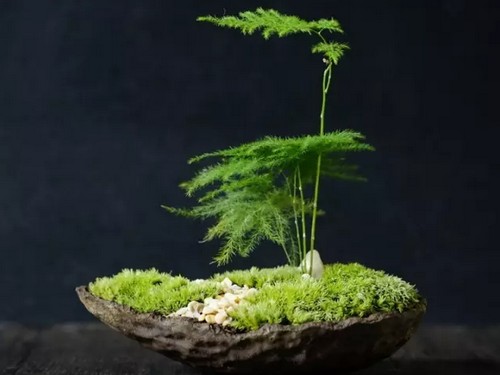
Moss is an indispensable part of tree bonsai, miniature landscape bonsai or water-and-land bonsai. It can add content to the scene and enrich its colors, playing a multiplying role in the ornamental value of the work; (moss secretes acidic metabolites that corrode rock, promoting the decomposition and weathering of rock and contributing to the formation of soil; moss is also a pioneer for the growth of other plants) moss can both prevent soil erosion and retain and preserve moisture.
1. Quick moss-growing method
Soak the finished bonsai rocks in water for several days, then evenly sprinkle taro or potato flour over the rocks or potting soil, cover with damp weeds and place in a damp spot, spraying water daily; moss will grow in about a week.
2. Moss inoculation method
Choose a few pieces of loess, grind them fine, add water and mix into a paste, put natural moss into the mud and stir evenly, then use a small brush to evenly brush it onto rocks or soil surfaces that have been soaked in water and rain, spraying water frequently; moss will be visible after several days. You can also take collected fresh moss, remove debris and dry it in the sun, grind it into powder, mix it evenly with water or thin rice water, apply it to the places on the bonsai where it is needed, move the pot to a shady, damp place and keep it moist, and moss will grow.
3. Natural moss-growing method
Place the finished rocks in a water basin, frequently pour on rice-washing water or vegetable-washing water, keep moist, and place in a spot that sees the sky but not the sun; water-absorbing stone is even better.
4. Pot-surface moss-growing method
For the moss used on the pot surface of tree bonsai, lay a sheet of film flat in a damp spot that sees the sky but not the sun, beat the original moss into a slurry and evenly apply it to the film, keep it moist, spray once with diluted fertilizer water after seedlings emerge, and it can be used as needed in 15 days. Stick mud slurry on the root surface of the moss tray, keep the potting soil moist, also brush on mud slurry, then attach it.
Moss needs to live in a damp, shady environment, so moss is generally found at the base of a south wall in shade and dampness. Because its leaves are single-layered cells, it is very afraid of drying out; if you forget to water for a few days it will turn yellow and wither, but after watering again it will grow back in a few days. In addition, too low a temperature will also cause yellowing and withering, so it is best to keep it above 25 degrees.
Many flower lovers who like bonsai want to plant some small plants in their bonsai, which not only looks clean but also retains moisture. The most commonly used is moss, so many flower lovers hope to see an illustrated guide to making bonsai moss. This article is an illustrated guide to making bonsai moss written step by step by a flower lover based on their own experience.
1. Find moss. There are many kinds of moss suitable for decorating bonsai; the most important thing is simply that the moss filaments are not too long. There are also many channels for obtaining moss. Some friends buy it online, which shows they are too wealthy. I calculated that a pot surface of generally 30cm costs nearly 50 yuan. Our ordinary approach is to go to shady, damp ground, rocks or tree trunks in the mountains and fields to look for suitable planting material. Of course, if you are in a large or medium-sized city, that is hard to do, so your simplest method is to look under solar panels on brick-and-concrete roofs that have some years on them, beside drainage holes, on the tiles of tile-roofed houses, and along outdoor drainage ditches.
2. Collect the moss. Use a blade or bamboo stick to gently scrape it off in whole pieces along the bottom.
3. Prepare some fine soil with fairly good stickiness, and pick out the large particles.
4. Tidy the pot surface. Use a small knife or bamboo stick to scrape off the rough layer on the pot surface.
5. Tidy the moss. Gently clean off the larger pieces of wood debris and rotten leaves on the underside of the moss (if there are none, do not clean it, because the collection channels differ, so some have none).
6. Prepare the pot surface. After watering the bonsai thoroughly, evenly sprinkle a layer of fine soil on the pot surface, generally no more than 1cm, then water the fine soil and gently stir it into a thin mud.
7. Lay on the moss. For the shape of each piece of moss, you can gently tear off the edges and corners according to the shape of the pot surface and the pattern you want to arrange, or you can use scissors.
8. Later care. Place the finished bonsai moss under the shade of trees in the courtyard or in a cool, ventilated place at home, then spray water once every 1-2 days with a spray bottle to keep the moss moist (keeping it moist is very important, otherwise it will become dried out), and slowly the moss will survive.