How to make a moss bonsai? Detailed step-by-step tutorial
Today, moss bonsai has been well cultivated. As a very special plant, it has many characteristics such as a high survival rate, but during cultivation, special attention must be paid to the invasion of other higher plants, so no matter what, the cultivation process of moss bonsai plants is also the most critical part. How about it, after looking at moss bonsai pictures, are you also a little tempted? Then why not use the above moss planting method to grow a pot of moss bonsai to decorate your beautiful home!
Making bonsai moss is a good choice, but many friends have only seen bonsai moss in exhibition halls or pictures, and only have a superficial understanding of the actual operation. All right, if you want to make one, do not worry, let the author, who is always happy to help others, teach you step by step:
1. Preparation work.
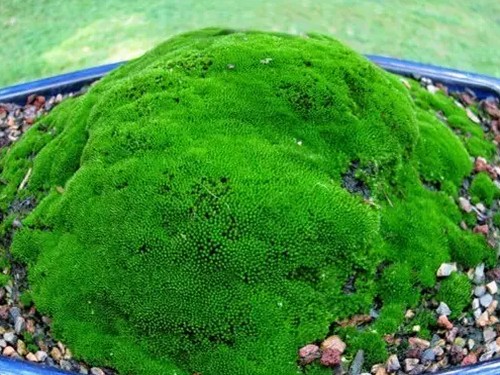
1. Find moss. There are many kinds of moss suitable for decorating bonsai. The most important thing is that the moss filaments should not be too long. There are also many channels for obtaining moss. Some friends buy it online, which shows they are too wealthy. I calculated that generally a 30cm pot surface costs nearly 50 yuan. If you have a hobby and are also compassionate, would it not be better to donate this 50 yuan to the Hope Project?
Our ordinary people's approach is to look for suitable planting material on shady, damp ground, stones, or tree trunks in the mountains and fields.
Of course, if you are in a large or medium-sized city, that is difficult to do. Then your simplest method is to look under solar panels on old brick-and-concrete roofs, beside drainage holes, on the tile surfaces of tiled houses, and beside outdoor drainage ditches. A few days ago, the solar water heater at my father-in-law's house was not draining, and my wife asked me to go up to the roof to take a look. I went quite lazily, but unexpectedly made a discovery:
2. Collect moss. Use a blade or bamboo stick to gently scrape it off in whole pieces along the bottom.
3. Prepare some fine soil. It should have somewhat good stickiness, and large particles should be picked out
4. Prepare the bonsai. Actually, there is no need to prepare it, just bring it over and set it up. This is a rose
5. Tidy the pot surface. Use a small knife or bamboo stick to scrape off the rough layer on the pot surface.
6. Prepare a basin of clean water and a cup. There is no towel, which shows it is not for washing hands after finishing the job. You will know its use below.
2. Officially begin.
1. Tidy the moss. Remove the larger pieces of wood debris and rotten leaves from the bottom of the moss
2. Prepare the pot surface. After watering the bonsai thoroughly, evenly sprinkle a layer of fine soil on the pot surface, generally no more than 1cm (anything over 15cm is not moss), then water the fine soil and gently stir it into a thin mud.
3. Lay on the moss. For the shape of each piece of moss, you can gently tear off the edges and corners according to the shape of the pot surface and the pattern you want to arrange, or you can use scissors. Be careful not to cut yourself……
The first piece is laid:
Use the trimmed edge pieces to fill the unfinished gaps. Make full use of resources, wasting is shameful! Especially for ordinary people like you and me!
4. Bond fully. The moss should be made to bond tightly around the bonsai with the pot soil as the core
Sprinkle water on the laid moss surface, not too much. Gently pat it firm with your palm, and some mud will come out on the pot surface.
3. Cleaning
1. Clean the bonsai.
The pot will not move by itself, so you have to personally tip the pot on its side, pour water from the upper side, rinse off the mud, and then clean the outer rim of the pot.
All right, is it much cleaner and much prettier
2. Future management. Place the finished moss bonsai under the shade of trees in the courtyard or in a cool, ventilated place at home. After that, spray water once every 1-2 days with a spray bottle to keep the moss moist, and slowly the moss will survive.
4. Finally there are results
Below are some moss bonsai I made before, incredibly ugly and painful to look at. Those with courage can look as they please!
Made half a month ago, the material was taken from the roof insulation layer. The material is not bad, no wonder it can insulate heat:
Made a month ago, the material was taken from beside the ditch at a rural relative's house. At a glance it looks ecological, without urban pollution
This was made three months ago, the material was taken from the ground beside a mountain path. The moss filaments are a bit too short, thin and short, not meeting practical requirements. It looks a little pitiful, but it will still grow
This is the seed of moss (spore), and let you get to know it too.