How do you make a cement rockery bonsai? Detailed production method shared
Cement sculpted-stone rockery refers to rockery formed by artificial shaping using modern materials such as concrete, fiberglass and organic resin, and non-stone materials such as lime, brick and cement. Sculpted mountains and sculpted stones can save the steps of quarrying and transporting stone, the shapes are not limited by stone material, and the volume can be large or small.
Production steps for cement sculpted-stone rockery:
Step 1: Build the main keel. The size of the materials used should be based on the size requirements of the rockery, generally angle steel, channel steel and the like. If needed, scaffolding should be built at the same time as the main keel is built. In this process, the overall load-bearing capacity and the ability to withstand swaying must be achieved, and it must be firm;
Step 2: Build the secondary keel. At this point, use 6.5# wire (rebar) to weld out the basic shape of the rockery. In this process, the basic undulating relationships must be created;
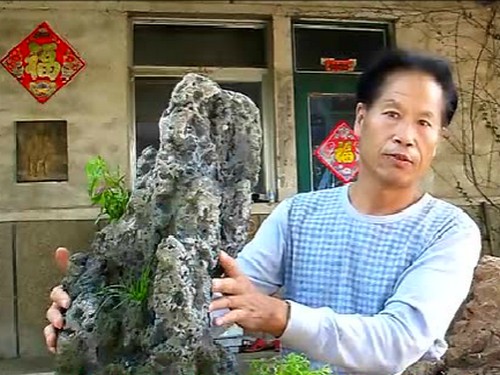
Step 3: Use angle steel to reinforce the connection between the secondary keel and the main keel and further reinforce the main structure;
Step 4: Use wire to densify and subdivide the shape into a grid of about 15cm square;
Step 5: Apply anti-rust treatment to the keel;
Step 6: Wrap the steel frame with galvanized wire mesh. A mesh opening size of about 1cm is suitable. Note that except for the upward-facing side, try not to overlap;
Step 7: Use cement without mortar, add an appropriate amount of paper towel ash and fiber filaments, mix with water, and apply it to the surface of the wire mesh. This layer is relatively difficult and easily falls into the mesh openings. Adding fiber and paper towel ash is to enhance viscosity and adhesion;
Step 8: After the first cement layer is basically dry, gently apply 1:1 cement mortar to the surface to make the previous layer more solid and firm;
Step 9: After this layer is slightly dry, another layer can be plastered and surface details or texture can be made. If colored cement is used for this layer, then no additional coloring will be needed later;
Step 10: After completion, spray exterior wall paint and acrylic pigment to create color effects;
Step 11: Remove the scaffolding, clean up the site and withdraw from the site.
The method of making rockery is not difficult, but to make a relatively realistic and beautiful rockery, it still has to be achieved with the help of professional rockery makers. Placing rockery in the home can not only decorate and beautify the home, but also has a certain feng shui effect!
Cement rockery production methods:
1. Positioning and setting out: According to the general construction plan, carry out site clearing, clear the roads, survey the actual site, recheck the elevation and the mutual positional relationship with surrounding buildings, and determine the construction scope.
2. Base laying: Set out and mark lines, excavate earthwork, pour the concrete cushion and lay the foundation.
3. Embedding of embedded parts: When the embedded parts are located on the upper surface of cast-in-place concrete, according to the different sizes and use functions of the embedded parts, there are the following 3 fixing methods.
(1) Flat-plate embedded parts are relatively small, so the embedded parts can be tied directly to the main reinforcement, but during the concrete pouring process, their position must be observed at all times so that problems can be solved promptly once they occur.
(2) Angle steel embedded parts can also be tied directly to the main reinforcement. In order to prevent the concrete under the embedded parts from not being vibrated densely, holes should be drilled in the embedded parts before fixing to allow air to escape during concrete construction.
(3) When constructing embedded parts with a large area, in addition to fixing with anchor bars, angle steel of appropriate specifications should also be spot-welded on top of them to prevent displacement of the embedded parts. When necessary, holes should be drilled in the anchor plate to release air. For extra-large embedded parts, vibrating holes must be drilled in the anchor plate to vibrate the concrete densely, but the position and size of the drilled holes must not affect the normal use of the anchor plate.
4. Skeleton welding production: Build the skeleton structure. Skeleton structures include brick structures, steel frame structures and mixed structures of both. Brick structures are simple and economical. For parts with large mountain-shape changes, steel frames must be used for cantilevering. For the flying waterfalls, flowing springs and reserved greening cave positions on the mountain body, waterproof treatment must be done well for the skeleton structure.
5. Steel mesh welding production: Lay small rebar on the already formed skeleton, and use an electric welder to weld, fix and shape it. This step can basically determine the basic shape of the rockery.
Complete collection of rockery production methods. See here for how to make rockery
6. Wire mesh binding: Lay the steel wire mesh on the already shaped steel frame, then use small steel wires to bind and fix it.
7. Plastering: For mud-base shaping, use cement, yellow mud and river sand to mix a mortar with relatively strong plasticity and shape it on the already built skeleton. Process repeatedly so that the shape, texture, molded body and surface carving basically approach the model.
8. Shaping: For the sculpted surface, carefully carve the stone's texture, color, grain and surface features on the surface of the molded body. According to design requirements, mix stone powder and color powder in appropriate proportions with white cement or ordinary water powder into mortar for texture and color, and treat it according to sculpted-surface techniques such as rough, smooth and brushed. For the shaping of grain, generally speaking, rocks with mainly vertical grain and supplemented by horizontal grain can better express a steep and upright posture; rocks with mainly horizontal grain and supplemented by vertical grain can better express an unrestrained and bold impression; rocks with comprehensive patterns can better express a deep and magnificent style. In order to enhance the natural realism of the rock landscape, in addition to carving the grain, the natural features of the rocks must also be well handled, such as seams, holes, cavities, rotten areas, cracks, faults and displacements in detailed treatment.
9. Pigment surface oiling: Coloring is carried out when the moisture on the sculpted surface has not completely dried. For the basic tone, mix pigment powder and cement with water evenly and sprinkle-dye layer by layer. Slightly sprinkle a somewhat darker tone at stone seams, holes or inner-corner areas. When the sculpted surface is 90 percent dry, sprinkle a small amount of spots of different sizes and densities in green, black or white at the recessed areas to enhance the three-dimensional sense and natural feel.