How do you make a deadwood moss bonsai? Here is the detailed tutorial
Moss——the lowest of the higher plants, with no flowers and no seeds, reproducing by spores. We usually spread moss over the surface of a bonsai pot to green it and help retain moisture, but when it is placed in a pot for viewing on its own, it has a charm all its own.
The moss bonsai originated in Japan and is now loved by people around the world, and more and more young people are joining the ranks of moss bonsai enthusiasts. The advantage of a moss bonsai is that it can be enjoyed as soon as it is finished, it does not need much effort to care for, and the materials for making it are all inexpensive. The editor is also a moss enthusiast, and once the weather warms up, I will gradually start sharing the small potted plants I make.
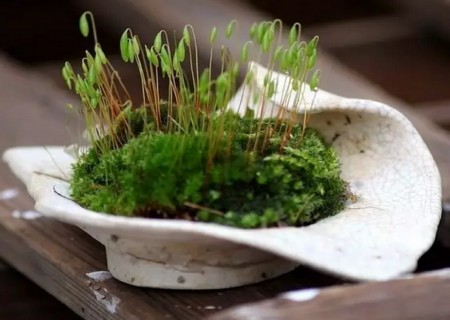
The solo-appreciation bonsai is mainly about enjoying the beauty of the moss plants themselves, and is mainly made by planting various different kinds of moss together. This type of bonsai may look like the simplest, but for beginners it is still not easy to control the temperature and humidity well, because different kinds of moss have different temperature and humidity needs, and to get all the moss to grow well takes some careful thought.
Although using a glass container has many conveniences, there is one most serious problem: once the humidity inside the bottle is too high and the air circulation is poor, many algae and lichen plants will grow, and at this point the moss will turn black, seriously affecting the viewing effect, so after keeping it sealed for a period of time, open the lid to let it breathe.
Moss bonsai are gradually becoming popular, and deadwood moss bonsai can be seen in many places. Deadwood moss pots come in all shapes, are easy to source materials for, and are a kind of carrier for making moss micro-landscapes, but deadwood itself is rotting wood, and before use it must be treated before it can be used. So how should we handle the deadwood we pick up ourselves? Let us look at the tutorial below.
Tools/materials:
Deadwood, torch, chisel, brush
Method/steps:
Step one: Select the material, choose deadwood that matches the shape, preferably wood of a suitable size with a natural transition at the broken end; do not use a saw to cut it, because after sawing the cut end is very hard to deal with.
Step two: Clean and shape, using a steel wire brush and a steel chisel to clean away the rotten wood and carve out the grooves for planting the moss.
Step three: Carefully check for missed spots and revise repeatedly until you are satisfied.
Step four: Carbonize. Carbonizing the wood has several effects: first, it cleans off burrs and also sterilizes, and another main effect is preservation against rot.
Step five: Clean and sand again. First use a steel wire brush to clean off the charcoal on the surface, then carefully sand with sandpaper until it meets the requirements. I sanded with 320-grit sandpaper.
A pot of deadwood micro-landscape generally has to go through two rounds of creation before it can be produced. The first round of creation is making the deadwood moss pot, and the second round of creation is the process of beautifying the pot surface. Only through these two rounds of creation does a one-of-a-kind moss micro-landscape come into being. At this point, the first round of creation is complete, and next it is up to you to complete the second round of creation.
Moss, in ordinary bonsai, is only spread on the pot soil to retain moisture. But when moss is viewed as a bonsai on its own, it also has a charm all its own.