Step-by-step illustrated guide to making a root-over-rock bonsai yourself
A root-over-rock bonsai is a bonsai work in which a tree and a rock are skillfully fused together through certain means or techniques, making them into an organic whole, thereby enhancing its ornamental value and artistry. Making a perfect root-over-rock bonsai not only embodies the artistic value of bonsai creation coming from nature yet surpassing nature, and coming from life yet rising above life.
Simply put, a root-over-rock bonsai is a bonsai work that uses a rock as the foundation, letting a tree grow attached to the rock while still allowing it to maintain normal growth. So, have you ever thought about making a root-over-rock bonsai yourself? Today, we will teach you step by step how to make a root-over-rock bonsai yourself (with illustrations).
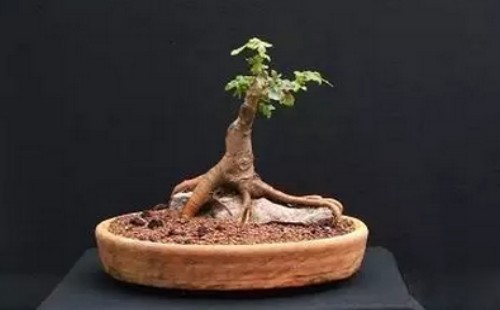
This is a root-over-rock bonsai made with a maple. Strictly speaking, it cannot yet be called a finished bonsai work, because the making is not yet complete, and the top of the maple still needs to be grown on for a period of time. But clearly, the design and layout of the maple's roots have already been completed, and it took 6 years in total to make this bonsai. Now, let us take a look at its making process!
1. This is a maple sapling propagated by cuttings, grown in the ground for 2 years, and at present you can see that its growth is quite good. Later we plan to use it to make a maple root-over-rock bonsai.
2. After another 2 years of free growth and cultivation, we can dig it out and place it on a rock that also looks quite ordinary, ready to make a maple root-over-rock bonsai.
3. Comb the maple's root system smooth so that it spreads out only over the rock. After arranging the roots, use a rope to tie it up, fixing the roots onto the rock. The rope should be of a kind that rots easily, so that later there is no need to untie it; it will naturally rot and fall off, and will not affect the growth of the plant's roots.
4. Next, wrap the plant's roots together with the rock in a sheet of transparent plastic film. This ensures that the maple's root system can fit more tightly against the rock, letting it grow attached to the stone; only the upper part of the tree needs to be left exposed. At the same time, the part marked by the red arrow is a "sacrifice branch," which needs to be kept at this time in order to thicken the plant's roots, and can be cut off later when the opportunity arises.
5. Then plant it in the ground again for cultivation. You can see that this is the maple that has grown to its 5th year; not only did it survive successfully, but its growth is also quite good. This laid a solid foundation for our next step of work.
6. By the 6th year, that is, 2 years after being replanted in the ground, after pruning, cut-and-grow pruning and cultivation, it already has a good shape. Then it is ready to be dug out and transplanted into a pot.
7. Dig the maple sapling that has been cultivated for 6 years out of the ground, remove the soil, wash the roots, and you can see that the maple sapling's root system has already become very developed.
8. Remove the plastic film that was previously wrapped over the maple's roots, and you can find that the roots have thickened quite a lot, then trim the roots and pot it up promptly.
9. Next is removing the plant's "sacrifice branch." Previously, we let the "sacrifice branch" grow freely on its own for several years, mainly to thicken the lower trunk. Now that the lower trunk has thickened, the "sacrifice branch" has also become a superfluous branch, so at this time we should cut it off promptly.
10. This is the finished maple root-over-rock bonsai. It is a root-over-rock bonsai work cultivated and created over 6 years. Everyone, take a look at the result, how does it feel?! Next, we only need to cultivate the top branches of the maple.