How to make bonsai moss? Detailed illustrated tutorial
Since entering modern society, with the improvement of people's level of civilization and the growing demand for spiritual nourishment, growing bonsai has become an important part of more and more people's lives. Because keeping some bonsai at home can not only elevate people's taste, but also decorate the environment, and some can even purify the air and drive away mosquitoes and insects. This is truly a wonderful choice that pleases people, lifts the spirits and beautifies the scenery!
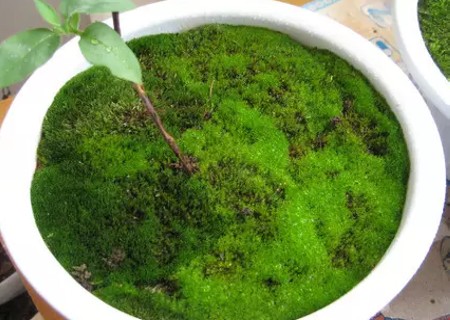
Now a fellow bonsai enthusiast has shared an illustrated tutorial on making bonsai moss, and the editor is posting it here for everyone to enjoy and learn from, hoping it will provide some guidance for everyone to make bonsai moss with their own hands.
I. Preparatory work
We should do the corresponding preparatory work before doing anything; only by completing the preparations in advance can we handle the later steps with ease and confidence. The materials needed are: moss, fine soil, a bonsai, clean water, a cup, etc.
II. Production process
1. Tidying up the moss
Before using the moss, remove debris such as bits of wood stuck to the underside of the moss, and handle it gently during the operation, keeping each piece of moss as intact as possible.
2. Preparing the pot surface
Scrape off the coarser and uneven soil from the surface of the prepared bonsai pot, then water it thoroughly once. Next, evenly sprinkle a layer of the pre-prepared thin fine soil over the pot surface, about 0.5 cm thick is enough. Then water again, and afterward stir the fine soil and water into a thin mud.
3. Laying the moss
First, trim the moss appropriately according to the size of the pot surface, then place several suitably sized pieces of moss. Use this method until the entire pot surface is covered.
4. Patching the gaps
After laying several pieces of moss, looking at the pot surface as a whole, there will inevitably be some small corners or joints that are not completely closed up. This is normal, but to achieve a seamless effect, we need to use moss fragments to cover all these small uncovered spots.
5. Pressing firmly into place
To make the laid moss look more realistic, as if it had grown naturally and formed a single whole, we also need to gently pat the surface of the moss with our hands, especially the places where the joints are not properly fitted.
III. Cleaning the pot surface
After finishing the process of making the top dressing for the bonsai, we also need to clean the pot surface, especially the debris and moss fragments that fell on it, so that the moss on the pot surface looks neater.
IV. Watering in time
After cleaning the bonsai moss, we should replenish water in time to retain moisture, thereby further keeping the moss fresh. Never wait too long before watering, otherwise the moss will look "listless."
V. Later management
Place the finished bonsai moss under the shade of trees in the courtyard or elsewhere, but make sure the environment is cool and well ventilated. After that, spray it with water once every 1-2 days to ensure the moss's humidity; after persisting for a period of time, the moss will successfully survive in the new environment.