A Detailed Guide to Wintersweet Bonsai Cultivation Techniques and Care Methods
Wintersweet blooms in the cold months and early spring, with yellow flowers like wax and a delicate fragrance filling the air. It is a precious ornamental flowering tree unique to our country. Many people do not know the cultivation techniques for wintersweet and often fail to grow it well. In fact, as long as you master the key points in four aspects of wintersweet cultivation techniques, you will soon become proficient!
I. Wild Collection in the Cultivation Techniques of Wintersweet
Using old root stumps of wild wintersweet from mountainous areas and planting them in the ground for cultivation to create ancient wintersweet stumps is relatively common and effective quickly. Select old tree stumps that have sprouted from many years of cutting, and after digging them back, take care to protect the root system and prune the branches. Choose a location with moderate light, loose soil, and good drainage for "nurturing the embryo." After it survives, move it into a pot for cultivation. If it is an old stump of Gouying wintersweet (a less ornamental variety), you can select Suxin wintersweet (a highly fragrant variety) for grafting, and after it survives, you can process and shape it as needed.
II. Open-Ground Planting and Pot Cultivation in the Cultivation Techniques of Wintersweet
1. Open-Ground Planting
Choose neutral or slightly acidic sandy soil with deep soil layers, shelter from wind, sunny exposure, and good drainage, and generally plant before spring bud break. For small seedlings, plant at a spacing of 30 cm × 50 cm; for 2-3 year old medium seedlings, plant at a spacing of 50 cm × 55 cm. For large seedlings planted permanently in courtyards, the planting hole should be 60-70 cm in diameter and 40-50 cm deep; place fully decomposed manure, soybean cake, etc. at the bottom of the hole as base fertilizer, cover the base fertilizer with a layer of soil, then place the wintersweet plant with its root ball into the hole, fill with soil, firm it by treading, and water.
2. Pot Cultivation
Choose loose, fertile, well-drained sandy soil as the growing medium, place a layer of gravel over the drainage hole at the bottom of the pot or tub, and in early winter each year select a small plant with plump flower buds, dig it up with soil, and plant it in the pot. After flowering, it can be displayed for viewing. Usually keep it outdoors in a spot with plenty of sunlight for care.
III. Water and Fertilizer Management in the Cultivation Techniques of Wintersweet
1. Watering
Usually, watering to maintain the soil in a half-moist state is best. In the rainy season, pay attention to drainage to prevent water accumulation in the soil. In dry seasons, replenish water in time. During the flowering period, keep the soil moderately dry and do not water too much. For potted wintersweet in spring and autumn, do not water until the potting soil is dry; in summer, water once in the morning and once in the evening each day, with the amount controlled according to how dry or wet the potting soil is.
2. Fertilizing
After the flowers fade each year, apply fully decomposed organic fertilizer once; during the growing season from the emergence of new leaves in spring until June, apply decomposed cake fertilizer water once every 10-15 days; during the flower bud differentiation period in July-August, apply a mixed liquid of decomposed organic fertilizer and phosphorus-potassium fertilizer; after autumn, apply organic fertilizer once more. After each fertilization, water and loosen the soil in time to keep the soil loose. Do not fertilize during the flowering period.
For potted wintersweet, do not apply additional fertilizer water in the initial period after potting. In spring, apply leaf-promoting fertilizer. Repot and change the soil once every 2-3 years, after the flowers fade in spring, and at the same time replace 1/3 of the potting soil.
IV. Shaping and Pruning in the Cultivation Techniques of Wintersweet
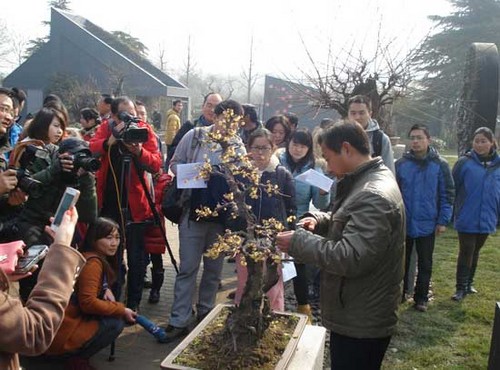
Winter is the season when wintersweet flowers are in full bloom. Recently, quite a few netizens have left messages for "Weinong Service": wintersweet is generally planted in courtyards, so how does it become a wintersweet bonsai? Today, we will briefly introduce a method for quickly cultivating a wintersweet bonsai.
1. Shaping
(1) Tree-form shape. During the seedling stage, select and keep one thick, strong branch and do not pinch it out, cultivating it into a trunk. After the trunk reaches the desired height, pinch it out to encourage branching. When the branches grow to 25 cm, pinch them out again to form a canopy, and at any time prune away branches sprouting from the base.
(2) Clump-form shape or pot cultivation. Pinch out the growing tips at the seedling stage to encourage branching. After the clump canopy has formed, during the dormant period cut off the tender tips of strong branches, and for weak branches leave 2-3 buds at the base and cut them back, while also clearing away thin branches, diseased and dead branches, and irregularly shaped branches inside the canopy. For new branches of the current year, pinch them out once in early to mid-June. In horticultural shaping, generally when buds sprout, use a knife to bend and adjust the trunk and branches to form a basic framework. From May to June, new branches can be twisted and bent by hand. After the basic shape is set, frequent pruning is still needed to maintain the established form.
2. Pruning
(1) Bud removal and pinching during the growing season. When wintersweet leaf buds have sprouted about 5 cm, remove excess tender buds that are dense, inward-facing, or close to the ground. During the vigorous growth period in May-June, when the main branches have grown to more than 40 cm and the side branches to more than 30 cm, pinch them out to encourage branching. In the rainy season, promptly prune away miscellaneous branches, useless branches, irregularly shaped branches, and branches that block wind or shade light.
(2) Pre-flowering pruning. After leaf fall and before the flower buds swell, for long branches leave one extra pair of leaf buds above the flower buds, cut off the upper part without flower buds, and thin out dead branches, diseased and insect-damaged branches, overly weak branches, and dense or excessively vigorous non-flowering branches and root suckers not used for renewal. Operate carefully to avoid knocking off flower buds.
(3) Supplementary pruning after flowering. Thin out aged branches, dead branches, overly dense branches, and excessively vigorous branches, etc., and cut back weakened main branches or branch groups. For main branches that are too high, too long, or too strong, cut them back at a relatively large, moderately vigorous slanted branch, using a weaker branch as the leader to control branch height, length, and vigor. Cut back one-year-old branches; for extension branches of main branches, leave 30-40 cm, for other relatively strong branches leave 10-20 cm, and for weak branches leave one pair of buds or remove them. After the flowers fade, promptly remove the spent flowers.
I. Sowing
Collect some wintersweet seeds in June-July, soak them to promote germination, and sow them. In February to March of the following year, appropriate pruning can be done, and in the spring of the third year they can be used as rootstock.
II. Grafting
Beforehand, look for a wintersweet variety you like. When grafting in spring, cut 2-3 healthy scions and graft them onto the rootstock.
III. Pruning
In the year of grafting, when the new shoots of the scion have grown to about 250px, pinch them out, and when the secondary new shoots reach 250px, pinch them out again. At the same time, prune away new branches such as inward-growing branches, overlapping branches, and twin branches to set the shape of the young tree.
Overall pruning: In the spring of the second year after grafting, shape the wintersweet stump embryo through overall pruning. Before overall pruning, carefully observe the branch morphology of the stump embryo, then conceive a design, and finally use methods such as cutting back and renewal to give the wintersweet a certain posture, mainly slanting-trunk style and natural style.
Local pruning: In April to May of the second year after grafting, pinch out the new shoots so that their length is ≤250px. In June to July, carry out cutting back and thinning to make the flower buds on the new shoots plump.
IV. Wiring
In early summer of the second year after grafting, the wintersweet branches begin to lignify, and wiring and shaping can be carried out.
Trunk wiring: Wrap one end of the aluminum wire at the intersection of the root crown and a thick root, then wrap it tightly against the bark and slowly wind upward from bottom to top all the way to the top of the trunk. After the aluminum wire is wrapped, begin bending, twisting slowly and repeating many times to achieve the ideal shaping curve.
Main branch wiring: Wire the main branches layer by layer and section by section in sequence. Generally, the first layer has a large drooping extent, and the higher up it goes, the smaller it becomes, until it is flat or slanting outward.
Unbinding: During the shaping period, loosen the binding in time according to growth conditions (1-2 years for old stumps, 1 year for small branches); otherwise, the aluminum wire will embed into the cortex or even the xylem, causing branch death or complete death.
V. Formation
In the winter of the year of wiring, a small amount of wintersweet flowers will open. Select a suitable flower pot, transplant the wintersweet into the pot, lay moss on top, and place stones. At this point, the wintersweet bonsai has been initially completed.
From sowing and raising seedlings to the initial formation of the bonsai, a total of 3 and a half years is spent. If an existing old wintersweet stump is available, the time can be shortened to 2 years.