How to Grow Passion Fruit (Passiflora edulis)? A Detailed Guide to Cultivation Techniques
Passion fruit, also known as Passiflora edulis, is a perennial vine. The plant has no upright trunk or fixed tree shape, and under natural conditions it climbs trees or other objects by means of tendrils. Passion fruit is a tropical fruit tree, not cold-tolerant, light-loving and heat-tolerant; when grown in the mountainous areas of northern Guangdong, it is a seasonal crop. To achieve high-quality, high-yield and high-efficiency cultivation results, one must follow the natural laws of climatic conditions, make full use of the seasonal light and temperature conditions of the region, and plant at a reasonable density to increase yield per unit area.
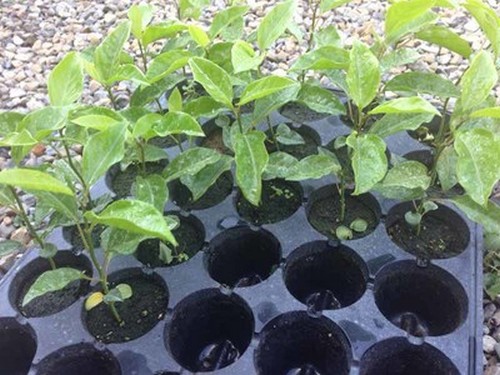
The most suitable growing temperature for passion fruit is 20-30°C. Generally, it grows well at temperatures not lower than 0°C; at -2°C the plant suffers severe damage or even dies. Areas with an annual average temperature above 18°C are most suitable for cultivation. Below is an introduction to the cultivation techniques for passion fruit:
I. Cutting Propagation Techniques
1. Cutting time. Generally, choose late October to early December.
2. Cutting collection and insertion. Select branches with mature leaves, take two nodes; keep the leaf at the upper node, cut 2 cm above the node, and large leaves can be cut in half; leave no leaf at the lower node, and cut below the node. After cutting the cuttings, soak them in a rooting agent solution for 2 to 3 minutes (use 1 g of rooting powder per 1 kg of water), then insert them into the nursery bed or nutrient cups, at a depth of two-thirds of the cup soil, and water thoroughly after inserting. For the nutrient soil formula, the lower two-thirds of the nutrient cup is field mud, and the upper one-third is yellow mud.
3. Management of cuttings. For the nursery site, it is best to use a large greenhouse with a small shed inside, cover with film to keep warm, and use shade netting to reduce light. Make beds in the nursery, 1 m wide and more than 15 cm high. For directly inserted cuttings, the bed surface should be covered with 2 cm of yellow mud. For nutrient bag seedlings, fill with soil, place them on the bed surface, and then insert. The nursery site should be kept moist, watering once every 5 days. After budding (about 30 to 40 days after insertion), spray foliar fertilizer once every 10 days; you can use 20% biogas slurry or 0.3% urea solution or other foliar fertilizers. Water once before spraying fertilizer, and spray after watering to avoid damaging the seedlings. Keep the temperature inside the shed between 20°C-30°C. Ventilate and cool down during the high-temperature period at noon. When the cuttings grow to 10 cm, ventilate to harden the seedlings, and plant in mid-March.
II. Planting Management
1. Preparation before planting. For mountain planting, open strips and dig holes, with a size of 80 cm long × 80 cm wide × 50 cm deep. Apply 5-8 kg of organic fertilizer enzyme bacteria per hole, or apply 50 kg of farmyard manure (rotted pig, cattle, chicken, and sheep manure), mix evenly with the hole soil and fill it into the hole. When filling the hole, first fill a layer of weeds, then fill with fertilized soil. After filling level, build a 50 cm high soil mound; for paddy fields, there is no need to dig holes. Place base fertilizer at fixed points in the loosened field mud, then build a 50 cm soil mound to complete the preparation before planting.
2. Select disease-free seedlings. Before planting, remove seedlings with shrunken and yellowed leaves, then spray twice with the fungicide moroxydine hydrochloride 5% soluble powder or Nongsde (20% sodium dichloroisocyanurate), once every 7 days, and then plant.
3. Field planting. For nutrient bag seedlings, remove the nutrient bag; non-woven bags need not be removed. For directly inserted seedlings, plant immediately after watering. Keep the root system in good condition when planting, press firmly after planting, cover with grass, and water enough settling water. The planting density can use 2.5 m × 2 m row and plant spacing, or 2 m × 2 m.
4. Topdressing: use 25 kg of rotted farmyard manure plus 5 kg of plant ash, and cover with soil after application.
5. Insert bamboo to guide vines. When new shoots grow to more than 30 cm, insert bamboo poles beside them, fix the seedling vines with plastic rope, guide the vines upward, and promptly remove the side vines at the lower part of the main vine. When the main vine grows to 1.5 m, pinch off the top to let it branch into 2-3 side vines onto the trellis.
6. Trellis. For passion fruit, you can choose trellis types such as large shed trellis, small shed trellis or hedge trellis. Trellis materials can be bamboo and wood, concrete columns or steel columns, choosing materials according to local conditions. It is recommended to use small shed trellis planting, which can achieve early fruiting and high yield.
7. Pinching tops and thinning branches. After the branches and vines are on the trellis, for branches showing flower buds, leave 5-6 flower buds and pinch off the top. For side branches that branch after pinching, after flower buds appear, leave 5-6 flower buds and pinch off the top. For flowerless vegetative branches, if there is space, leave 50 cm and pinch off the top; cut off the excess. Old branches after fruit harvest should be cut off in time.
8. Winter pruning. Flowers that open after October 1 are difficult to mature and should be cut off early. Carry out winter pruning in mid-to-late December when the first frost appears. When pruning, cut the main branches on the trellis surface at 50 cm, generally leaving 3-5 main branches, then pull the trunk and branches to the ground, roll them into a 60 cm circle, tie them with rope, cover with grass, and then cover with film to keep warm for overwintering. At the end of February or early March of the following year, straighten the branches and tie them to the trellis surface.
III. Pest and Disease Control
Passion fruit has strong resistance to pests and diseases, and plants are occasionally found infected.
The main diseases include seedling damping-off, mosaic disease, Phytophthora blight, and stem base rot. Control methods: ① Choose clean soil for raising seedlings, maintain field moisture, especially prevent the soil from being too wet, stay away from bananas, various melons and solanaceous vegetables, and promptly remove and burn diseased branches and leaves. ② Chemical control: choose 0.5% Bordeaux mixture or phosethyl-Al, ridomil, 1000-fold solution of Kukuling, 800-fold solution of 75% chlorothalonil, and 1000-fold solution of 50% carbendazim wettable powder for control.
The main insect pests include fruit flies, mites, scale insects, etc. Use 800-fold 90% trichlorfon, 1000-fold Nongdile, 800-fold Lorsban, 2000-fold Mite-Death solution, etc. for control.
IV. Timely Harvest
Passion fruit planted in spring can bloom in July of the same year and bear fruit in September. From the second year onward, it begins to bloom in April each year, and can bloom 5-6 batches a year, with each batch of flowers 20 days apart. From flowering to fruit maturity takes 60-70 days, and fruit harvest lasts more than 4 months.
Generally, harvest 10 days before fruit drop, when the fruit color turns purple (purple variety) or yellow (yellow variety) or red (red variety) and has a slight fragrance, but fresh fallen fruit can also be picked up from the ground.