How to Grow Morning Glories in Pots: Even Beginners Can Learn with Ease
The morning glory is an herbaceous annual plant, covered all over with white hairs, with short hairs on the stems and leaves that are soft and fine. The leaves are broad, round or ovate, varying in shade, about 4-15 cm long and 4.5-14 cm wide. The leaf surface has slightly stiff, loose downy hairs. The petioles are 2-15 cm long, growing on the inflorescence, varying in length. The bracts are leaf-like or linear. The corolla is funnel-shaped, and the corolla color is pale. To grow morning glories scientifically, they must be planted in pots. This makes scientific management easier, as well as exhibition and judging, and also makes it easier to ensure seed collection from superior varieties.
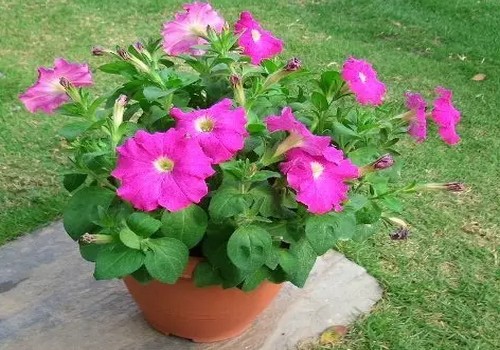
Potted large-flowered morning glories can also be kept from climbing and grown into a dwarfed, bushy, lush plant shape. When the seedlings grow 5 to 6 leaves, plant them in a two-gallon tub pot (inner diameter 23 cm). Then pinch off the tips to encourage 2-3 side buds, and remove the rest. When the side buds unfold leaves and extend vines, again leave 2-3 leaves and remove the tips. In this way, about 10 flowers can bloom at one time. After the flowers fade, pick them off immediately to encourage the side branches to send out new buds; keep a few as appropriate, remove the excess, and still pinch the tips as before. This keeps the plant clump full at all times, with flowers blooming continuously.
[Propagation]
The sowing period is spring and summer, and sowing is suitable at 20-25°C; flowering occurs in summer and autumn. When sowing, soak the seeds in warm water for 4-6 hours, treat them appropriately with sulfuric acid, scatter them in the soil, and cover with a thick layer of soil, about 1 cm, then keep the soil moist; they sprout in about 5-6 days, and once two leaves have grown, they can be transplanted.
[Raising Seedlings]
The germination temperature for morning glory seeds is 20-30°C. They are generally sown in late April to early May (earlier in the south is also possible), sown in rows by variety in a fine sandy soil seedbed, and when humidity is moderate they sprout in about 10 days. After about another 10 days, the cotyledons are fully open. As soon as the true leaves just begin to emerge, they should be transplanted into small pots; too early makes the seedlings weak, too late damages the roots, and neither is good for later development. The small pots should be marked, noting the variety.
[Planting Out]
After the seedlings in the small pots grow two or three true leaves, when the root system has developed well, they can be planted out in medium pots, with base fertilizer added in advance. As Mr. Mei said, morning glories are not afraid of heavy fertilizer, and horse hooves, cooked hemp residue, and the like can be used as base fertilizer. The development of the morning glory's root system requires temperature; according to Japanese researchers, black pots absorb heat better than red pots. The pots should be turned frequently to give even sunlight exposure, so that the root system develops fully.
[Pinching]
After the morning glory's true leaves grow three or four, vines begin to form in the center, and at this point they should be removed. After the first pinching, branches and vines grow again from the leaf axils; after the branches and vines produce three or four leaves, pinch again, combining this with shaping. After each pinching, topdressing should be applied, and the fertilizer used is similar to that used for chrysanthemums. Be careful not to let fertilizer water and mud stain the leaves (including the cotyledons), so as to prevent the leaves from falling off. After the branches and vines grow, they enter the flowering period (generally one month after planting out); ideally, the first leaf of the branch and vine produces axillary buds again, and the leaf axils of the second and third leaves send out flower buds. Once the flower buds take shape, the stipules of the buds can be removed to help the buds develop. To ensure sufficient nutrients are supplied to the buds so they produce large, brilliantly colored flowers, some buds can also be removed to cultivate solitary blooms, just like cultivating a specific chrysanthemum variety. After flowering, the spent flowers should be picked off so they do not set seed, to avoid affecting the nutrition for the next batch of flowers. Of course, after three or four batches of flowers have bloomed, axillary buds proliferate and become difficult to control. Ordinary varieties can then be moved to ground planting, while superior varieties are kept for seed.
[Planting]
When planting morning glories, 4-5 seeds can be sown per pot, with the hard seed coat slightly cracked. Keep the temperature at 25°C, and they will sprout in about 7 days. When the leaves grow, they can be transplanted, separating the seedling tray with soil. When planting morning glories, first choose soil with good drainage, provide moderate ventilation and sufficient sunlight, water them, apply dilute fertilizer once every half month, and control the nitrogen level well to prevent the stems and leaves from growing too luxuriantly.