Detailed Explanation of Lilium candidum (Madonna Lily) Planting Techniques and Methods
Lilium candidum is a beautiful flower with extremely fragrant blooms that contain aromatic oil and can be used as a fragrance. It is also an elegant cut flower with a captivating light fragrance, suitable for flower beds, flower borders, garden features, or potted display, and can also be used in floral arrangements for decoration. In Europe and America, Lilium candidum is mainly used as a cut flower and as a potted flower for Easter, where it has become an almost indispensable flower for the holiday, and is therefore widely cultivated in European and American countries with high cultivation standards. However, growing Lilium candidum requires certain skills. Below, let us learn about the planting techniques for Lilium candidum together.
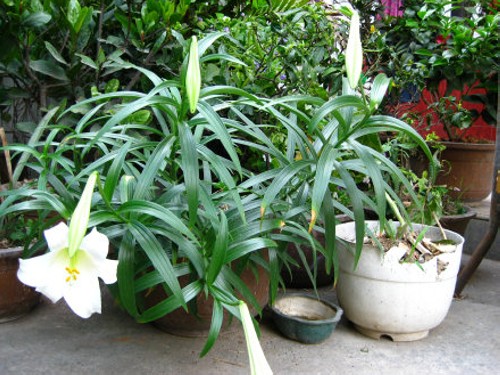
[Preparation Work]
1. Soil disinfection: Before planting lilies, soil disinfection should be carried out. The commonly used disinfection methods are steam disinfection and chemical disinfection. Steam disinfection is rarely used at present due to its high energy consumption and cumbersome operation. Chemical disinfection involves mixing 40% formalin into a 1:50 or 1:100 solution and sprinkling it onto the soil at a rate of 2.5 kg/sq m. After sprinkling, cover with plastic film for 5-7 days, then uncover and air-dry for 10-15 days before planting. Alternatively, carbendazim powder at 8-10 g/sq m can be spread into the soil for disinfection.
2. Thawing and disinfection of bulbs: After the bulbs arrive, immediately open the packaging and place them in a 10-15°C environment to thaw. After complete thawing, proceed with disinfection. Disinfection method: Soak the bulbs in a 0.1% aqueous solution of captan, chlorothalonil, carbendazim, potassium permanganate, etc. for 30 minutes. Alternatively, soak the bulbs in an 80-fold diluted 40% formalin solution for 30 minutes. After removal, rinse off the residual solution on the bulbs with clean water, then dry them in a shaded place before planting. Some domestic planting bases cut off the original basal roots before planting, which helps promote new basal root growth.
3. Storage of bulbs: If the thawed bulbs cannot be planted immediately, they must not be refrozen, otherwise there is a risk of frost damage. They can be stored at 0-2°C, but for no more than two weeks; they can also be stored at 2-5°C for up to one week, and the plastic film packaging must be opened.
[Planting Methods]
Site selection and land preparation: It is advisable to choose sandy loam or humus-rich loam with high and dry terrain, sunny exposure, deep soil layers, loose texture, and good drainage for planting; in mountainous areas, semi-shaded sparse forests or gentle slopes can be chosen. After selecting the site, deep-plow the soil to a depth of more than 25 cm before planting. In conjunction with land preparation, apply 2000 kg of decomposed barnyard manure or compost and 25 kg of superphosphate per mu as base fertilizer, plus 0.6 kg of 50% diazinon, and plow them into the soil simultaneously for soil disinfection. Then, finely rake and level the soil to make raised beds 1.3 m wide or flat beds, with a furrow width of 30 cm. Dig deeper drainage ditches around the perimeter to facilitate drainage.
Planting: Autumn planting is preferred. In the south, plant from late September to early October; in the north, plant in early September. Before planting, select small bulbs obtained by the above propagation methods, preferring those with tightly clasped scales, white color, regular shape, and no damage or pest and disease damage. After selection, soak the seed stems in a 2% formalin solution for 15 minutes for disinfection, remove and air-dry before planting. On the prepared bed surface, open horizontal furrows at a row spacing of 25 cm, about 12 cm deep, then place one small bulb (seed stock) every 15 cm (plant spacing), with the tip pointing upward, cover with fine soil, plant upright and firm, rake the bed surface level, cover with a layer of fallen leaves, press down with dry branches, and remove them when sprouting in the following spring. Use 150-200 kg of seed stock per mu.
[Post-Planting Management]
1. Cultivation, weeding, and fertilization. In the second year after planting, carry out the first cultivation and weeding after the seedlings emerge in spring. Shallow hoeing is advisable, taking care not to damage the bulbs. In conjunction with weeding, apply one topdressing per mu of 1000 kg of decomposed human and animal manure water, 20 kg of superphosphate plus 800 kg of compost, mixed evenly and applied in furrows between rows, then cover with soil. The second application is before flowering in May, in conjunction with cultivation and weeding, applying per mu 500 kg of decomposed cake fertilizer water, 20 kg of superphosphate plus 800 kg of compost, mixed evenly and applied in furrows between rows. The third application is after flowering in July, in conjunction with weeding, applying another topdressing of phosphorus and potassium fertilizer at a slightly larger rate, using the same method as the first. Each fertilization should avoid direct contact between the fertilizer solution and the seed stems to prevent bulb rot.
2. Bud removal. Except for seed production plots, promptly cut off the flowering stems when buds appear from May to June, so that nutrients are concentrated on bulb growth, which is beneficial for increasing yield.
3. Drainage and irrigation. Lilies are afraid of waterlogging. During the high-temperature and rainy summer season and after heavy rain, ditches should be dredged and drained promptly to prevent disease. In dry weather, irrigation should be carried out promptly.
[Harvesting and Processing]
1. Harvesting: In the second year after transplanting, around the Beginning of Autumn, when the stems and leaves wither, choose a sunny day to dig them up. Remove soil, stems, and fibrous roots. Large bulbs are provided as commodities, and small bulbs are retained for seed use.
2. Processing: First, separate the large bulbs into pieces, place them separately by size (large, medium, small), wash off the soil, and drain the water. Then, put them into boiling water to blanch briefly, about 10 minutes for large pieces and 5-7 minutes for small pieces, until the edges are soft and tiny cracks appear on the back, then quickly remove, put into clean water to rinse off the mucus, and immediately spread thinly on a drying mat for sun-drying. Do not turn them randomly while still wet, to avoid breaking them. In the evening, bring them indoors and spread them flat to air-dry; do not stack them. The next day, take them out to sun-dry again. After two days of drying, they can be turned once. When they are 90% dry, fumigate with sulfur, then repeat sun-drying until completely dry. In cloudy and rainy weather, they can be dried over a gentle fire.