How to Grow Vanda Orchids? A Complete Guide to Planting Methods
Vanda orchids are a major group among tropical orchids and one of the toughest members of the tropical orchid family. Its scientific name Vanda originally comes from Sanskrit in the India region, meaning an orchid that hangs on a tree trunk. Some also believe that the word itself means “orchid” in India. Either way, from this genus name it can be inferred that Vanda orchids were first discovered in India. Chinese experts translated it as “Wandai”, probably because it has strong vitality and is able to carry on from generation to generation forever.
Vanda orchids are typical tropical epiphytes, attaching to other plants or rocks with their well-developed root systems. The roots are relatively thick and grayish-white, with the root tips often green, and they are the main nutritional organs of the Vanda orchid. The leaves are arranged on both sides of the stem, with relatively wide gaps between the leaves so the stem can be seen. The leaves can be divided into two major types by type: one is round and rod-shaped; the other is strap-like V-shaped flat leaves, and both varieties described in this article have this type of leaf. Vanda orchid leaves are relatively thick and have strong drought tolerance. The stem is lignified and fairly hard. The flowers are large and brightly colored, with rich color variation. The petals have spots or net-like markings. The sepals and petals are similar. The column is short, the anther is terminal, and there are 2 to 4 pollinia attached to the viscidium stalk. The Vanda orchid produces a raceme from the leaf axils, with 8-20 flowers, and each flower can stay open for 2-3 weeks, usually opening from bottom to top, so each inflorescence can remain in bloom for 1-2 months under normal conditions.
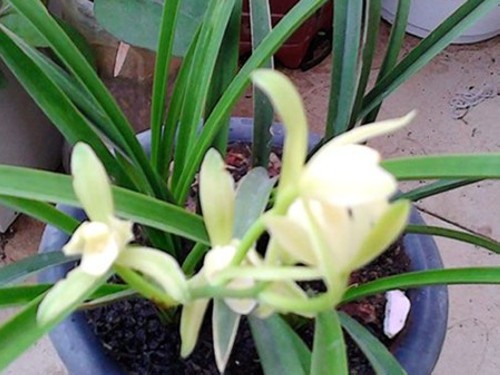
Vanda orchids are one of the tough members of the orchid family and belong to the genus Vanda in the orchid family, which contains about 50 original species. Next, let us take a look at how to grow Vanda orchids.
[Propagation]
Vanda orchids can generally be propagated by keiki, tissue culture, or top cutting. The keiki method uses the keikis that older Vanda plants produce in the leaf axils in late autumn. When they grow to 5-7 cm, use a sharp and sterilized knife to cut the keiki from the mother plant, then plant it in a pot filled with tree fern fiber, and it can later be transplanted into a larger pot. Tissue culture propagation requires a high level of skill, so it is not suitable for home practice. Top cutting propagation is done by using sharp scissors to cut near the top at the position of 8-10 leaf layers, smearing the cut with chlorothalonil powder for disinfection, then planting it in another pot. After watering, place it in a semi-shaded, humid place. In addition, when a plant grown for many years reaches more than 1 m, the top shoot about 30-46 cm long can be cut off, and both cut surfaces should be disinfected with medicine, then planted in a pot and kept moist.
[Cultivation]
Depending on the production purpose, cultivation methods are divided into two types. The first is the potted method: use a wooden frame (10×10 cm wide, 5 cm high) instead of a flower pot, fix the Vanda seedling in the middle, then fill in some chopped coconut husk, make a hook with thin wire and hang it on the wooden frame, allowing the root system to be fully exposed to the air. The second is the cut-flower cultivation method: use square timber to make a wooden rack 60 cm high and 100 cm wide of any length, fix the Vanda seedlings on the rack at a spacing of 20 cm between plants and rows, then pile a 20-40 cm thick layer of coconut husk at the roots so the root system can attach and grow, while also helping retain water and fertilizer.
[Potting Medium]
Because Vanda orchid roots are aerial roots, any well-drained medium can be used, such as tree fern fiber, broken bricks, charcoal, coarse gravel, and so on; whether used alone or mixed, they are all good potting media. In addition to the medium, the pot itself must also be carefully chosen when growing Vanda orchids. Among pots of various materials, wooden slat baskets and clay pots are preferable, and drilling a few more holes in the pot is even better for drainage and air circulation. Apart from wooden slat baskets and clay pots, Vanda orchids can also grow well on tree fern boards or tree trunks. No matter which cultivation method is used, remember that the potting medium must have very good drainage and aeration.
[Light]
Vanda orchid leaves are thick and leathery with a rich water content. They can withstand intense sunlight. However, in the scorching summer sun, generally about 30% shading can also be used to prevent the leaves from being sunburned yellow, which would affect the ornamental effect of the whole plant, especially for potted varieties. Once Vanda orchids lack sufficient light, the plants will grow leggy and weak, and because they accumulate little nutrients in the body, it is difficult for them to produce flowers. Therefore, potted Vanda orchids should have their position adjusted according to the seasonal changes in sunlight so they can absorb the most appropriate amount of sunlight. The common Vanda varieties mentioned above need relatively strong light. In local high-temperature seasons, only 40-50% shade netting is needed, and in winter, shading is not even necessary.
[Temperature]
Most Vanda orchid varieties should be cultivated in a warm and humid environment. Their optimum growth temperature is 20-30°C. If this temperature cannot be reached during the growing period, the Vanda orchids grown will be very difficult to flower, or may not flower at all. Winter is the key to whether Vanda orchid cultivation succeeds. If daytime temperatures in winter can remain above 20°C and nighttime temperatures remain above 15°C, they can overwinter safely. If the accumulated temperature for Vanda orchid growth throughout the year is insufficient, the plants will become thin, weak, and disease-prone, let alone bloom. In winter they should be brought indoors for cultivation. If there is no heating, it must be artificially warmed to 20°C to meet the needs of their normal growth. The Vanda orchids cultivated in Xishuangbanna all prefer a high-temperature environment. The most suitable temperature is 20-30°C. Because there is no frost there all year round, Vanda orchids can bloom normally in any season.
[Humidity]
Vanda orchids are epiphytic orchids with a powerful mass of aerial roots, so during vigorous growth their respiratory metabolism is intense and they need a well-ventilated growing environment. Stagnant, stuffy air will hinder the orchid plant's respiratory metabolism and affect its normal growth. Therefore, the cultivation environment for potted Vanda orchids should preferably be an open area with no obstacles blocking it. Indoor growers should choose a location near a window so that the window can be opened at any time to strengthen ventilation and the exchange of fresh air. If necessary, an electric fan can also be turned on to blow away the stuffy air.
[Watering]
Like other tropical orchids, Vanda orchids like to grow in a humid environment, especially in the severe heat of summer, when humidity can help them continue growing. Therefore, during the growing periods in spring, summer, and autumn, sufficient water should be provided, watering once in the morning and once in the evening each day, and the plants should often be misted to ease excessively high temperatures. In winter, when the temperature drops sharply, watering can be reduced to once every 2-3 days, based on watering thoroughly after the growing medium dries out, and remember not to leave standing water at the bottom of the pot, otherwise the roots are prone to rot. The two Vanda varieties mentioned above are both typical tropical epiphytes, and daily management must ensure sufficient water and air humidity. In the rainy season, vigorous growth can be maintained by natural conditions alone. In the dry season, artificial watering must be used to keep air humidity at around 80%.
[Fertilizing]
Vanda orchid plants are sturdy and tall, so they naturally need more fertilizer than other tropical orchids. Therefore, during the vigorous growth period, apply dilute liquid fertilizer once a week. Spraying the leaves once a month with a 1000-fold solution of monopotassium phosphate can increase the nutrient accumulation of Vanda orchids, which helps flowering and enhances cold tolerance. During the slow-growth period in winter, fertilizing can be reduced, about once a month is more appropriate; or diluted fertilizer can be applied once every 7-10 days. The best fertilizer has a nitrogen, phosphorus, and potassium ratio of 10:10:5. Fertilizing can be stopped during the flowering period of Vanda orchids until the flowering period ends and then resumed.
[Repotting]
Vanda orchids should not be repotted frequently. Unless they are troubled by pests or diseases, they should be repotted only once every 3 years at least. In spring, Vanda orchids are about to enter their vigorous growth period, which is a good time to repot. For Vanda orchids grown for many years, their root systems cling tightly to the inner wall of the pot, so if they are grown in clay pots, it is best to break the pot before repotting, remove the old growing medium and broken pot fragments, place the plant into a new pot, add and firm the growing medium, water it, and place it in a semi-shaded, humid place, so as to avoid damaging the roots when taking out the plant. In order to enhance the aeration of Vanda orchid aerial roots, it is more suitable to grow Vanda orchids in unglazed clay pots with holes on the sides or in hanging wooden basket pots.
[Ventilation]
Vanda orchids are epiphytic orchids with a powerful mass of aerial roots, so during vigorous growth their respiratory metabolism is intense and they need a well-ventilated growing environment. Stagnant, stuffy air will hinder the orchid plant's respiratory metabolism and affect its normal growth. Therefore, the cultivation environment for potted Vanda orchids should preferably be an open area with no obstacles blocking it. Indoor growers should choose a location near a window so that the window can be opened at any time to strengthen ventilation and the exchange of fresh air. If necessary, an electric fan can also be turned on to blow away the stuffy air. Remember, poor ventilation is usually the trigger for the appearance of scale insects and red spiders. While spraying pesticides for control, ventilation conditions should be improved immediately to prevent these pests from occurring again.
[Pest and Disease Control]
Tough leaves are the main reason Vanda orchids are not prone to pests and diseases. Apart from snails and slugs, the common pests generally appear less often on strong and healthy Vanda plants. However, when water remains on the leaves for too long, or when the plant is infected by a virus, dark markings or patches often appear and gradually rot. If the situation is mild, the affected area can be cut away. If the rot is too extensive, the entire orchid must be discarded to avoid infecting other orchid plants.