A Detailed Guide to Fig Cultivation Techniques and Methods in Pots
Figs originated in the Mediterranean coast of Europe and Central Asia, and were introduced to China during the Western Han Dynasty; the Tarim Basin has a long history of fig cultivation. The fig does not bear fruit without flowers; its flowers are solitary, pale red, and hidden inside the receptacle, inconspicuous. After the fruit ripens, the flowers drop off, hence the name "fig". The fig's leaves are large, ovate, and palmately lobed; the crown is round and attractive, making it suitable for landscaping and potted ornamental display.
The fig is also known as "Tianshengzi". Because of its high nutritional value, it can not only detoxify and suppress blood sugar, but also contains a variety of anti-cancer substances. Therefore, along with the miracle fruit, it is praised by fruit-growing enthusiasts as one of the most worthwhile balcony fruits to grow.
1. Container
There are many kinds of containers for potted figs: pots, boxes, buckets, and so on. The size and quality of the container determine the volume and growth vigor of the potted root system. The fig is a shallow-rooted fruit tree; when growing figs on a balcony, a clay ceramic pot with a diameter of 40-50 cm and a depth of 25-30 cm is usually most suitable.
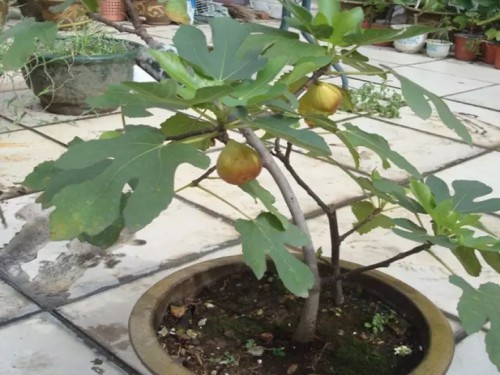
2. Soil Mix
Figs do not have high requirements for soil conditions; they grow best in deep, fertile, loose, well-aerated neutral to slightly alkaline soil. Therefore, the potting soil can be made from 2 parts sandy loam, 1 part vermiculite, and 1 part barnyard manure, or mixed from 2 parts garden soil, 2 parts peat, and 1-2 kg of compound fertilizer.
3. Potting
Potted figs are generally planted when spring buds are about to sprout and the temperature is relatively high, as the survival rate is high when planted at this time. The potting time can be chosen in mid-to-late March; before potting, it is best to place a tile over the drainage hole at the bottom of the pot.
4. Watering
The fig tree is drought-tolerant and waterlogging-tolerant, so water management can be somewhat rough; watering should not be excessive, especially during the fruit ripening period, as too much water will worsen fruit cracking.
5. Fertilizing
In early June, apply a top dressing of diammonium phosphate or monopotassium phosphate, about 0.3 kg; dissolve it in water and evenly pour the fertilizer liquid into the pot. In late August, apply a top dressing of compound fertilizer containing nitrogen, phosphorus, potassium, and trace elements, about 0.5-1 kg.
6. Pruning
Because the fig tree grows at an astonishing rate, special attention should be paid to pruning when growing figs in pots. When pruning, first, the plant should be kept short; after potting, it should be cut off at 15-20 cm on the seedling stem. Second, vegetative growth should be controlled to cultivate a compact tree shape with dense branches and short shoots. In May and June, the peak growing season of the fruit tree, pruning methods such as pinching, bud removal, and branch bending are used to control vigorous shoot growth, so as to cultivate short, sturdy medium and short branch groups with short internodes and increase fruit-bearing density.
7. Placement
Try to place the potted tree in a spot with good light and ventilation, preferably where light can shine directly, such as a sunny balcony or a sunny spot in the courtyard.
Key points of the potting steps:
1. Use broken pot pieces to cover the drainage hole at the bottom of the pot, so as to facilitate water and air permeability and prevent loss of potting soil; place a small amount of coal cinders at the bottom of the pot to aid drainage, then put in a few horseshoe pieces or crushed bone pieces as long-acting base fertilizer, and cover with 2-3 cm of soil.
2. Fill a small half-pot of growing medium and shape it into a mound; place the fig seedling roots on top, spread out the root system, lift the seedling with the left hand, and use a small trowel with the right hand to add growing medium into the pot.
3. After filling the soil, shake the pot and gently lift the seedling upward to make the root system spread out; then press the potting soil firm with your hands and water thoroughly; after the water seeps down, seal with another layer of growing medium. The soil should be lower than the pot rim to facilitate future watering.
4. After planting, place the pot in a sunny spot, and pay attention to watering to keep the soil moist; water when the potting soil looks dry, using less water but watering frequently, which helps sprouting.