How to grow camellia seeds? A detailed guide to container growing
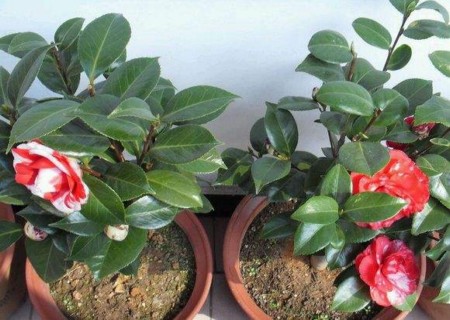
Camellias bloom at the turn of winter and spring, with full, graceful and elegant flowers. They are one of the traditional top ten famous flowers of China and one of the world's famous flowers. Guo Moruo praised them: “A camellia tree blooms peach-red early, a hundred crimson clouds stand proud in the midst.” The camellia has both the proud plum-like character of “only the camellia endures so long, alone it can claim the spring breeze in the deep months,” and the peony-surpassing brilliance of “flowers abundant and brilliantly red, deeply surpassing the morning glow.” Therefore, since ancient times it has been an extremely famous woody flowering plant, reaching its peak during the Tang and Song dynasties. After being introduced to Europe in the 17th century, it also caused a sensation, and thus earned the beautiful name of “world-famous flower.”
When grown in containers, especially outside the camellia's native region, camellias generally rarely set fruit. Seeds capable of germinating can only be obtained under conditions of single flowers or a low degree of stamen petalization, normally developed pistils, artificial supplementary pollination, and suitable temperature and humidity. Below is an introduction to how to grow camellia seeds.
Seed treatment:
When the capsule turns slightly red and splits, the fruit can be picked, and the seeds promptly removed. To test whether the seeds are capable of germinating, place them in a container filled with clean water. If a seed floats on the surface, it means the seed is empty and shriveled with no kernel, and will not germinate after sowing; if the seed sinks in the water, it means the seed has a plump embryo and can germinate and sprout. Because camellia seeds have a relatively high water content, if they are dried and stored directly after removal, the seeds will lose water and rapidly lose their germination capacity. A more practical method is:
After scooping the seeds out of the clean water, store them in fine sand of moderate dryness and moisture. The moisture content of the sand should be such that it forms a ball when squeezed in the hand and falls apart when released. By February—March of the following spring, when the seeds crack open and reveal the radicle, they can be sown in loose, fertile potting soil or a seedling bed.
In regions south of the Yangtze River, they can also be sown in open-ground seedling beds immediately after harvest, with soft grass or pine needles added in winter to keep them warm and moist. This likewise serves to promote germination, and the germination rate is higher than with spring sowing.
Seedling camellias grown from seed grow slowly in the first 1 year—2 years, then speed up after 3 years—4 years. They usually take 4 years—8 years or longer to bloom. Therefore, in commercial cultivation, cutting propagation or grafting is generally used to breed young plants, but for camellia hybrid breeding, sowing is indispensable.
Sowing method:
In early and mid-October, place the harvested fruit in a ventilated indoor spot to dry in the shade. Once the capsule splits, take out the seeds and sow them immediately. If they cannot be sown right away in autumn, they must be stored in sand until sowing in February of the following year. Before sowing, the seeds can be dressed with New High-Fat Film. Generally, autumn sowing gives a higher germination rate than spring sowing.
Sowing camellias is suitable for single or semi-double varieties. The seeds mature in mid-October and can then be sown. Shallow sowing is best, using vermiculite as the substrate, covering 6 mm, at a room temperature of 21°C, with 10 hours of light each night, which can promote seed germination. Germination begins 15 days after sowing, seedling height reaches 8 cm within 30 days, and the seedlings are transplanted when they have 2 to 3 leaves.
1. Soil
First, we need to know that soil is the fundamental condition for camellia growth, so the choice of soil is also very important. Generally, when choosing soil, you should choose soil with a relatively high humus content, slightly acidic soil, with a soil pH of 5-6.5 being best.
2. Temperature
Generally, the suitable growing temperature for camellias is 18-25 degrees. Temperatures that are too high or too low are both unfavorable to camellia growth. Pay special attention in winter to move the plant indoors to grow, and generally at noon move the plant to the balcony; in summer also pay attention to sun protection to prevent the temperature from getting too high.
3. Watering
Generally, camellias like to grow in a moist environment, so you should mainly water the camellia, but be careful to keep the soil from being too dry or too wet. Generally, water more in spring and summer, which is also good for camellia growth. In winter, be careful to water less, preferably once every two to three days.
4. Fertilizing
Camellias are fertilizer-loving plants, so during cultivation, remember to fertilize. Generally, during the growing period, add phosphorus and potassium fertilizer, which is also good for camellia growth and makes the flowers bloom more abundantly. At the same time, be careful not to fertilize too much.
5. Pruning
Pruning work is also very important. Generally, when the camellia flower buds are dense, it is recommended to carry out regular pruning, cutting off weak branches and tidying the buds. This can also promote the camellia's absorption of nutrients.
6. Pests and diseases
Camellias are also very prone to pests and diseases. Generally there are two kinds, black mold and anthracnose. During pest and disease outbreaks, be careful to spray the camellia with some pesticide and fungicide, which can do a good job of promoting growth.