How to Plant Tulip Bulbs? Detailed Planting Methods and Steps
Tulip, what an elegant name! It also carries many symbolic meanings, representing beauty, nobility, vows of love, and more. We often see them at flower shows or plantations, and when in bloom they are as beautiful as their name suggests. In fact, tulips can also be grown in pots, which is undoubtedly good news for friends who love tulips.
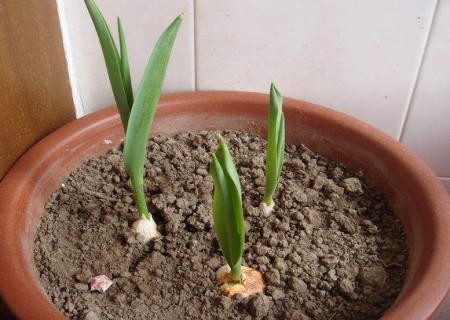
Before planting tulips in pots, we need to select good bulbs. Because as a home potted plant, young plants are usually obtained by planting bulbs or bulbous roots. When selecting tulip bulbs or bulbous roots, choose plump and firm bulbs. And before planting, if any moldy parts are found, the outer skin should first be peeled off, then soaked in a diluted solution of carbendazim for half an hour to disinfect and sterilize. The planting steps are roughly as follows:
1. Bulb Treatment
Gently peel off the outer skin near the basal plate of the tulip bulb, but it is best to keep the outer skin at the top, as this is more conducive to the sprouting of the bulb. However, be very careful during the peeling process to avoid damaging the bulb, otherwise it will affect survival.
2. Disinfection and Sterilization
Place the peeled bulbs into a diluted carbendazim solution and soak for a period of time to achieve disinfection and sterilization. When using carbendazim, it is recommended to dilute it 1000 times, and the soaking time for bulbs is generally about half an hour, then take them out and let them dry.
3. Soil and Flower Pot
First, we need to prepare the growing soil. If you find mixing soil too troublesome, you can buy special bulb soil at a flower market. But whether you mix it yourself or buy special soil, the principle should be fertile, loose, and breathable potting soil. Then prepare a flower pot of suitable size and you are ready to plant.
4. Key Planting Points
After all the preparatory work before potting is done, we can plant in the pot. First, make a drainage layer at the bottom of the pot, then add soil, then place the bulbs, and cover with soil. The whole process is relatively simple, but note that the planting depth for bulbs is generally best at 3 times the size of the bulb, and the depth of the covering soil should preferably be 2 times the size of the bulb.
5. Watering After Planting
After planting the bulbs, we need to water thoroughly once as rooting water. The method of watering thoroughly has been mentioned in many previous articles by the editor, so it will not be repeated here. In the later stage, watering should be controlled, with the principle of "dry-wet cycle." Never water too much to avoid water accumulation in the pot, and do not go without watering for a long time, which can cause poor growth due to lack of water.
6. Placement Location
After completing the above steps, we need to move the flower pot to a cool, ventilated outdoor area for management, which can promote rooting and vernalization of the bulbs. In the first 2 weeks, shade and light protection measures should be taken, which is more conducive to root sprouting; after buds emerge and tender leaves grow, we can gradually increase light for them to promote photosynthesis and keep the young plants growing well.