How to grow potted hydrangeas? Detailed guide to cultivation methods and precautions
Hydrangea flowers are full in form, large and beautiful, and their colors are very pretty, pleasing to the eye. Many people like to propagate this potted plant. Below, the editor introduces some cultivation methods for potted hydrangeas, hoping everyone will like them.
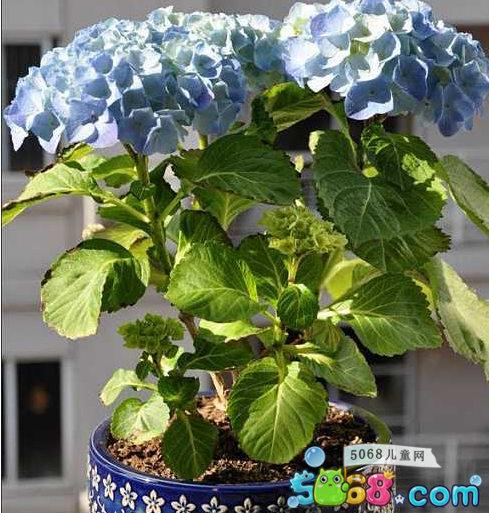
Cultivation methods for potted hydrangeas
1. Soil: Hydrangeas are better suited to loose, fertile, well-drained sandy loam. When planting, it is better to use 4 parts humus soil, 3 parts garden soil, 2 parts river sand and 1 part cake fertilizer. Or mix 4 parts compost soil, 5 parts sand and 1 part cake fertilizer, or mix 6 parts humus soil, 3 parts sand (or ash) and 1 part cake fertilizer. After watering following potting, place it indoors for maintenance, and move it out of the room in early May.
2. Watering: Hydrangea leaves are relatively large and need more water. Watering in spring and summer should keep the soil moist. In high temperatures, water once in the morning and once in the evening, and pay attention to providing appropriate shade. Water less in winter, just keep the soil moist. During the growing period, watering should be sufficient so that the potting soil always stays moist; especially in summer, more water should be given.
3. Lighting: Hydrangea is a short-day plant. After being moved out of the room, it should be placed in a semi-shaded environment for maintenance. In summer, move it to a well-ventilated shady place to prevent sunburn. After September, light intensity gradually weakens. To promote flower bud differentiation, move the pot to a place with more light.
4. Temperature: Hydrangea likes a warm environment, with a growing temperature of 18-28°C, and the winter temperature should not be lower than 5°C. Flower bud differentiation requires 6 to 8 weeks at 5 to 7°C. A temperature of 20°C can promote flowering. After maintenance, the flowers can be kept at 16°C, which can extend the flowering period, and pay attention to high temperatures, which make the flowers fade quickly.
5. Fertilizing: Hydrangea, like fertilizing, during the growing period, generally a diluted cake fertilizer should be applied about every 15 days. To maintain the acidic reaction of the potting soil, 0.2% ferrous sulfate can be added together with liquid fertilizer to the manure water. Adding 0.5% superphosphate 1 or 2 times during the bud stage can promote flower color.
6. Pruning: In early March each spring, hydrangeas should have diseased branches and thin branches cut off from the base, keeping 3-5 strong main branches and short branches, with 2-3 buds left on each branch, to promote new branches and make the flowers lush. Through pruning and shaping, the tree shape can be compact, full, symmetrical, gorgeous, large and brightly colored. If not pruned, old branches that have been lignified at the base for more than 3 years are not easy to sprout new branches, and it is easy to form emptiness in the lower part of the plant, affecting ornamental value.
7. Pests and diseases: Hydrangea diseases mainly include wilt, powdery mildew and leaf spot. It can be sprayed with 65% zineb wettable powder at 600 times dilution. The main pests of hydrangea are mites and mirids, and 40% omethoate emulsifiable concentrate at 1500 times dilution can be sprayed.
Hydrangea notes
1. Hydrangea likes acidic soil and is not tolerant of poor and saline-alkaline soil. It grows poorly in alkaline soil, with yellow leaves, and is suitable for loose, fertile, humus-rich acidic soil. Due to the influence of pH, its color changes from white to red, and from red to blue.
2. Hydrangeas are moved indoors in mid-October, watering is controlled, and room temperature is kept at about 5°C to promote dormancy. Remove the leaves before bringing them into the room to avoid rotten leaves. Starting in mid-December, move them to a sunny place, keep the temperature at 15-20°C, promote the growth of branches and leaves, and move them out of the room in late April.
Hydrangea seedlings inserted in March can be moved into 10 cm pots after rooting, and then planted in 16 cm pots in mid-June. The first ten days of June are better for pinching. If you pinch the growing point in early June, flower buds can form in mid-August. From July to August, seedlings from May to June can be planted in 16 cm pots. To promote flower bud formation in the same year, the later pinching should be done before September, otherwise flower buds cannot form in the same year.
4. Hydrangea likes fertilizer. During the growing period, generally a thin layer of cake fertilizer should be applied every 15 days. To maintain soil acidity, 1 to 3% ferrous sulfate can be added to the fertilizer solution for application. Frequently watering with manure can make the plant grow green, and 1 to 2 applications of potassium dihydrogen phosphate can be added during the bud stage to make the flowers more beautiful. The application of cake fertilizer should avoid rainy days, so as not to cause pests and diseases and damage the root system.
Hydrangea leaves are large, the branches and leaves are lush, and the water requirement is high. In the growing seasons of spring, summer and autumn, water should be poured to keep the potting soil moist. In summer, the weather is hot and evaporation is high. In addition to water, water is sprayed onto the leaves every day. Hydrangea roots are fleshy roots. Watering should not be excessive. Avoid water in the pot, otherwise it will rot.
6. After September, the weather gets colder and colder, and the amount of watering should be gradually reduced. Move it indoors before frost falls, and keep the room temperature at about 4°C. Remove the leaves before bringing it into the room to avoid rotten leaves. In winter, the plant should be placed in a sunny place indoors; in the first year, it should be moved out of the room after rain. Hydrangea management is relatively extensive, with fewer pests and diseases. It is an ideal potted flower, easy to manage and cultivate.
Hydrangea cultivation methods
1. Division: Division should be carried out before germination in early spring. Rooted branches are separated from the mother plant and planted directly. Watering should not be too much. It should be maintained in semi-shade, then moved to normal care after germination.
2. Bulbils: When the bulbils sprout, they can grow after 30 days; in the first spring, separate them from the mother plant, transplant them with soil, and they can bloom in the same year.
3. Cuttings: Take cuttings in the rainy season, cut top branches about 20 cm long, remove the lower leaves, with an appropriate cutting temperature of 13-18°C, and they root 15 days after insertion.