How to grow camellias? Camellia growing methods and precautions
Camellia, also known as camellia, is one of the ten traditional famous flowers of our country. Its leaves are emerald green and glossy, evergreen all year round, with large and colorful flowers, rich flower shapes, and a long flowering period. It is an excellent flower for garden beautification and indoor decoration. So, what are the growing methods for camellias? And what points need special attention during the growing process? Let us learn about them together.
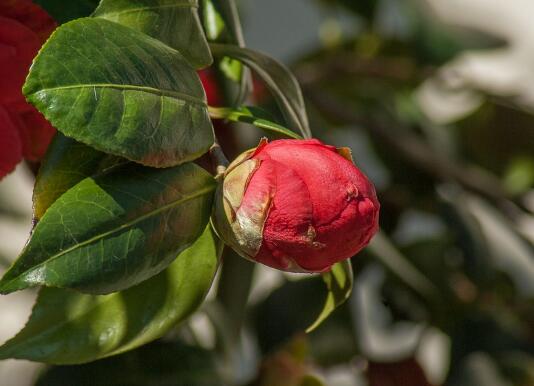
I. Growing methods for camellias
1. Soil selection
Camellias generally prefer a high-temperature and humid environment, and are not very particular about soil texture, but it is best to use fertile, moist, well-drained acidic soil (pH 5-6.5), and soil that is not dry in summer and is close to alkaline.
2. Fertilizer and water management for camellia growing
Camellias like fertile, loose, slightly acidic loam or humus soil, and can grow within a pH range of 4.5—6.5. They require good drainage and no waterlogging, so as to avoid root rot. However, they require high air humidity and dislike dryness. In areas with annual rainfall above 1200mm, as long as water is drained promptly after heavy rain, they can all grow well. Therefore, during the seedling raising and cultivation of camellias, watering should be done frequently to keep the soil and air moist. Fertilizer should be applied many times and at low concentration; never apply a single high-concentration, large-dose fertilization.
In summer, do not let them become especially dry; water every day. To keep the flower pot from drying out, irrigation-style watering is better. In potted conditions, when camellias form flower buds but do not bloom or even drop their buds, this is caused by insufficient water, so when flowers are forming, mist frequently to increase humidity and prevent flower drop.
In winter, mix organic fertilizer and chemical fertilizer and apply as a base fertilizer. Apply fertilizer of the same composition again when flower bud differentiation occurs.
3. Potted maintenance for camellia growing
Potted camellias should preferably use clay flower pots, especially young camellia plants. The potting soil can be made by mixing 6 parts leaf mold, 1 part cake fertilizer residue, and 3 parts sandy loam, or by mixing 3 parts leaf mold, 4 parts sandy loam, and 3 parts compost evenly. Potting is best done in early spring from March to April or from late September to early October. When planting, line the bottom of the pot with broken tiles to facilitate drainage, and do not apply base fertilizer, so as to avoid burning the new roots.
When potting, plant the small soil-ball cutting seedlings into the pot. After planting, water thoroughly until water seeps out from the bottom of the pot, then place in a ventilated shaded spot. Pay attention to humidity; if necessary, cover with a plastic bag, but the temperature inside the bag must not exceed 25°C, otherwise survival will be difficult. After 8-10 days, place in a ventilated semi-shaded spot. During the growing period, watering should be based on seasonal changes, with the principle of keeping the potting soil moist; both excessive dryness and excessive wetness are unfavorable for plant growth.
During the growth and sprouting period, the amount of watering should be gradually increased. After the new shoots stop growing (around late May), watering should be properly controlled to promote flower bud differentiation. During the plum rain season, prevent water accumulation in the potting soil that causes root rot. In summer high temperatures, water once each in the early morning and evening, and at the same time spray around the plant to increase air humidity. Residents in high-rise buildings can place it in the living room or corridor to spend the summer, and move it to the balcony before 9 a.m. or after 5 p.m.
In winter, the plant enters dormancy, so the frequency of watering should be reduced; topdressing should mainly be decomposed dilute liquid fertilizer, avoiding concentrated fertilizer and raw fertilizer. In early spring, apply liquid fertilizer mainly based on nitrogen fertilizer once every 10 days. Apply 1-2 times continuously to promote branch growth and leaf development. From May to August, apply fertilizer combining nitrogen and phosphorus with phosphorus as the main component once a month to promote flower bud differentiation. During the hottest days, attention should be paid to properly controlling fertilizer. From September to October, apply fertilizer mainly based on phosphorus and potassium to promote further growth of flower buds.
4. Propagation methods for camellia growing
(1) Camellia grafting propagation
Using the large rootstock water-insertion grafting method for propagation gives a high survival rate, and the size of the rootstock is not restricted. After grafting, growth is fast and the tree form is established early. One rootstock can be grafted with multiple branches and buds, and on a larger rootstock, multiple varieties can also be grafted at the same time, giving good ornamental value. The grafting period is long; except during the flowering period, it can be carried out throughout the growing period.
① Rootstock selection Choose white-flowered or red-flowered oil camellia with vigorous growth and no pests or diseases; the thickness of the grafting site should be above 1cm.
② Scion selection Choose plump and sturdy buds and shoots, about 10-15cm long, retaining 1-3 leaves at the upper part. If grafting in large quantities, the prepared scions can be promptly placed in a pot or bucket, sprayed with water, and then covered with a wet towel to maintain the moisture of the scions. The scions must be moderately mature; too old or too tender ones are both unlikely to survive.
③ Grafting First choose a smooth surface at an appropriate part of the rootstock, and use a grafting knife to cut a 3-5cm long cut surface in the phloem. Then cut a slit between the relatively straight phloem and xylem 3-5cm above the base of the scion, slightly shorter than that of the rootstock, trying not to damage the xylem. Then align the cambium layers of the two, bind with plastic film, put a plastic bag over the upper part of the scion, and place a glass bottle, plastic bottle, etc. filled with clean water over the base, with the scion immersed in water about 2-3cm. Within 30 days after grafting, keep the base of the scion submerged in water, prevent water loss and leaf shedding, and keep the water clean. Generally, they can bloom in the second year after grafting.
④ Waterproofing the graft union Because the surface of the scion is relatively rough, it easily absorbs water and moistens the graft union, affecting healing. The moisture-proof method is to apply a ring of vegetable oil, wax, or paint 0.5cm wide between the lower part of the graft union and the water bottle.
⑤ Post-grafting management One month after grafting, if the grafted buds are plump and the leaves are green, it indicates that the graft has survived. After 45-60 days, the plastic bag can be removed; after another week, the water bottle can be removed, and at the same time the "tail" below the graft union and the rootstock above the graft union can be cut off, and the binding appropriately loosened. After 3 months, the binding can be completely removed, but not too early, otherwise survival will be affected.
(2) Camellia cutting propagation
Suitable for horticultural varieties that root easily.
① Selection of cuttings To adapt to the local environment, cut current-year branches from camellia plants that have grown locally for many years. The longer they have grown locally, the more stable their adaptability to the local environment, and the easier the camellia seedlings bred are to cultivate.
Because camellias are affected by the northern environment, their physiological performance has already changed, and to a large extent their inherent growth habits have been altered, basically adapting to the local soil, water, climate, and so on. Cuttings should preferably be cut from the top 4-5 nodes of the shoot tip, about 8cm long; as they are cut, remove the lower leaves, keep 2 upper leaves each cut in half, and then insert them into the pot for cutting.
② Cutting time Mid-to-late June is the suitable period for cutting; at this time most current-year branches have become lignified or semi-lignified, are rich in nutrients, and the cut surface has active meristematic ability, strong regeneration ability, fast callus formation, fast rooting, and easy survival.
③ Cutting medium For the cutting pot, choose a clay pot with a large bottom hole, and before filling with soil, first cover the bottom hole with double-layer gauze. For the cutting soil, use pure leaf mold, which is well aerated and slightly acidic, suitable for camellia rooting and growth. Before cutting, scald the potting soil thoroughly and evenly with boiling water for disinfection.
④ Cutting method When cutting, first make holes with a small bamboo stick to avoid scraping the cortex of the cuttings. The spacing should be such that the leaves do not shade each other. Immediately after insertion, spray thoroughly and evenly with cold boiled water until water drains from the bottom hole of the pot.
II. Precautions for camellia growing
1. Be careful not to place camellias in the scorching sun
Camellias prefer a semi-shaded and semi-sunny environment, and like warmth and humidity. The most suitable temperature for camellia growth is 15-25°C, so it is suitable to plant them in places with semi-shade or diffused light in summer, full light on the south side in winter, and a windbreak on the north side. During summer high temperatures, spray water mist on the branches and leaves and around them to lower the temperature and prevent dryness. From June to September, shading treatment should be carried out.
2. Be careful not to change the placement direction of camellias at will
Camellias have relatively poor adaptability. During the period from April to September when they sprout and grow buds, the placement direction of camellias should not be changed at will, so as to prevent the leaves originally on the shaded side from suddenly contacting strong light and falling off.
3. Be careful not to use alkaline soil to grow camellias
Camellia roots are fragile and fleshy, so loose, well-drained, slightly acidic soil should be used. Neither clayey nor alkaline soil is suitable, and calcareous soil especially must not be used. Moreover, the potting soil should preferably be changed once every two to three years. When changing pots, note that base fertilizer should be placed at the bottom of the pot; a small amount of hair, bone meal, chicken feathers, poultry manure, and other substances containing calcium superphosphate can be used. The time for changing pots is better chosen between the "Rain Water" and "Start of Summer" solar terms.
4. Be careful not to water camellias too much or apply too concentrated fertilizer
Camellias have fleshy roots; watering too much can easily cause root rot, so it must be in appropriate amount. During drought and high temperatures, water the leaf surfaces twice a day. Camellias like fertilizer; except during the flowering period, usually fertilizer can be applied thinly and frequently, but never apply too concentrated fertilizer, otherwise it easily damages the roots and can cause the plant to be burned to death. Fertilizer should mainly be phosphorus and potassium fertilizer, with nitrogen fertilizer secondary; it is best to mix three parts decomposed cake fertilizer, chicken manure, or human manure with seven parts water. Apply once about every twenty days in summer and autumn to promote vigorous growth and robust plants.
III. Pest and disease control for camellia growing
1. Camellia leaf yellow mottle
Symptoms: Camellia leaf yellow mottle disease may be a whole-plant disease caused by viral infection. In the early stage of the disease, unclear mottled symptoms of uneven color appear on the leaves, fading green or grayish white, later gradually becoming dark yellow mottling or colored spots, with the colors of the spots relatively bright. The mottling is rather irregular in shape and variable in size, and the edges of the diseased spots are extremely obvious. The petals of camellias sometimes also show mottling or marbled patterns. Affected plants have thinner leaves, reduced chlorophyll, and weakened growth vigor.
Control methods: ① Avoid using branches from diseased plants for cuttings, and do not use diseased plants as rootstock or collect scions from them. ② If diseased plants are found, immediately pull them out and destroy them. ③ Usually, agents for controlling viral diseases such as virus spirit and virus clear can be used for prevention and control.
2. Camellia algal leaf spot
Symptoms: Camellia algal leaf spot can occur on both the leaves and young stems of camellias. The pathogen can invade the front and back of leaves, but mostly the front. In the early stage, affected leaves show needle-head-sized small round spots from grayish white to yellowish brown; sometimes the small spots are slightly cross-shaped, and later gradually expand radially outward, forming round, slightly raised felt-like spots. The edges of the diseased spots are irregular, grayish green or dark brown, with fibrous fine lines on the surface, 2-15 mm in diameter; in the later stage the color deepens and the surface becomes relatively smooth. On affected young branches, reddish-brown hair-like small stalks appear on the diseased parts, and the spots are elongated oval; in severe infections, the branches dry up and die.
Control methods: ① Strengthen cultivation management, fertilize reasonably, prune in time, remove diseased branches and leaves, avoid excessive shading, maintain ventilation and light transmission, and improve plant resistance. ② During the growing season, spray 0.5%-0.7% half-strength Bordeaux mixture, or first spray 2% potassium chloride on the leaves and then spray 0.25% copper preparation; the control effect is even better.
3. Camellia gray leaf spot
Symptoms: Camellia gray leaf spot mainly harms leaves, but also infects new shoots. In the early stage of the disease, light green or dark brown needle-head-sized small spots appear on the underside of the leaves, gradually expanding into round, semicircular, or irregular diseased spots, brown to black, later with the center turning grayish white and the edges reddish brown, slightly raised, with the diseased part clearly demarcated from the surrounding healthy tissue. Sometimes several diseased spots connect with each other and occupy most of the leaf, producing dense black small dots on them; when moist, black sticky matter, namely the pathogen's conidial mass, overflows from the black granular dots. In severe cases, the diseased leaf tissue ruptures, breaks apart, and even falls off and perforates. Infected new shoots show brown water-soaked elongated spots, generally 3-4 mm long, sometimes reaching 10-30 mm; the diseased spots are constricted, sunken, with discontinuous longitudinal cracks, and finally the diseased shoot often falls off from the base.
Control methods: ① Potted flowers should not be placed too densely, to avoid increased friction and causing wounds. During the peak period of the disease, when watering, avoid spraying from the top of the plant; instead pour water in from the edge of the pot to reduce leaf surface humidity. ② In autumn and winter, remove diseased residues such as dead branches and fallen leaves. During the growing season, promptly remove diseased branches and leaves and burn them in a centralized manner. ③ Spray 150-fold high-lipid film solution or 50% amobam 1,000-fold solution, 3-4 times continuously.