Gloxinia seeds: price per packet, planting and flowering time, and pruning for regrowth
Gloxinia, also known as Sinningia and "falling snow mud," is a common perennial herb of the genus Sinningia in our country. Because of its rich, brilliant colors and graceful flowers, it is deeply loved by flower enthusiasts. So how much is a packet of gloxinia seeds? How do you plant them? When do they bloom after planting? And how do you cut them back after flowering?
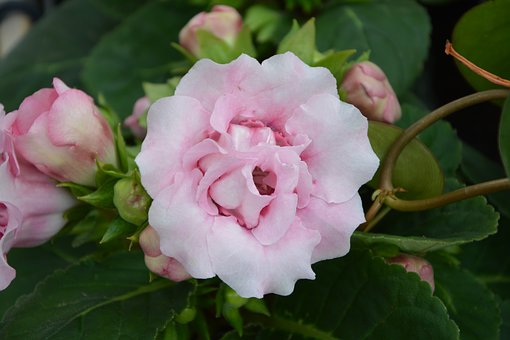
Seed price:
Gloxinia seeds are generally bought in small packets. A small packet contains about 10 or 20 seeds. A packet of 10 costs about 5 yuan, and 20 costs about 10 yuan. They are generally available at flower markets or online.
How to plant?
1. Seed selection
If you want gloxinia to bloom more, when selecting seeds you should choose excellent imported F1 hybrid varieties that bloom abundantly, have a short, sturdy plant shape, strong resistance, and are easy to care for. Single-petaled varieties bloom more than double-petaled varieties.
2. Obtaining seeds
Gloxinia is relatively difficult to self-pollinate. In order to obtain excellent seeds, artificial pollination is necessary. During the flowering period of gloxinia, collect the pollen from the stamens and use a brush to apply it to the stigma of the pistil. About 35 days after pollination, the seeds will mature. Remove the seeds, dry them in the sun, and store them.
3. Sowing method
Before sowing, first soak the seeds in water for 24 hours to encourage them to germinate earlier. For the potting soil mix, it is best to use a growing medium mixed with leaf mold, garden soil, and fine sand. After leveling the soil, evenly scatter the seeds, place the pot in shallow water to soak through, then take it out, cover it with glass, and place it in a semi-shaded area, maintaining a humidity condition of 18-20°C. Seedlings will emerge in about 10 days. After that, gradually let the gloxinia receive sunlight, but avoid direct sunlight. Spray frequently to maintain humidity. Apply a dilute cake fertilizer solution about once every 10 days. Generally, it can bloom about 6 months after sowing.
Flowering time:
Gloxinia flowers are terminal or axillary on the branches, with a bell-shaped corolla; the flowering period is between April and November, and the flowering period is relatively long. The flower colors include pink, red, purple-blue, white, and bicolor, among many others, and the flowers are large. A single gloxinia plant can produce dozens of flowers, truly stunningly beautiful. A single gloxinia plant can bloom dozens of flowers, with the flowering period from April to November, lasting for several months. But it blooms once a year.
How to cut back after flowering?
Generally, after gloxinia blooms, many new shoots will also emerge from the base. When cutting back, we must pay attention to these new shoots. If there are no new shoots, do not cut back easily, otherwise it will be difficult for the plant to recover.
As for how to cut back gloxinia after flowering, there are actually two ways: one is to cut back, more drastically, and the other is to simply pinch off the old flower stems.
Both methods are fine, and flower enthusiasts can choose for themselves. If cutting back, it is best to do it on a sunny day after the flowers have completely finished blooming. At least 1 pair of leaves should be kept, and leaving 1-2 cm of stem is good. After cutting back, do not water for 3 to 5 days to avoid wound infection causing the tuber to rot. If you cut back when there are no new shoots, it will generally sprout again within ten days and bloom again in about 2-3 months. The cut leaves can be used for cuttings.
Whether they are the original new shoots at the base or the new shoots that grow after cutting back, unless it is for propagation, you can keep only one among all the shoots and remove the weak ones. This helps concentrate nutrients, so the flowers bloom more abundantly and fully.
Cultivation methods:
1. Soil: Gloxinia prefers loose, fertile, humus-rich soil with good water retention. It is best cultivated in slightly acidic soil rich in humus and loose. A common mix is 1 part perlite, 1 part river sand, and 3 parts leaf mold, plus a small amount of decomposed, sun-dried, finely crushed poultry manure. Potted gloxinia commonly uses a mixed substrate of leaf mold, coarse sand, and vermiculite.
2. Temperature: The suitable growing temperature for gloxinia is 10-25°C. Different seasons also have different requirements: from January to October, 18-25°C; from October to January of the following year, 10-12°C. A suitable temperature can make the leaves grow luxuriant and emerald green, and the flowers large and vivid. When the plant withers and goes dormant, take out the tuber and store it in slightly moist sand.
3. Light: Gloxinia is a semi-sun plant. Usually it should be properly shaded to avoid direct strong light. In winter during the seedling stage, it should have sufficient sunlight. In summer, it must be placed in a ventilated shade house with scattered light and carefully maintained. During the growing period, light should not be too strong. When flowering, the shading time should be appropriately extended. During the winter dormant period, the potting soil should be kept appropriately slightly dry.
4. Watering: The flowers and leaves of gloxinia have fine hairs. Once they get water droplets on them, they rot very easily, so do not spray water on the flowers and leaves. It is best to use the immersion method for watering. Usually water in moderation; too much can easily cause tuber rot, yellowing leaves, and even the death of the whole plant. During the high-temperature period in summer, water 1-2 times a day. During the flowering period, rain must be avoided.
5. Fertilizing: From leaf expansion to before flowering, apply a decomposed dilute organic liquid fertilizer once a week. After flower buds form, additional phosphorus fertilizer is needed, and it must not contaminate the leaf surface. After each fertilization, spray clean water once. From leaf expansion to before flowering, apply a dilute cake fertilizer solution once every 10-15 days. When flower buds form, apply an additional dose of bone meal or superphosphate.
6. Pests: During cultivation, gloxinia is prone to leaf mite pests, which mainly harm the roots, stems, and leaves of gloxinia, causing leaves to turn yellow and fall off, and in severe cases leading to death. When red spider mites are found on the leaves, you can spray a 5% Nissorun emulsifiable concentrate 1000x solution, which has a very good control effect. Generally spray once every 1 week, for 2-3 consecutive sprays.