How to grow medicinal Acorus calamus? Soil and hydroponic methods and solutions for yellow leaves
Acorus calamus is also called white calamus and Tibetan calamus. It grows in swamps, streams or by paddy fields. It is a spiritual herb in traditional Chinese culture that can prevent epidemics and ward off evil, and during the Dragon Boat Festival there is the custom of tying calamus leaves together with mugwort and inserting them under the eaves. Therefore, more and more people are starting to grow Acorus calamus, so how do you grow it in soil? Can it be hydroponically grown? What should you do if the leaves turn yellow?
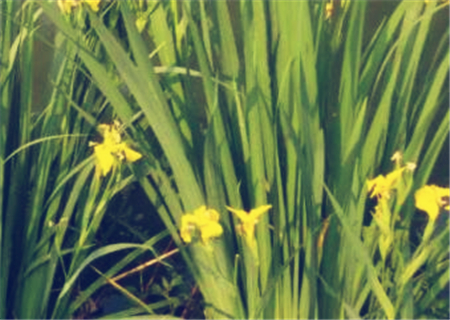
I. How do you grow Acorus calamus?
1. Propagation method
When growing Acorus calamus normally, you must understand its propagation method. It can be propagated by division. This propagation method should be carried out from September to October each year. During propagation, you can take out the large clumps, remove the withered yellow old leaves, then divide the plant into several parts, plant the small clumps in flower pots and water them thoroughly.
2. Soil
Acorus calamus is a moisture-loving plant that grows by the water. When growing it at home, you must choose a culture soil with good drainage and keep the pot soil moist. In addition, this plant has especially strong vitality and grows quickly, so during cultivation it needs to be repotted in time. Repotting once a year is most suitable, and the repotting time should be in spring each year.
3. Fertilization method
Acorus calamus has strong adaptability during the growing season and can be managed extensively. Acorus calamus likes nitrogen fertilizer, and decomposed soybean cake water is the best fertilizer, as it can avoid burning the seedlings. Nitrogen fertilizer can promote its growth. In the later stage, 2-3 topdressings are needed, combined with fertilization and weeding. In the early growth stage of Acorus calamus, nitrogen fertilizer should be the main fertilizer, and before heading and flowering, increase the application of phosphorus and potassium fertilizers to enhance the immunity of Acorus calamus;. Note that each fertilization must bury the fertilizer about 5 cm below the soil surface, and be careful not to place it too close to the roots to avoid burning the roots. Before overwintering, clean up the dead branches and fallen leaves on the aboveground part, and remove disease and pest pathogens and insect sources.
4. Propagation method
Sowing
Clean the collected mature red berries, sow them indoors in autumn, keep the soil moist or in shallow water, and under conditions of about 20°C, they will gradually germinate in early spring, then carry out separate cultivation, and when the seedlings grow strong, they can be transplanted and planted out.
Division
In early spring (around Qingming) or during the growing season, use an iron shovel to dig out the underground stems, wash them clean, remove old roots, stems and dead leaves and stems, then use a sharp knife to cut the underground stems into several blocks, each retaining 3-4 new buds, for propagation. For division during the growing season, dig up the plant with roots, wash it clean, remove 2/3 of the roots, then divide it into blocks. When dividing, keep the young leaves, buds and new roots intact.
II. Can Acorus calamus be hydroponically grown?
This plant is essentially shade-loving and moisture-loving. From this point of view, water culture is better than mud culture. Indoor ornamental cultivation is mostly hydroponic, and as long as the clear water does not dry up, its lifespan can reach several decades.
Hydroponic method
Acorus calamus with large old roots is suitable as the target material for hydroponics. It is best if the old roots rise above the mud surface and wind like a dragon. Small scattered plants of Acorus calamus can be formed into clumps, then wrapped with palm bark and placed in a water basin. However, small plants of Acorus calamus have very short fibrous roots, so enameled wire can be used to string these Acorus calamus together into clumps. Note that the old roots must not be damaged, then wrap enameled wire around them several times.
When planting, you can choose a medium-depth leak-proof flower vessel according to personal preference and plant size, wash the stem sections of Acorus calamus clean, trim off old roots and overly long roots, first soak in potassium permanganate solution for 2 hours for sterilization and disinfection, fill one side with pebbles while fixing the plant in the pot, keep the water level just above the roots, do not soak the leaves, and finally place it in a place with sufficient light, but do not expose it to direct sunlight.
III. What should you do if the leaves of Acorus calamus turn yellow?
1. Water yellowing
Water yellowing: Acorus calamus likes water, and generally watering does not affect its growth. However, if the calamus pot used has no bottom hole, or the planting material is not permeable to water, water accumulates in the pot and causes waterlogging, resulting in soil oxygen deficiency, then the calamus roots rot and the calamus leaves turn yellow. In addition, in the south, during the returning damp days and plum rain days, attention should also be paid. In such weather, with continuous drizzle and extremely high air humidity, transpiration is reduced, and Acorus calamus is also prone to yellow leaves. When encountering water yellowing, first reduce the watering frequency and amount, place the Acorus calamus in a ventilated place, and if the problem is with the calamus pot or planting material, replace them as soon as possible.
2. Drought yellowing
Generally, when we grow Acorus calamus for beauty, we mostly use small pots, with little space and little planting material. If the weather is sunny and hot, drought problems will appear if it is not watered for two or three days. For Acorus calamus, this is fatal, and it will immediately show you a yellow face. For drought yellowing, first water as soon as possible, but at this time the physiological functions of Acorus calamus have not yet recovered, so it is not easy to water too much. Just keep the soil moist and let the Acorus calamus gradually adapt.
3. Dry yellowing
Different from drought yellowing, dry yellowing is caused by air humidity being too low, and this situation easily occurs in midsummer or in indoor environments in the north with heating. Because air humidity is low and transpiration is strong, Acorus calamus is very prone to yellow leaves and scorched tips. For dry yellowing, first increase the amount of watering, then consider making a water basin or sand basin. Place a brick at the bottom of the water basin, do not let the water cover the brick, place the Acorus calamus pot on the brick, artificially create a small environment, and increase air humidity. The principle for a sand basin is similar. If it is summer, pay attention to shading, or place the Acorus calamus in a cool and ventilated place.
4. Scorch yellowing
Acorus calamus is a shade-loving plant and can generally be placed in a place with scattered light. In winter and spring, it can properly get some sun, but if it encounters strong direct sunlight, then Acorus calamus will develop yellow leaves and scorched tips. At this time, pay attention to putting it back in a cool and ventilated place.
5. Alkaline yellowing
Acorus calamus likes a weakly acidic growing environment. If the water quality is alkaline, or if it sits in a basin for a long time, salt and alkali accumulate in the pot soil, then the calamus leaves naturally turn from green to yellow. Usually try to use clean water and do not let it sit in a basin for a long time. If alkalinity returns severely, ferrous sulfate solution can be used to neutralize it, but considering the actual situation, I think it is easier to just change the soil and repot it.
6. Freeze yellowing
Acorus calamus likes to grow in an environment of 15-25 degrees. Below 10 degrees, growth is relatively slow. Below 5 degrees, it should be brought back indoors or heating facilities should be added. Some people say that Acorus calamus may not necessarily be affected at zero degrees or even below zero, but why take that risk? For example, last winter, many people's Acorus calamus was frozen damaged. When freeze yellowing occurs, remove the yellow leaves as soon as possible and place it in a warm environment, hoping for roots and leaves to regrow.
When Acorus calamus develops yellow leaves or even withering, we must first find out the cause. Once the cause is found, the right remedy should be applied in time, hoping that the leaves of Acorus calamus will turn from yellow to green as soon as possible. Moreover, the causes of yellowing leaves in Acorus calamus are not all the same, so we must treat this seriously and investigate carefully in order to perfectly solve this problem.