10 potted plant cutting methods for fig, Chinese rose, osmanthus and more - pick up a branch and grow a pot
When out for a walk or having fun, seeing the brightly blooming flowers and lush grass beside you, you can't help but want to take them all home and decorate your house into a world of flowers and plants. Actually, you can "move" the flowers and grass you usually see by the roadside back home through cutting propagation. How do you do it? Below we introduce the cutting methods for ten common potted plants such as fig, Chinese rose and osmanthus - pick up a branch and grow a pot of flowers.
I. Fig
Figs are in season right now. They are delicious, but expensive, and don't keep well - the ones sold in the market are not very fresh. If you could grow a fig tree at home and eat them fresh off the tree, wouldn't that be great? And when there is no fruit, fig leaves can also decorate the home, and they look even better than common foliage plants!
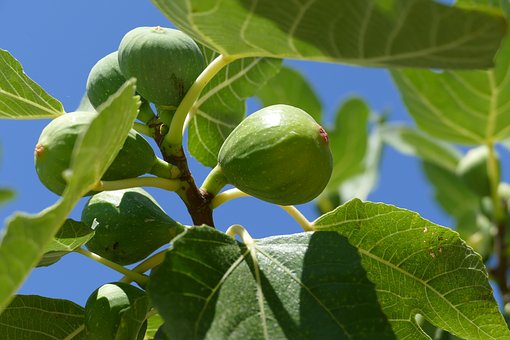
Cutting method
1. Figs can basically be propagated by cuttings all year round (except in winter in the north). When taking cuttings, cut thick, pest- and disease-free branches, each about 15-20 cm long, keeping 2-3 leaves on each.
2. Soak the cut branches in clean water for 2-3 hours to wash off dust and dirt on the surface, then soak the lower end of the branches in a rooting agent solution for 6-10 minutes.
3. River sand has the highest success rate for fig cuttings. Before use, it is best to rinse the river sand with carbendazim or expose it to the sun to sterilize it.
4. Find a plastic bottle, cut off the upper half and keep only the lower half, poke a few drainage holes in the bottom, fill the lower half of the bottle with river sand, and water thoroughly.
5. Use your finger to poke a few small holes in the river sand, insert the prepared lower end of the fig branch into the holes, then gently press the sand around the holes to firm it, and finally place it on an east or west balcony with bright indirect light and good ventilation.
6. With the current high temperatures, rooting is fast - roots will form in about 10-20 days, and we can clearly see the white roots through the wall of the plastic bottle
7. Cut open the plastic bottle and transplant the rooted fig, together with its original soil ball, undisturbed into a deep flower pot. Make sure there is plenty of light and water; when the leaves look a bit wilted, water thoroughly, but do not let water accumulate.
II. Chinese rose
Cutting method
1. The part of the Chinese rose that roots most easily from cuttings is, of course, the post-bloom branch. The spent flower and the 2 leaves below it cannot be used - cut them off.
2. Cut the branch into several small sections: make a flat cut above a bud node on the upper part, and a diagonal cut about 0.5-1 cm below a bud node on the lower part. The cuts should be smooth, not rough. Tip: be sure to use a very sharp blade or scissors, and sterilize them beforehand by heating them with a lighter.
3. Cut off the excess leaves on the branch, keeping only 1-2 per section, and cut each leaf in half to reduce water evaporation, otherwise the branch is prone to dehydration and loss of vitality.
4. Outdoor branches inevitably carry some pathogens that affect survival, so the prepared branches need to be soaked entirely in a carbendazim solution for 10-15 minutes to disinfect and sterilize them.
5. After sterilizing the branches, dilute the rooting agent with water, then mix it into pot-bottom ash (plant ash) and stir into a paste, and apply it to the diagonal cut at the lower end of the branch to disinfect and promote rooting.
6. Insert the prepared branches into soil that has been pre-moistened. The soil can be vermiculite, perlite, peat soil, fine sand, rice husk charcoal, etc. The principle is that it should be clean, breathable and free of pathogens. Many people fail to root Chinese rose cuttings simply because they did not disinfect properly.
7. After inserting the cuttings, spray water on the leaves to keep them moist, then place in a cool, ventilated place and do not expose to strong sun. Spray water on the leaves 1-2 times a day to keep them moist, and keep the soil slightly moist. You can place a tray under the pot with water in it, so the soil absorbs water automatically through the drainage holes at the bottom. You can also put them in a large plastic bucket to retain moisture.
8. For indoor cuttings, when the temperature is no higher than 28 degrees and no lower than 20 degrees, roots will form in about 15 days.
9. Once rooted, they can be transplanted into a large pot!
III. Bougainvillea
Friends in the south who see bougainvillea flower walls by the roadside - don't you just want to take them home? Don't be envious; learn the cutting method below and you too can have a bougainvillea flower wall. Get started right away.
Cutting method
1. Before cutting, prepare some breathable, loose soil. You can use peat soil mixed with some vermiculite and river sand.
2. Select healthy bougainvillea branches at least 1 year old, cut them into several small sections of about 7-10 cm each, with 1-2 buds, remove most of the leaves and keep only 2-3 to reduce water evaporation.
3. Dip the lower end of the bougainvillea branch in a little clean water, then in some rooting powder, then insert the lower end into the soil and water thoroughly.
4. After inserting the cuttings, cover the top of the flower pot with a layer of plastic wrap and place in a ventilated, cool place. As it is hot now, you can poke a few small holes in the plastic wrap for ventilation. After about 2 weeks, the bougainvillea branches will root, and after rooting they can be transplanted into flower pots.
IV. Wisteria
I have heard friends say they want to grow wisteria more than once. Actually, wisteria is not difficult to propagate by cuttings. If you see that a neighbor has one, you can ask for a branch to use as a cutting!
Cutting method
1. Cut off thick, healthy 1-2 year old wisteria vines, and cut each into cuttings of about 15 cm.
2. If there are leaves and new buds on the cuttings, cut them all off to prevent nutrient consumption, then soak the cuttings in a carbendazim solution for 5-10 minutes, then immerse the lower part in a rooting solution for about 20-30 minutes.
3. Insert the soaked branches directly into the soil. There are no great requirements for the soil, as long as it is clean and free of pathogens; it is best to spread it in the sun to dry for 2 days beforehand.
4. Wrap the upper cut end of the branch with a plastic bag to avoid water evaporation, which would affect survival.
5. Place the potted cuttings in a cool, ventilated place, do not expose to strong sun, and keep the soil slightly moist. If new shoots appear before roots have grown, pinch them off promptly.
6. Wisteria roots relatively slowly, taking about 1 month, so you must be patient. After rooting, you can let it sprout and expose it to sunlight; it grows very fast.
V. Osmanthus
Osmanthus smells wonderful and is also a very popular flower, but it is a bit expensive. However, you can make use of the osmanthus trees by the roadside - sometimes when branches are blown down, hurry and pick them up and take them home.
Cutting method
1. For osmanthus cuttings, it is best to use relatively robust woody branches of the current year.
2. For the soil for osmanthus cuttings, you can use peat soil with a handful of sand mixed in, or vermiculite, which retains water while also being breathable.
3. Cut the osmanthus branches into 10-20 cm long cuttings, keep 2-3 leaves at the upper end, remove the lower leaves, and cut the lower end into a horseshoe shape.
4. Insert the osmanthus branches into the soil at a spacing of 6cm×6cm, with the part inserted into the soil accounting for about 2/3 of the branch length, and water thoroughly.
5. Place the potted cuttings in a place with bright indirect light and good ventilation, cover with plastic wrap, and spray water frequently to increase humidity.
6. Generally, in about one month, the branches will root.
VI. Azalea
Azaleas are also very common flowers in green belts across the country, with many varieties and different blooming seasons. If there is a variety you like, why not wait until the landscaping workers prune them, pick up 1 branch and try propagating it at home according to the cutting method!
Cutting method
1. Azaleas can basically be propagated by cuttings throughout the year. In August-September and April-May, the branches have the strongest vitality and the temperature is suitable, so the cutting survival rate is very high.
2. For the soil mix for azalea cuttings, generally mix peat soil : garden soil : coconut coir = 4:3:3. Before the actual cuttings, water the soil thoroughly first, then poke several small holes in the soil surface.
3. Use relatively sharp scissors to cut healthy, pest- and disease-free azalea branches, about half a year to one year old.
Cut the branches into several small cuttings, each about 8 cm, cut off all the lower leaves, and cut the upper leaves in half. Soak the lower part of the trimmed branches in a rooting powder solution for about 5 minutes.
4. Insert the azalea branches into the small holes, press gently to firm, then water thoroughly once. You can also mix in some carbendazim solution and spray it to disinfect and sterilize.
5. After inserting the cuttings, spray water frequently to keep them moist, keep them in a cool place with bright indirect light, and avoid direct sunlight.
6. Keep the soil slightly moist; when the soil is a bit dry, spray water promptly. After about 3-4 weeks, the azaleas will root! After rooting, transplant them into flower pots to grow.
VII. Camellia
Camellias are large and beautiful, and many people like them. I have a variety-obsessed friend nearby who, upon seeing a variety they don't have, will exchange branches and cuttings with others, and won't stop until they get what they want - simply relentless.
Cutting method
1. Camellia branches that have grown within half a year are the easiest to root; the buds between the leaves are relatively plump and there are few pests and diseases.
2. Cut the camellia branches into several small sections, remove the lower leaves, keep 2 leaves at the upper part, and cut these 2 leaves in half as well. Soak the trimmed branches in a solution of carbendazim : water = 1:1000 for 5-10 minutes.
3. For the medium for camellia cuttings, you can choose sand or perlite. Put the sand into a pot, water thoroughly, and use a wooden stick to poke several small holes in it.
4. Insert the branches into the holes, cover with soil, press firm, water thoroughly once, then cover with a layer of plastic wrap and place in a cool, ventilated place. Open it at noon every day and spray water once to keep it moist. Roots will form in a few weeks, and after rooting, transplant into flower pots for normal care.
VIII. Hydrangea
Hydrangeas are very common on the streets in the north, blooming in large patches and looking especially spectacular! Every time I pass by, I can't help taking photos. Actually, hydrangeas have just finished blooming now, which is the perfect time for cuttings. Everyone should make use of it right away!
Cutting method
1. Use a sharp knife to cut off a hydrangea branch that has already bloomed. Be sure to be quick, accurate and firm, cutting at a 45-degree angle to make the cut as smooth as possible.
2. Keep the 2 leaves above the diagonal cut, then make a flat cut above the leaves.
3. Cut these 2 leaves in half to reduce water evaporation.
4. Insert the prepared branch into loose, breathable sandy soil, water with a carbendazim solution to keep it moist, and spray water on the soil surface 1-2 times a day to keep it moist.
5. Keep the soil surface slightly moist. After about 15-20 days, the branch will root. After rooting, transplant it into a large pot.
IX. Hibiscus
Hibiscus is a very common flower in both the south and the north. It blooms abundantly, looks beautiful, and has a long flowering period. More importantly, it is very tough, and in the south it can bloom all year round. Today, taking the small hibiscus as an example, we introduce the cutting method.
Cutting method
1. Cut robust small hibiscus branches, half a year to one year old.
2. Cut the small hibiscus branches into short sections of about 5-8 cm each, soak in a carbendazim solution for about 2-5 minutes, then take them out and let them dry.
3. Prepare perlite and vermiculite, mix them in a 1:1 ratio, then put the mix into a disposable paper cup and water thoroughly.
4. Insert the branches into the soil and place in a cool, ventilated place, away from strong sun.
5. After a few weeks, the small hibiscus will root!
6. Besides using soil for cuttings, you can also root them in water with foam, which is also relatively easy.
7. After rooting, the small hibiscus can be transplanted into a flower pot for care. Afterward, place it in a spot with good light, give it plenty of sunlight and keep it ventilated.
X. Periwinkle
Periwinkle is also a common flower in green belts, and it roots very easily from cuttings and is tough to grow.
Cutting method
1. Cut off healthy young periwinkle shoots, about 5-7 cm long, pest- and disease-free, and cut all the leaves in half.
2. Find a plastic bottle, cut a square hole in the middle, fill the hole with vermiculite, water thoroughly, then insert the periwinkle branches into the vermiculite.
3. Place the potted periwinkle cuttings in a place with bright indirect light and good ventilation, and spray water frequently to keep them moist.
4. After about 10-15 days, the periwinkle will grow white roots! After rooting, transplant into a large pot to grow.
Chinese roses, bougainvillea, camellias and others are all excellent potted flowers with high ornamental value. The above has introduced the cutting methods for 10 common potted plants, and we hope it will be helpful to everyone!