Where is the mini cucumber native to? Detailed explanation of cultivation methods and benefits and effects
Mini cucumbers have a crisp, tender texture and are often eaten as a fruit. They are only half as long as ordinary cucumbers, juicy with a strong cucumber flavor. Because the fruit is small and mini-cute, they are deeply favored by consumers. So, where is the mini cucumber native to? How is it cultivated? What benefits and effects does it have?
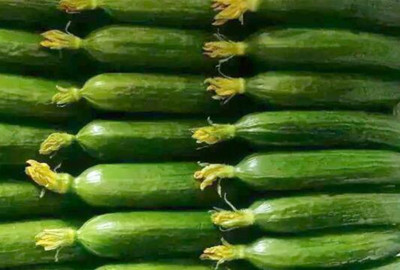
Where is the mini cucumber native to?
Origin of the mini cucumber: the Netherlands; other European countries also have similar varieties. The fruit is short and small, within 15cm long; the surface is smooth, with no spines or bumps; the skin is green and glossy. It is a gynoecious line, with fruit set at every node.
How is the mini cucumber cultivated?
1. Cultivation season
For the spring crop, raise seedlings in January-February, transplant in February-March, and harvest from March to June; for the autumn-winter crop, raise seedlings in August-September, transplant in September-October, and harvest from October to April of the following year.
2. Raising strong seedlings
(1) Substrate treatment: Mix the required substrate (peat: vermiculite: perlite = 1:1:1) evenly, pile it 10-15cm high, spray the substrate thoroughly with a 50-fold formalin solution, then cover the substrate pile with clean plastic sheeting. Generally, when the ambient temperature is 20-35°C, keep it sealed for 3 days. When the ambient temperature is 10-20°C, keep it sealed for 4 days. When the ambient temperature is below 10°C, keep it sealed for 7 days, then uncover the plastic sheeting and let it air-dry, and finally fill the trays with the substrate.
(2) Seed soaking, germination and sowing: First soak the seeds in warm water at 55—60°C for 10 minutes to disinfect the seeds, so as to kill pathogenic fungi and bacteria attached to the seed surface and at the same time inactivate viruses inside the seeds. Then rinse them clean, soak the seeds in warm water at about 25°C for 4-6 hours, and then place them at a constant 30°C to germinate. After 20 hours the seeds can germinate; sowing is best done when the sprout is about 5mm long. First spray the substrate with water until thoroughly wet, and after the water has drained, make holes and sow. After sowing, cover with a mixed material of peat: vermiculite = 1:1 to a thickness of 0.5-1cm.
(3) Seedling-stage management: During the seedling stage, generally use 1/2-1 dose of nutrient solution based on the Japanese Yamazaki cucumber formula, or 800-fold compound fertilizer and 1000-fold urea, alternating water and fertilizer, once every 2-3 days (adjusted according to the actual weather conditions). After the young seedlings have all emerged, drench once with 500-fold carbendazim, and spray a fungicide on the leaves once every 7 days to prevent disease. According to production experience, control should mainly target soil-borne diseases such as damping-off, as well as whiteflies and leafminers. When 1 true leaf has grown, spray pirimicarb and Lűcaibao. For bacterial wilt, root-drenching with agricultural streptomycin can be used.
3. Transplanting
The substrate can be peat: vermiculite: perlite: rice husk ash = 1:1:1:1. First sterilize the substrate and the facilities. Generally, transplanting can be done when the soil temperature is above 15°C. Spray the seedlings once with a fungicide 1-2 days before transplanting to help them recover. Transplanting should not be deep; it is best for the cotyledons to be about 5cm above the bed surface. Plant two rows per pool, with a plant spacing of 30cm, and 3000-3500 plants per 667 sq m.
4. Cultivation management
(1) Light and temperature management: In summer, high temperatures make the greenhouse stuffy and hot, affecting plant growth and development, so attention should be paid to ventilation and air exchange, shading and cooling. Keep the daytime temperature at 25—30°C, the nighttime temperature at 15—18°C, and the soil temperature preferably at 21°C. In winter and spring, seal the film in time to keep it warm. When the temperature exceeds 35°C in the later growth stage, ventilation should be strengthened, and the film around the greenhouse can be opened for ventilation. Keep the greenhouse film clean and glossy at all times to increase light transmission.
(2) Nutrient solution management: 3-5d after transplanting, nutrient solution needs to be applied manually together with drip irrigation, once each in the morning and afternoon, 100-250mL per plant each time. After 3-5d, apply the solution through drip irrigation tubing, once a day, 500mL per plant each time, with the specific amount depending on the weather and the growth of the seedlings. The nutrient solution is a modified formula based on the Japanese Yamazaki cucumber formula and combined with the local water quality, with a pH value between 5.6 and 6.2. From transplanting to flowering, ammonium nitrate should be added to the nutrient solution at 400mg/L to supplement N. After flowering, the nutrient solution concentration should be increased to 1.2-1.5 doses. After fruit set, the nutrient solution dose continues to increase, and potassium dihydrogen phosphate is additionally added at 30mg/L, with an EC value of about 2.4ms/cm. Pay attention to regulating the balance between vegetative growth and reproductive growth. If vegetative growth is too vigorous, the amount of potassium nitrate can be reduced, and potassium sulfate added to supplement the reduced potassium, with the added amount not exceeding 100mg/L. During the peak fruiting period, the nutrient solution concentration can continue to increase to 3.0ms/cm.
(3) Plant training: When the plant grows to 4-5 leaves, begin hanging strings to train the vines. Start keeping fruit from the sixth node. Side branches and flowers at nodes 1-5 should be removed in time so that nutrients are concentrated to supply the main vine, which favors good fruit development and plant growth; at the same time, excess leaves at the base and aged yellow leaves should be removed to strengthen ventilation and light penetration and reduce disease occurrence. Vine training is carried out once every 3-5 days, and tendrils and deformed fruits are removed at the same time. Generally, 1-2 fruits can be kept per node, and side branches can be pinched after leaving 1 leaf, reducing nutrient consumption and ensuring the marketable rate. When the plant is too tall, remove the lower old leaves, lower the vines, and coil the vines.
(4) Pest and disease control: The main diseases harming mini cucumbers are downy mildew, powdery mildew, gray mold, viral disease, angular leaf spot, etc.; the main insect pests are thrips, aphids, American leafminer, whiteflies, etc. Cucumber downy mildew (paomagan, black mold) is the main disease of cucumbers and can be controlled by the following methods: First, implement management with a large temperature difference, with the daytime maximum temperature at 33°C——35°C and the nighttime temperature dropping to about 13°C. Second, close the greenhouse at high temperature, raising the temperature above 40°C (someone must be observing) for about 2——3 hours (key point). Third, chemical control: spray pesticides immediately when symptoms appear. Propamocarb aqueous solution, JINLEIDUOMIER, blue powder and Shuangfali, etc. can be used alternately, and at the same time combine with the use of 45% chlorothalonil smoke agent in the afternoon to fumigate the greenhouse; for pest control, smoke agents are best used to reduce greenhouse humidity and reduce disease occurrence; in addition, use urea 0.25kg + sugar (brown sugar or white sugar) 0.50kg + water 50kg, and spray during the peak growth period of cucumbers, once every 5 days for 4-5 consecutive times, with good results (this method can also add 0.3% potassium dihydrogen phosphate to enhance cold resistance, with even better results).
5. Timely harvesting
Harvesting can begin when the flowers start to wither. During the harvest period, pick once a day in cool weather; if it is hot, pick once each in the morning and afternoon. When harvesting, use scissors or a small knife to cut off the fruit stalk, and handle gently to minimize surface wounds on the fruit caused by friction, ensuring the mini cucumbers have a glossy appearance and good market appeal, thereby increasing their commercial value. During transport and storage, cover them with sterilized and moist cotton cloth to keep the fruits firm and fresh.
What benefits and effects do mini cucumbers have?
1. Mini cucumbers rank first among melon vegetables in propanol and ethanol content. Their main effect is inhibiting the conversion of sugars into fat, so they have a weight-loss effect. Because they contain glucosides, fructose, mannitol, xylose and other substances that do not participate in sugar metabolism, they are very suitable for people with diabetes.
2. Mini cucumbers are sweet in taste and cool in nature. They can clear heat and quench thirst, promote urination and reduce swelling, clear internal heat and detoxify, lower blood pressure and remove fat, and improve arteriosclerosis. Mini cucumbers have auxiliary effects in lowering blood sugar and aiding weight loss.
How to select mini cucumbers?
Spoiled mini cucumbers have a rough surface, with the skin covered in prickles and bumps, and the green skin shows yellow with a dull luster.
Preparation tips for mini cucumbers
1. When eating cucumbers raw as fruit, do not eat too many;
2. Cucumbers contain relatively few vitamins, so when eating cucumbers often, some other vegetables and fruits should be eaten at the same time.