When to sow Photinia × fraseri (red tip photinia) of the Rosaceae family? Detailed explanation of planting methods and medicinal effects
Red tip photinia is the collective name for hybrid species in the genus Photinia of the Rosaceae family. It is an evergreen small tree; new leaves are bright red in spring, turn green in summer, and remain red through autumn, winter and spring. So when should red tip photinia of the Rosaceae family be sown? How is it planted? What effects does it have?
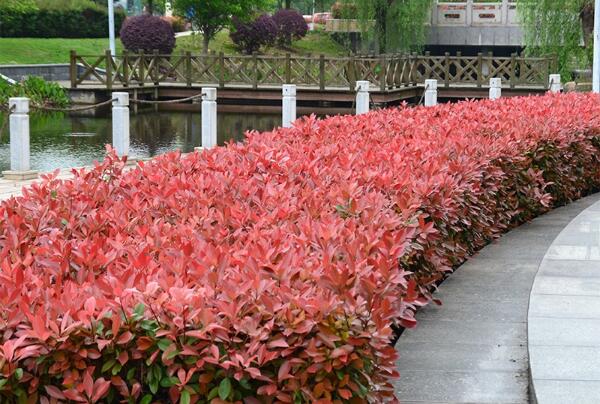
I. When to sow red tip photinia?
Red tip photinia seeds are generally best sown from March to April in spring. Before sowing red tip photinia seeds, the nursery must be prepared in advance. The planting soil should mainly be fertile, loose, neutral in acidity and alkalinity, easy to irrigate and well drained. Fertiliser can be applied per mu before planting. At the same time, insecticides can be used to effectively control soil-dwelling pests. After ploughing, level the soil neatly, open drainage ditches and prepare the seedbed. For spring sowing, seedlings can be transplanted in October to November of autumn. Transplanting should be determined according to local climatic conditions. The planting spacing should be determined according to the time the seedlings remain in the nursery and the cultivation goal. For example, for small shrubs planned as one-year-old plants, planting should be done at different row spacings. After transplanting, care must be taken to avoid loss of packaging material and nutrients, to ensure the integrity of the root system, to pile fine soil around the roots, and to help the roots spread out well.
II. How to plant?
1. Selection and purchase of seedlings. When buying seedlings, choose a supplier with a good reputation and quality after-sales service, so as to ensure the purity of the variety and reduce production risks. For example, Zhejiang Senhe Seed Industry Co., Ltd. is currently one of the larger companies in China developing red tip photinia; its seedling technology is leading, and the seedlings it provides are all high-quality container seedlings with good product consistency and well-developed root systems. In particular, transplanting with the substrate does not damage the roots, the survival rate reaches almost 100%, and growth after transplanting is rapid.
2. Selection and preparation of the nursery site. The soil of the planting site should preferably be loose in texture, fertile, and slightly acidic to neutral, with convenient irrigation and good drainage. Before planting, apply 3000 kg of rotted stable manure and 50 kg of superphosphate per mu. Plough the soil to a depth of more than 25 cm, and at the same time use insecticides to control soil-dwelling pests. After ploughing, level the soil, open drainage ditches and make seedbeds with a bed surface width of about 1 m.
3. Seedling transplanting is generally carried out in spring from March to April and in autumn from October to November, and should be decided in combination with local climatic conditions. The planting spacing should be determined according to the time the plants remain in the nursery and the cultivation goal. If the plan is to sell them as one-year-old small shrubs, a plant and row spacing of 35 cm × 35 cm or 40 cm × 40 cm is suitable, about 3000 plants per mu. When transplanting seedlings, carefully remove the packaging or take off the nutrient pot, ensure the root soil ball is intact, and dig holes at fixed points; pile fine soil around the roots, spread the root system out, and press down gently. After planting, water thoroughly in time to settle the roots.
4. Cultivation management. Water once 3-4 days after transplanting, and then about once every 10 days; if there is continuous rain, drain in time. After about 15 days, once the seedlings have passed the recovery period, fertilisation can begin. In spring, apply about 5 kg of urea per mu every half month; in summer and autumn, apply compound fertiliser once every half month, 5 kg per mu; in winter, apply rotted organic fertiliser once, 1500 kg per mu, preferably by digging trenches and burying it. Fertilisation should follow the principle of light application and frequent application; do not use too large a single dose, so as to avoid damaging roots and burning seedlings. Weed and loosen the soil in time at ordinary times.
5. Pest and disease control. Red tip photinia has strong resistance, and no devastating pests or diseases have been found. However, if management is improper or the nursery environment is poor, grey mould, leaf spot, or damage by scale insects may occur. Grey mould can be prevented by spraying 1000 times diluted 50% carbendazim; during the onset period, it can be controlled by spraying 800 times diluted 50% zineb. Leaf spot can be controlled with 300-400 times diluted 50% carbendazim or 300-400 times diluted thiophanate. Scale insects can be sprayed with 200 times diluted dimethoate emulsion or 800-1000 times diluted spray.
6. Leaving the nursery. When the small seedlings grow to the specifications required for landscaping, they can leave the nursery. One week before leaving the nursery, water thoroughly once, which helps with lifting the seedlings. When lifting the seedlings, make the soil ball as large as possible, and wrap it with rice straw soaked thoroughly in water. Finished seedlings are tied in bundles of 5 or 10 plants, stacked in order, piled on the transport vehicle and covered with a tarpaulin.
III. What effects does it have?
1. As a herbal Chinese medicine, photinia also has very wide uses for its leaves. To treat traumatic injuries, crush photinia leaves and take the juice, and apply it to the surface of the wound from the injury; it can reduce inflammation, relieve pain and promote rapid wound healing.
2. Promoting bowel movements. Drinking photinia leaves steeped in water can effectively promote intestinal digestion. For some people with long-term constipation, this method can be tried to relieve constipation.
3. Warming the kidney and strengthening yang. Photinia leaves also have a very obvious effect on strengthening yang in men.