Japanese Black Pine (Pinus thunbergii) Sapling Prices, Differences from Japanese White Pine, and Bonsai Making and Care
Japanese black pine, also known as white-bud pine, is an evergreen tree that can reach 30 m in height, with grayish-black bark, and blooms in April. It is native to Japan and the southern coastal regions of Korea. So how much does a Japanese black pine sapling cost? What is the difference from Japanese white pine? What are the bonsai making and care methods?
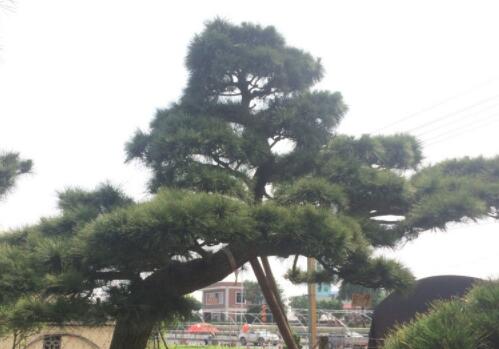
How much does a Japanese black pine sapling cost?
The prices below are compiled for reference only:
| Sapling name | Height (cm) | Diameter (cm) | Unit price (yuan) |
| Japanese black pine sapling | 80 | 2 | 1.8~3.5 |
| Japanese black pine sapling | 120 | 3 | 4.5~8 |
| Japanese black pine sapling | 180 | 4 | 12~26 |
| Japanese black pine sapling | 250 | 5 | 65~120 |
| Japanese black pine sapling | 300 | 6 | 80~180 |
| Japanese black pine sapling | 350 | 8 | 130~350 |
| Japanese black pine sapling | 450 | 10 | 230~500 |
What is the difference between Japanese black pine and Japanese white pine?
Japanese white pine. Needles: five needles per bundle, slender, short and dense, with white stomatal lines, and the leaves are blue-green. Bark: light gray and smooth when young, orange-brown when old. Flaky scales peel off. Flower color: rose red.
Japanese black pine. Needles: two needles per bundle, needles long. Young branches orange-yellow. Bark: grayish-black. Irregular flaky peeling. Flower color: yellow.
What are the bonsai making and care methods for Japanese black pine?
Making:
1. When digging them up, expand the digging area and be careful to keep as much soil as possible. Because Japanese black pine grows in sandy gravel soil on hillsides, where there is less soil, and because the winter weather is dry and the soil contains little water and has poor stickiness, you should protect the soil around the roots as much as possible when digging. This is because the soil around the roots is rich in root fungi, which are symbiotic fungi of Japanese black pine and are extremely beneficial to root growth. After digging, promptly wrap them simply with plastic bags to prevent soil loss during transport, so as to facilitate transplanting.
2. When digging, be careful to protect the root system of the Japanese black pine. You should start digging some distance away from the pine tree, first hollow out the soil around it, retain as much of the main root as possible, make the cut ends of broken roots smooth, cut off rotten roots, and try to avoid injuring the root system. This is especially true for the lateral roots and fibrous roots that the Japanese black pine has grown into the sandy gravel; the root system is relatively weak, so keep it as long as possible and protect it especially well when digging.
3. The Japanese black pines dug up should be planted in soil promptly; the sooner the better, because a long time will cause the roots to lose water and dry out, affecting survival. To prevent the roots from being buried too deep, you can use raised planting and shallow planting, then add soil on top and mound it over. If conditions do not allow planting in the ground, pot them promptly.
4. Potting Japanese black pine is very important. Before planting, first place a layer of crushed stone and tiles at the bottom of the pot to facilitate airflow and drainage, then fill the surrounding area firmly with soil. If the gaps in the soil are too large, it is easy to cause frozen roots, so cover the pot with a straw curtain to prevent freezing. The best soil is the original mountain soil, but you can also use a mixed soil made of coarse yellow sand, coal ash, and yellow mud in a ratio of 0.5:0.25:0.25. After potting, prune heavily in time; too many branches and leaves will cause insufficient water supply to the roots and consume a large amount of water and nutrients.
Care:
1. Environment: Japanese black pine is cold-resistant and drought-resistant, and can be placed year-round on courtyard terraces and slopes, balconies, and flat platforms in places with sufficient light and air movement. However, small bonsai should not be exposed to strong direct sunlight in midsummer. In winter, they can overwinter in the open ground, and it is best to bury the whole pot in a sunny, wind-sheltered spot. If overwintering indoors, the room temperature should not be too high, and they can be moved outdoors at Qingming Festival.
2. Watering: Japanese black pine likes dryness and avoids waterlogging, so do not water excessively; water only when the soil is dry, and water thoroughly when you do. Properly controlling water during the growing season can make the branches and trunk thick and short and the needles short and small, adding ornamental value. During high summer temperatures, you can frequently spray water on the leaf surface, which is beneficial to growth.
3. Fertilizing: Japanese black pine tolerates poor soil and can grow normally even when the soil lacks fertilizer, and this also promotes a short trunk, dense branches, and short leaves. However, properly applying 1-2 times of dilute, fully decomposed cake fertilizer water during the growing season is beneficial to healthy growth and increases resistance to pests and diseases.
4. Pruning: To maintain its beautiful and elegant tree shape, Japanese black pine bonsai needs proper pruning. During the growing season, pruning is mainly bud pinching, 3-4 times per year. When new buds have extended but have not yet produced needles, about 1/2 of each terminal bud can be pinched off. For bonsai that do not need to grow more branches, all terminal buds can be pinched off. For branches that affect the beauty of the tree shape, prune during the dormant period.
5. Repotting: Japanese black pine bonsai is generally repotted once every 3-5 years, preferably in February to March. When repotting, keep the original pot soil intact and turn it out, remove 1/2 of the old soil, cut off overly long roots as well as dead and rotten roots, and at the same time prune some unnecessary branches and leaves to maintain the balance between the upper and lower parts of the pot soil. If the original pot is not large enough, you can switch to a slightly larger new pot, and the planting method is the same as for potting.