Anthurium seed planting and watering methods, causes of yellowing and drying leaves, and prices
Anthurium, also known as flamingo lily, is a perennial evergreen herbaceous plant of the Araceae family. It prefers warm, humid, semi-shaded environments and dislikes direct sunlight. Anthurium has unique and beautiful flowers with a long blooming period, making it suitable for pot cultivation. So do you know what the seed planting methods for anthurium are? How to water it? What to do when leaves turn yellow and dry up? How much does a pot cost? According to a flower market survey, there are many varieties of anthurium. The general wholesale price is between 38 yuan and 280 yuan, and the retail price ranges from 80 to 450 yuan. The wholesale price of domestically tissue-cultured anthurium flowers is between 10 yuan and 80 yuan, and the retail price is between 15 yuan and 150 yuan.
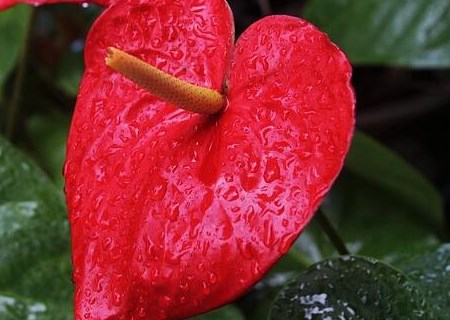
Anthurium seed planting methods
Division
Division is mainly carried out in the cool and humid spring, and can also be done in cool autumn weather. Never divide in the hot summer or in dry, cold seasons. When dividing, care must be taken not to damage the mother plant. Side shoots that are too large, too closely attached, or too weak should not be divided. Mainly divide side shoots that are relatively easy to separate from the mother plant and are more robust, with at least 2 main root systems. When transplanting seedlings, division can be done by applying even hand pressure to separate the side shoot from the mother plant at the underground stem bud eye. When separation is difficult, use a sharp sterilized blade to cut at the bud eye. For cut-flower shoot removal and division, first loosen the soil layer, pay attention to the root distribution and the underground stem bud eye, carefully cut at the bud eye, then remove the side shoot. After cutting, let the side shoot wound dry slightly, then heel it in a cool place to promote rooting and restore growth. When planting, the root system must be spread flat and the plant upright, with support if necessary. Do not water immediately after planting; instead, spray water on the leaves to maintain humidity. After 2 days, water or apply diluted fertilizer solution as appropriate.
Cuttings
For upright anthurium varieties with stems, cutting propagation can be used. Cut off sections with 1-2 stem nodes and 3-4 leaves as cuttings, insert them into sphagnum moss, and after new roots sprout, plant them in pots.
Sowing
The sowing method is generally only used in breeding. Anthurium has poor natural pollination and requires artificial pollination to obtain seeds. After the seeds mature, they must be sown immediately after collection. Anthurium seeds are relatively large, so indoor pot sowing is used. The suitable germination temperature is 25°C-28°C, and germination occurs 20-25 days after sowing. Seedlings need 3-4 years of cultivation before they can bloom. The advantages of conventional propagation methods are that they are simple, easy, and low-cost. One drawback is that the propagation speed is slow, failing to meet the demand for promoting new varieties. Another is that propagated plants are easily infected by pathogens, which accumulate in the plant body, leading to species degeneration and even death.
Tissue culture
The stem tip, stem segment, young leaves and petioles of anthurium can all be used as tissue culture explants. Rinse the explants clean under running water, soak in 75% alcohol for about 20-30 seconds, rinse with sterile water, then sterilize with 0.1% mercuric chloride for 8-10 minutes, wash thoroughly with sterile water to remove the sterilizing solution. Blot the surface moisture with sterile filter paper, cut into appropriate sizes, and inoculate for culture. Different explants have different pathways for inducing regeneration. Culture with stem tips or buds can directly induce adventitious buds or lateral buds. Culture with leaves, petioles or stem segments first induces callus, then differentiates to form buds or somatic embryos. The culture medium uses MS, 1/2MS or modified MS. In modified MS medium, some components of the MS medium are increased or decreased, and reducing the amount of ammonium nitrate has a better induction effect on anthurium. The medium is supplemented with 30 g/L sucrose, 8-10 g agar as a solidifying agent, pH 5.8. Hormone regulation is the most critical; anthurium is relatively sensitive to hormones and has an obvious cumulative effect. For bud induction culture, 6-BA 1-3 mg/L can be used, combined with NAA 0.1-0.2 mg/L. When culturing with leaves, etc., first use 6-BA 1.0 mg/L and 4-D 0.1 mg/L to induce callus formation, then transfer to a differentiation medium containing 6-BA 1.0 mg/L + NAA 0.1 mg/L to induce bud formation.
After inoculation, provide appropriate shading for the first few days, use fluorescent lamps for supplementary lighting for 8-10 hours, at a temperature of 25°C. After about 45 days of culture, when new buds or callus appear, transfer to bottles for subculture. In proliferation culture, after 40-50 days of induction culture, the established sterile culture lines are transferred to bottles for proliferation and to promote bud formation. The medium can be MS or modified MS + 30 g/L sucrose + 7 g/L agar + 6-BA 0.5-1 mg/L + NAA 0.5 mg/L, and one generation is cultured in about days. The culture conditions are the same as before. For seedling strengthening and rooting culture, during the proliferation culture process, when shoots grow continuously and multiply to a certain amount, the hormone amount can be reduced to 6-BA 0.1-0.2 mg/L, so the shoots grow larger and stronger and produce aerial roots. After 1-2 generations of seedling strengthening culture, transfer to a medium supplemented with IBA 0.1 mg/L or NAA 0.1 mg/L to promote root formation. After 7-10 days of culture on the rooting medium, aerial roots grow from the base and gradually form a root system. After about 30-40 days, they further grow taller to 3-4 cm.
During this period, supplementary lighting can make the seedlings more robust. For transplanting and greenhouse seedling cultivation, remove the seedlings, rinse the medium off the seedlings in water, and then transplant. The transplanting substrate can be a mixture of 3 parts peat, 1 part perlite and 1 part coconut coir, or river sand, crushed floral foam, etc. After planting, drench thoroughly with 800-1000 times diluted chlorothalonil, and spray water to maintain humidity. Provide moderate shading in the early transplanting stage. After survival, spray foliar fertilizer every 7-10 days to promote growth. Regularly spray carbendazim, chlorothalonil, etc. to protect seedlings and prevent disease. During the seedling stage, leaves and stems are relatively tender, and there are often pests such as cutworms and snails, so appropriate control should be given.
How to water anthurium
Water quality requirements
Anthurium is relatively sensitive to salt, so try to choose slightly acidic water for watering. Ordinary household water can be used after being left to stand for 2~3 days. However, if the water is too acidic, it will reduce the ornamental value. Natural rainwater is the best water source for caring for anthurium. When it rains, you might as well store a little more.
For home cultivation, you can fill discarded cola bottles or mineral water bottles with tap water and let them stand for 3~4 days, then spray the leaf surface of the anthurium. After tap water is left to stand for a certain period, the chlorine in the water can volatilize.
Watering time
In spring, autumn and winter, try to choose warm and sunny weather for watering, in the morning or noon, and avoid watering during cold and overcast times. In summer, watering is generally done in the evening, and definitely do not water at noon. You can choose to spray water once at 10 a.m. to 11 a.m. and after 15:00.
What to do when leaves turn yellow and dry up
Pathogen infection
When anthurium shows symptoms of yellowing and drying leaves, it is very likely to be harmed by bacteria. You can spray 0.3% garlic juice solution, 0.2% vinegar, or use specialized agents such as carbendazim and chlorothalonil for treatment.
Unsuitable soil
In most areas of the north, the soil and water contain more salt and alkali and lack the soluble iron elements needed for plant growth. If the soil is not changed for a long time, it causes nutrient deficiency in the plant, and the leaves will gradually lose green and turn yellow.
You can buy professional acidic soil from a flower shop, or treat the original soil. Add oxalic acid to the soil to change its acidity and alkalinity. You can also water with a little acidic water every week, using diluted lemon water or edible vinegar for irrigation.
Dry air
The growth of anthurium requires relatively high air humidity, and when indoor air is excessively dry in winter, leaf tips often dry up and turn yellow, or leaf margins scorch, or leaves develop scorched spots and curled edges.
According to the growth characteristics of anthurium, appropriately increase air humidity and frequently spray the leaves and surrounding environment. In winter care, try to keep the plant away from radiators and air conditioner vents.
Overwatering
When the new leaves of anthurium turn yellow while the old leaves remain normal, this situation is generally caused by watering too much and too frequently, making the soil in the pot wet for a long time or even waterlogged, causing some fibrous roots to rot, hindering normal respiration and nutrient absorption, and causing leaves to gradually turn yellow and fall off.
The accumulated water in the pot should be drained promptly. If the plant has been in an overly wet soil environment for a long time, you can take the plant out of the pot, dry the soil, and replant it. After that, water normally, and the leaves will gradually regain their green color.
Uneven fertilization
Too little fertilization, or not repotting or changing soil for a long time, leads to a lack of nutrients such as nitrogen in the soil, causing weak branches and leaves and thin, yellow leaves. In addition, excessive fertilization can also cause new leaves to be thick and uneven, while old leaves have dry tips and scorched yellow and fall off.
If fertilization is too little, add trace mineral elements, and you can use fully water-soluble fertilizers such as “Huaduoduo“.” For yellowing leaves caused by excessive fertilization, stop fertilizing immediately and increase watering. In severe cases, you can remove part of the old soil, replace it with new soil, replant, and then manage normally.