Diospyros cathayensis cultivation methods, old stump rooting methods, and seedling unit price
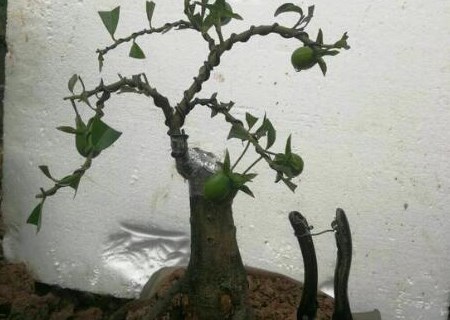
Diospyros cathayensis is often used to make bonsai landscapes, and both its flowers and fruit have good ornamental value, making it suitable for home cultivation and viewing. So do you know what the cultivation methods for Diospyros cathayensis are? What are the methods for rooting old stumps? How much is a seedling? In the Diospyros cathayensis trading market we learned the latest price: Diospyros cathayensis seedling height (cm): 30-50, price 0.70 yuan/plant.
I. What cultivation methods are there for Diospyros cathayensis
1. Temperature and light
Diospyros cathayensis is tolerant of low temperatures, but its activity requires high accumulated heat. April to November is the suitable growing period for Diospyros cathayensis, and the suitable growing temperature should be kept between 28-33°C. It likes sufficient sunlight; note that it should not be placed indoors for too long, otherwise insufficient light will cause its leaves to fall and affect fruiting.
2. Watering
Diospyros cathayensis likes a moist, semi-shaded growing environment. Normally the pot soil must be kept moist and must not be too dry. In summer high temperatures, while taking care to provide shade, increase the frequency of watering, and you can use a sprayer to mist water to increase the surrounding air humidity. During the flower bud differentiation stage, water must be strictly controlled, mainly keeping it dry, and water only when the soil is completely dry. Combined with watering, an appropriate amount of quick-acting fertilizer can be added, but the concentration should not be too high.
3. Soil
Diospyros cathayensis can grow well in both acidic and alkaline soil.
4. Fertilizing
In spring, mainly use nitrogen fertilizer to promote branch growth and prepare for cultivating new fruiting branches. During the growing period, fertilize fully and apply more phosphorus fertilizer. In the later stage of branch growth, mainly apply potassium fertilizer, such as plant ash. Generally, when repotting, add fertilizers such as cake fertilizer.
II. What are the methods for rooting old stumps of Diospyros cathayensis
Prepare in advance: soil, flower pot, large plastic bag (if it is a large stump, agricultural film can be bought instead; for larger stumps that produce fine roots slowly, you can also prepare some rooting powder, though rooting powder is not essential).
Soak the entire Diospyros cathayensis stump in water, then proceed as follows:
1. Choose soil. Soft, breathable garden soil or humus soil is fine. If the soil easily becomes compacted, sand can be added to improve it. (Note: do not add base fertilizer when potting a raw stump)
2. Choose a pot. Clay pots are easiest to use. The bottom of the pot must have drainage holes and be able to drain water. In principle, it only needs to match the artistic conception of the Diospyros cathayensis stump; of course, if there is really nothing else, an ordinary nutrient pot is also acceptable.
3. Shape, prune, and pot. According to the shape and artistic characteristics of the Diospyros cathayensis stump, do appropriate pruning and arrange the pot. Then plant it into the pot. The pot soil should not exceed the pot rim, to avoid water flowing everywhere when watering later.
4. High soil mounding. This is the key to survival and rapid recovery. Use hard cardboard or hard plastic board, etc., to surround the entire trunk and roots of the Diospyros cathayensis stump that are exposed above the pot soil after potting, making the surround as high as possible, and tie it tightly with rope or tape. Then add soil into the enclosure until the trunk and roots exposed above the pot surface are all covered.
5. If conditions permit, add moss or green plants on the pot surface, and water thoroughly once. The water must be poured thoroughly; do not be afraid of overwatering. It is best to water until water flows out from the drainage holes at the bottom of the pot.
6. Bagging. Use a transparent bag to cover the pot around the mounded soil, extending all the way to the pot rim, and it is best to cover the pot rim as well, then tie it tightly with rope. (If normally after 1-2 days many water droplets form on the inner wall of the bag, that is good; if not, the bag is too thin and should be replaced with a thicker one.)
After the above operations are completed, there is basically nothing to worry about. Depending on the weather, if it is spring, autumn, or winter, it can be placed in a sunny place, which is beneficial for rooting and sprouting. Related to the weather, it generally sprouts in 1-4 months. If potting in summer, it needs sun protection and shade, or only scattered light.
1. About removing the bag: after sprouting and semi-lignification, the bag can be removed on rainy days, and normal watering and care can be given. During the bagging period, water as little as possible, because after bagging there is little water loss; observe once every 1-2 months and water as appropriate.
2. About removing the mounded soil: after about 1 year of care, normal stumps can complete the transition from raw stump, and at this time they can be shaped freely. The high mounded soil can also be removed after this, and early viewing can be done. If you want it to grow more vigorously, you can also remove the high mounded soil later.