How to grow and propagate the Lily subfamily Vanda falcata (Phalaenopsis aphrodite), and what to do about root rot?
Vanda falcata likes a sunny yet cool environment, and grows poorly in high temperatures, so what are the growing methods for Vanda falcata? How do you propagate it? What should you do about root rot? According to available information, Vanda falcata should be planted in a well-ventilated environment. It is shade-loving by nature, averse to direct sunlight, fond of moisture and averse to dryness; 15℃~30℃ is its comfortable temperature range, in which it grows well.
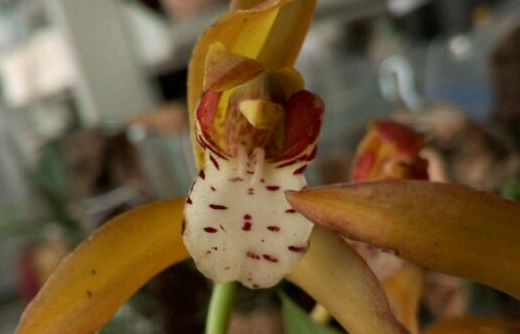
1. What are the growing methods for Vanda falcata?
Potting
Vanda falcata is usually potted (or repotted) in spring, in March-April. A pot with a small mouth, deep body and large bottom hole is best. Wild seedlings newly dug from the mountains need to be planted in clay pots first, as orchid soil dries easily in them, aeration is good, and rooting is easy; only after 2-3 years can they be moved into a Yixing clay pot or porcelain pot.
The method of planting orchids (in pots) differs from that for ordinary flowers; especially for rare orchid varieties, repotting and moving to a new pot requires washing the roots. The method is: soak the roots in clean water and gently scrub with an old toothbrush or a soft brush, never using too much force, to avoid damaging the root system; the roots must then be carefully pruned, and attention paid to good ventilation.
1. Potting method one: after preparing the orchid pot and the plant, hold the orchid plant upside down (roots up, leaves down) under a tap and rinse with slow-running water; the water pressure must be gentle so as not to damage the orchid roots and leaves. Grip the orchid crown with your thumb and index finger, brace your little finger against the rim of the pot, and secure the roots with a bamboo chopstick; when placing it into the pot, try not to let the roots touch the pot wall. Pour bean-sized mixed gravel into the bottom of the pot up to one third of its depth. Then pull out the bamboo chopstick and shake the plant in the pot firm.
2. Potting method two: pay attention to drainage at the bottom of the pot; fill a clay pot with broken tiles, and a Yixing clay pot must have its bottom covered with perforated nylon gauze. Before planting, first spread coarse stones in the pot, taking up about 2/5 of the pot's depth, then coarse stone potting soil, 3-5 cm thick, and then place the orchid in. When potting, make sure the roots spread out naturally and do not curl. When planting rare orchid varieties, be sure to place the old growths toward the edge and the new growths in the center, leaving room for the new growths to grow further.
2. How do you propagate it?
1. Propagation method for Vanda falcata: division
This can be done in either spring or autumn, generally dividing once every three years.
Any plant that grows robustly with densely clustered pseudobulbs can be divided; after division, each cluster must retain at least 5 pseudobulbs connected together.
Before division, reduce watering so the potting soil is fairly dry. When potting up after division, first cover the bottom hole of the pot with broken tile pieces, then spread coarse stones to occupy 1/5 to 1/4 of the pot's depth, then add coarse-grained soil and a little fine soil, and finally plant in sandy loam rich in humus.
After division, the planting depth should leave a 2 cm rim at the edge of the pot; spread Selaginella uncinata or fine gravel on top, then water thoroughly, place in shade for 10-15 days, keep the soil moist, gradually reduce watering, and carry out normal care.
2. Propagation method for Vanda falcata: sowing
Orchid seeds are extremely fine, containing only one incompletely developed embryo, with very low germination capacity; moreover, the seed coat does not readily absorb water, so sowing by conventional methods will not germinate. Orchid mycorrhiza or an artificial culture medium is therefore needed to supply nutrients before germination can occur. Orchids are hard to come by, and rare varieties are even more precious!
For sowing, it is best to choose fruit that has not yet split open; after sterilizing the surface with 75% alcohol, take out the seeds, soak them in 10% sodium hypochlorite for 5-10 minutes, take them out and rinse 3 times with sterile water, then sow them in a culture bottle containing culture medium, and place in a dark culture room with the temperature kept at around 25°; after they sprout, move them into the light and they will form protocorms. From sowing to transplanting takes half a year to a year.
3. What should you do about root rot?
1. Vanda falcata root rot: improve the quality of the nutrient soil
If the nutrient soil has poor aeration and poor drainage, or the soil is too raw or too thoroughly decomposed, it can easily cause orchid root rot. At this point you should improve the quality of the nutrient soil, enhance the drainage and aeration performance inside the pot, and improve the soil quality.
2. Adjust the amount of fertilizer and water appropriately
Vanda falcata should not be given too much fertilizer; fertilize little but often, otherwise excessive fertilizer generates heat that burns the root system and causes rot. Watering must also be moderate; too much makes the nutrient soil hold excessive water, aeration becomes poor, the root system has difficulty breathing, and root rot occurs.
3. Disinfection treatment and timely diagnosis and treatment
During orchid care, observe frequently; if root rot is found, treat it immediately.
Take the plant out, remove the rotted roots, rinse the roots with 1% potassium permanganate solution for disinfection, or apply some charcoal powder to the affected parts, and expose the roots to sunlight in a greenhouse for about 30 minutes; if more than 50% of the roots are rotted or all of them are rotted, after treating by the above method, use river sand to encourage new roots.
The temperature for encouraging roots should be higher than the usual temperature, generally controlled at around 22~30℃; after about 2 months new roots will grow, and at this point transplant into a pot of nutrient soil.