Propagate gardenia by cuttings this way - it's very simple and they root easily!
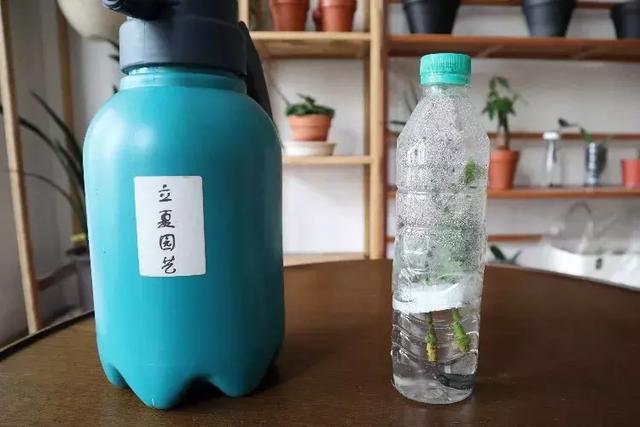
The gardenia I propagated in a mineral water bottle at the start of summer has finally rooted... it seems it took more than ten days, I don't remember the exact details. With this method of propagating gardenia by cuttings, under normal circumstances they root in 1-2 weeks.
After about a week, I saw lots of little bumps swelling up on the stems, and a very few showed white dots - this is the sign that roots are about to form.
Normally, my cuttings soaked in naphthalene acetic acid should have rooted in a week, but unfortunately I forgot to check the weather forecast. Soon after I put them in to root, the temperature dropped, down to just over ten degrees Celsius - I even had to wear two layers of clothing.
If the temperature stays around 25°C, rooting will be much faster. That's why the most suitable time for taking cuttings of most flowers is May-June, because the temperature is higher then and the cuttings root faster.
Look at the picture above - did you notice that one cutting's roots have already grown very long, while another cutting's are just tiny? This is the difference between current-year and second-year stems. I suggest beginner gardeners try to choose current-year, semi-lignified, fairly thick stems with relatively short nodes!
For the specific method of propagating gardenia in a mineral water bottle, please see the previous video: You only need 1 mineral water bottle to propagate a pot of gardenia! Next, Lixia will continue using this method to propagate roses, camellias, azaleas, bougainvillea, hydrangeas and so on. Want to see it?
How to propagate gardenia - a brief introduction to gardenia cutting propagation
Previously we introduced two articles about gardenia,
What types of gardenia are there - a brief introduction to gardenia
The flower language of gardenia - what does gardenia symbolize
Gardenia likes to grow in places with plenty of sunlight and loves light, so in spring and autumn, when caring for gardenia, you must be sure to give it fairly sufficient light. Otherwise, the growth and development of the gardenia will be affected, and it will also be very unfavorable for the gardenia to overwinter. But in summer, if the sunlight is too strong, the gardenia needs to be placed in a semi-shaded environment. When gardenia is affected by a combination of strong sunlight, high temperatures and excessive rain, it may develop yellow leaves. If the environmental conditions are not improved in time, it will gradually worsen and even cause death.
In some places, gardenia is called water gardenia, which also shows the gardenia's habit of loving moisture. So when we grow gardenia in pots, we must pay attention to its requirements for environmental conditions.
Gardenia also has the function of purifying the air. Gardenia has strong resistance to harmful gases such as sulfur dioxide and hydrogen fluoride. However, gardenia is relatively sensitive to smoke and dust, with very weak resistance, so gardenia leaves easily catch dust, which affects their respiration. Smoke and dust are also one of the causes of poor growth and death. Therefore, when caring for gardenia, you must pay attention to the effect of smoke and dust on the gardenia's growth.
A brief introduction to gardenia cutting propagation
Which propagation method is generally used for gardenia
Gardenia is generally propagated by cuttings, because gardenia roots very easily with cutting propagation.
Commonly used cutting propagation methods for gardenia
There are two ways to propagate gardenia by stem cuttings: one is soil cuttings, and the other is water cuttings.
Gardenia soil cutting propagation
Gardenia soil cuttings are further divided into softwood and hardwood cuttings. First, let's talk about gardenia softwood cuttings.
1. Softwood cuttings means taking vigorous current-year stems for cuttings, cutting the cuttings to a length of 8-15 cm for rooting.
2. Be sure to pay attention to the cutting period - this is the key to survival. Generally, the best time is the high-temperature season from the first fu to the middle fu, when rooting is fastest and the survival rate is highest, but it also requires the most meticulous management, ensuring high air humidity and a semi-shaded state.
3. After cutting, they root in 2-3 weeks; the survival rate can reach about 90%.
4. For spring cuttings, you can use 1-2 year old hardwood stems, cutting the cuttings to a length of about 20 cm. The cutting bed must be shaded, and the leaves should be sprayed with water frequently to maintain relatively high humidity. Spring hardwood cuttings take longer to root, with a survival rate of 70-80%, but those that survive from hardwood cuttings form a clump faster.
5. The potting soil used for cuttings is generally best made of black soil mixed with 1/2 sand. This is because black soil is acidic and has strong water retention, while sand has good permeability and is beneficial for rooting. However, pure sand or vermiculite can also be used as potting soil for rooting, but after rooting they must be transplanted into fertile soil in time.
5. After cutting, maintain sufficient moisture, but not to the point of waterlogging. The temperature of the water used for watering has a great influence on survival. When watering, do not cause strong changes in the temperature of the cutting bed. Therefore, when taking cuttings during the fu days, water before 7-8 am in the morning, and after 9-10 pm in the evening. Do not use water heated by the sun during the day, to avoid the base of the cuttings turning black and rotting.
Gardenia water cutting propagation
The gardenia water cutting method is quite popular now, because it is clean and tidy, and is loved by many people. The gardenia water cutting method is a method of soaking the base of the cuttings in water to root. Cut vigorous current-year softwood stems into 12-15 cm lengths, tie 30-40 of them into a bundle, then soak 1/2 of the cuttings in clean water. With the gardenia water cutting method, it is best to change the water once a day. After water cutting, place the water container in a semi-shaded place. Generally, after about 20-some days, new roots will grow. There is also a somewhat more troublesome method: use a thin wooden board, drill small holes in the board at 2x5 cm spacing, insert one cutting into each hole, then place the board on top of a basin filled with water. Note that the part of the gardenia cuttings below the board must be completely submerged in the water in the basin. Although this method is a bit more troublesome, the effect is better than the bundle water cutting method.
Gardenia propagation methods: gardenia cutting method, layering method, sowing method
Gardenia grows the same in all four seasons, with evergreen leaves. When it blooms, it is fragrant and elegant, with white flowers appearing white, looking especially fresh and beautiful, and very lovable. It is often used by people for pot cultivation in courtyards, balconies and other places. It has strong environmental adaptability and can grow well in these places. It has strong decorative and ornamental value.
Gardenia propagation methods1. Cutting methodGardenia stems root very easily. In the warm south, cuttings are often taken from March to October, while in the north they are often taken from May to June. Cut vigorous, mature stems and insert them into a sand bed; as long as they are kept moist frequently, they root and survive very easily. Water cuttings are far better than soil cuttings, with a survival rate close to 100%. Done from April to July, cut the cuttings and keep only the top 2 leaves and the terminal bud, insert them in a container filled with clean water, and change the water frequently to prevent the cut from rotting. After 3 weeks they begin to root.
2. Layering methodGenerally done around Qingming in April or during the plum rain season. In April, select 1-year-old vigorous stems 25-30 cm long from a 3-year-old mother plant for layering, pull them down to the ground, and notch the part of the stem that goes into the soil. If you can dip the notched part in 200 ppm naphthalene acetic acid powder, then cover with soil and press firm, rooting is even easier. If there is a three-pronged branch, then at the fork you can get three seedlings at once. Generally, roots form after 20-30 days. After rooting in June, they can be separated from the mother plant, and by the next spring they can be divided and planted with soil or potted individually.
For transplanting seedlings or potting, spring is best, done during the plum rain season, and a soil ball is needed. During the growing period, keep the soil moist; water more during the flowering period and midsummer. Fertilize once a month, and apply an extra phosphorus-potassium fertilizer once before flowering. In early spring of the following year, prune and shape, and promptly cut off dead branches and leggy branches.
3. Sowing methodGenerally choose plump, dark red ripe fruits, dry them in the sun or in the shade with the shell on to use as seed. Before sowing, use scissors to cut open the seed fruit skin, dig out the seeds, rub them apart in hot water, remove floating seeds or impurities, then scoop out the sunken, plump seeds, spread them on a bamboo mat, and place them in a ventilated place to dry off excess moisture. Generally choose a sunny hillside or earthen plot with deep, loose, fertile sandy loam for sowing. You can use field edges and corners for planting, or intercrop or relay crop with legumes. Before planting, plow the land 1-1.5 chi, remove miscellaneous tree stumps, and make beds with a bed surface width of 4-5 chi (the distance can be larger if the soil is good, otherwise smaller), with a bed height of 6 cun. You can apply farmyard manure, green manure or human and livestock manure water as base fertilizer, for example applying 20-30 dan of human excrement and urine per mu. After the soil dries, shallowly rake the clods and level the bed surface. On the bed surface, open sowing furrows at 6-7 cun row spacing, with a furrow depth of about 1 cun, ready for sowing.
Gardenia can be sown in spring or autumn, generally mostly in spring. Spring sowing is done around Yushui, and autumn sowing around Qiufen. When sowing, mix the seeds with wood ash and evenly sow them in the sowing furrows, then cover the furrows level with fine soil or burnt soil, cover with grass and sprinkle water, keeping the soil moist frequently to help emergence. Use 4-6 jin of seed per mu. After emergence, be sure to remove the covering grass in time. During the seedling stage, weed frequently, being careful not to damage the seedling roots. After weeding, all need to be top-dressed with diluted human excrement and urine water. After one year of seedling cultivation, they can be transplanted. If transporting a long distance, it is best to coat the roots with yellow mud slurry, cover with grass to retain moisture, plant one plant per hole, cover with soil, press firm and sprinkle water. After planting, cultivate and weed and top-dress once each in spring and summer every year. Applying human and livestock manure, stable manure, compost, cake fertilizer and so on are all fine. Before flowering in summer, it is best to apply fertilizer with higher phosphorus and potassium content. Fertilizing is generally done after weeding and loosening the soil.
4. Seed propagationThe sowing period is divided into spring sowing and autumn sowing, with spring sowing being better. From early February to late February (Lichun to Yushui). Select plump, dark red fruits, dig out the seeds, rub them apart in water, scoop out the sunken seeds, and dry off the water; then mix them evenly with fine soil or plant ash, drill-sow them in the bed furrows, cover with fine soil, then cover with rice straw; after germination remove the rice straw, weed frequently, and if the seedlings are too dense, thin them out gradually, maintaining a plant spacing of 10-13 cm. Cultivate the seedlings for 1-2 years, and when they are more than 30 cm tall, they can be planted out.