What are the methods for propagating Aglaia odorata (mock lime) with a high survival rate?
For Aglaia odorata, both cuttings and air layering give a fairly high survival rate. Cuttings under full-sun mist conditions give an even higher survival rate. Aglaia odorata cuttings root rather slowly; in the Yangtze River basin it is best done during the plum rain season. Take plump current-year shoots from the outer canopy, 8-10 cm long, keep the 2-3 small leaves at the tip, and it is best if the soft shoot still has a section of older wood on it; then insert it into a medium of half garden soil and half rice-hull ash, or loose soil or vermiculite may also be used. After inserting, shade it and cover with plastic film to keep in moisture; at 25-30°C and relative air humidity above 90%, it takes about 45 days to root. If the temperature and humidity cannot be reached, rooting takes about 2 months.
If the cuttings are dipped quickly in 500 ppm naphthaleneacetic acid, they will root in just 20 days under the same conditions. In the air-layering method for Aglaia odorata, one-year-old branches also root most easily, while branches three years or older are very hard to root. Air layering can be done from May to September, but June, the plum rain season, is still the most suitable, and rooting generally takes 40 days. When air layering, choose a strong one-year-old branch and make a ring of bark removed at the layering site, with the ring 1-1.5 cm wide; the bark layer must be scraped off cleanly until the xylem is visible. Whether the bark layer is removed cleanly or not is the key to rooting and survival. Then wrap plastic film around the ringed position and tie off the lower end, fill in moist peat or leaf mold, and seal the upper opening. Use string or similar to fix the ball of soil at the layering site to other branches. Afterwards, take care to add water and keep the medium moist. After 1 month, when the leaves on this part turn yellowish, it shows the wound has begun to heal, and after about another 10 days it will root.
After rooting, cut it away from the parent plant. When planting, do not break up the soil ball. The newly potted young plant should be placed in a shaded spot to recover for 1 week, and after some of the old leaves have fallen, gradually move it to a spot with plenty of sunlight for normal watering and fertilizing. Some will bloom the same year.
How to propagate Aglaia odorata: propagation methods for Aglaia odorata
Aglaia odorata can purify the air and make life healthier. How do you propagate Aglaia odorata? Let's take a look at the propagation methods for Aglaia odorata below.
Aglaia odorata is generally best propagated during the plum rain season in summer, because at this time the temperature is high and the humidity is great, making it easy to propagate successfully. The propagation methods for Aglaia odorata can generally be divided into three types: layering, air layering and cuttings, with cuttings and air layering being the main ones.
1. Cutting method
Propagating Aglaia odorata by cuttings is simple and easy, and produces many plants. The cutting method for Aglaia odorata can be divided into two types: one is cutting from old branches from the previous year, which can be done in April-May; the other is cutting from current-year soft shoots, which can be done in June-July.
For choosing the cuttings, whether they are old branches from the previous year or current-year soft shoots, branches that are robust, plump and vigorous in growth should be chosen as cuttings.
Soft-shoot cutting propagation is generally done by taking cuttings in June-July each year. Choose robust current-year branches, cut them to about 10 cm long, remove the lower leaves, and keep 2-3 small leaves at the tip. Before inserting, it is best to soak them for a while in vitamin B12 injection to promote rooting.
Use a flower pot as the cutting bed, with vermiculite or river sand as the cutting medium. Insert to a depth of 4-5 cm, press firm after inserting and water thoroughly, then cover with plastic film. Keep it hot and humid, at 28-30°C, and afterwards spray water 2-3 times daily to keep the soil layer moist; rooting takes 40-50 days.
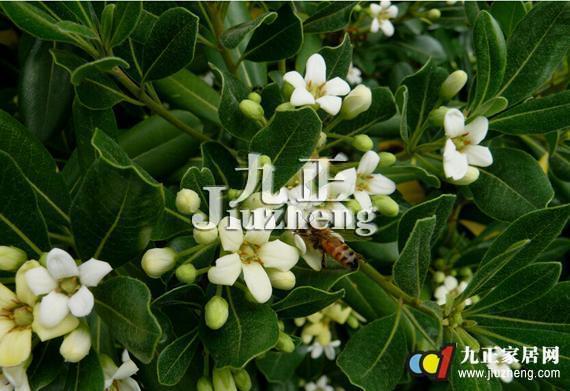
2. High-level layering method
The air-layering method is best carried out under conditions of higher temperature and greater humidity. The layering time is generally from May to August, and early June, the plum rain season, is best, giving a high survival rate and fast rooting, because during this period the environmental humidity is relatively high. Practice has shown that air layers started in this period begin rooting one after another after 40 days, and by October, with proper care, they can even bloom 1-2 times. Air layering started in July is also possible, but this is the height of midsummer heat, with intense sun, fast water evaporation and a dry environment, so the branches and leaves at the layering site easily scorch and healing and rooting are slower. Therefore, after air layering, the potted parent Aglaia odorata should be placed in a spot with half shade and half sun or half a day of sun, otherwise it easily scorches.
For choosing the air-layering site, without affecting the overall shape of the parent plant, choose a robust, lignified branch from the previous year, remove the leaves at a point 15-25 cm along its length, and make a ring of bark removed.
For high-level layering, choose a robust, pest-free branch from the current year that is semi-lignified, more than 0.5 cm thick, and make a ring of bark removed 7-8 cm below the branching point. Wrap mud, or moist vermiculite or moss, around the ringed position, then bind it tightly with plastic film on the outside, leaving an opening for watering. Keep it moist at all times; after 2-3 months it will root, and it can then be cut from the parent plant and potted, blooming easily. High-level layering can be divided into the pot-in-pot style and the mud-wrap style.
① Pot-in-pot style: choose a robust one-year-old lignified branch, and fit over it a flower pot with an enlarged drainage hole in the bottom, making sure the pot sits firmly and securely. On the Aglaia odorata branch inside the pot, make a ring of bark removed 1 cm wide, then fill soil around it and press firm, and water thoroughly. Afterwards, water daily and always keep the enclosing soil moist. It generally roots in two months; then cut it from the parent plant and grow it separately.
② Mud-wrap style: choose a robust one-year-old lignified branch, and at a point about 10 cm from the base of the branch, make a ring of bark removed. Keep 4-5 small branches above it and cut off all the side branches below. Use previously prepared mud (made by mixing fertile soil and moss, drying it over a fire, then kneading it with boiling water and letting it cool completely) and wrap it around the ringed position; wrap plastic film on the outside, tie it tight with string, keep the lower part from leaking water and leave the upper part slightly loose for adding water. The wrapped part should be 10 cm long and 5 cm in diameter. Afterwards, add water to the wrapping every day to keep it moist. It will root in two months; then cut it from the parent plant and plant it separately.
More informationHow to propagate Aglaia odorata: propagation methods for Aglaia odorata / sowing / cuttings / layering
Aglaia odorata is an ornamental flowering plant of high value, and it is grown in many regions of our country. As more people grow it, the question of how to propagate Aglaia odorata has become something people care about more. Below is a detailed explanation of the propagation methods for Aglaia odorata; let's take a look.
1. How to propagate Aglaia odorata
As for how to propagate Aglaia odorata, it can roughly be divided into three types: propagation by sowing, propagation by cuttings and propagation by layering. As long as you master the right propagation method, the survival rate is still quite high. As for how exactly these three propagation methods are carried out, let's read on.
2. Propagation methods for Aglaia odorata
1. Propagation by sowing
a: Soil selection
When propagating Aglaia odorata by sowing, soil selection is the first step and a fairly important one. Choosing the right soil can greatly increase the survival rate. For soil, we can choose relatively fertile humus soil; this kind of soil has good drainage and is more helpful for the seeds to absorb nutrients.
b: Sowing method
Among the propagation methods for Aglaia odorata, propagation by sowing is a relatively commonly used method. First we need to level the soil, then evenly scatter the seeds over the surface of the soil, and afterwards cover them with about 2 cm of soil, and then we can water. When watering, be careful to water thoroughly in one go, and be sure not to cause waterlogging, otherwise it will be very hard for them to sprout.
c: Follow-up management
After doing all of the above, they will sprout in about 15-25 days. After that we just carry out normal care; for the care method everyone can refer to the article on how to grow Aglaia odorata, and I will not go into too much detail here.
2. Propagation by cuttings
Among the propagation methods for Aglaia odorata, propagation by cuttings is one with a relatively high survival rate, provided of course that the method is correct. The specific method is described in detail in the article on the cutting method for Aglaia odorata; you can take a look.
3. Propagation by layering
Propagation by layering is relatively uncommon among the propagation methods for Aglaia odorata, but as long as the method is mastered correctly, the survival rate is still fairly high. When doing layering propagation, it is best to choose the rainy season. Choose a one-year-old lignified branch, make a ring of bark removed 1 cm wide at a point 20 cm from the base, apply peat around the ringed position, then tie the upper and lower parts tightly. It generally roots in about 2-3 months, and afterwards follow-up care is all that is needed.