What are the methods for propagating dahlia tubers?
Methods for propagating dahlia tubers. Dahlias have tall, stately form, varied flower shapes, brilliant colors and elegant bearing, making them important bulb flowers for bedding displays, flower borders, courtyards and containers, as well as excellent material for cut flowers. Because double-flowered dahlias with high ornamental value are very difficult to obtain seed from, spindle-shaped tubers are mostly used for propagation in production.
Winter storage: In relatively cold regions, if the fleshy dahlia tubers are not dug up and stored indoors, they are very easily frozen and left to rot. Usually in late autumn or early winter, when the above-ground parts wither, dig up the tubers and cut them off 5-8 cm from the base of the stem, taking care never to damage the crown (the "lu tou") at the upper end of the tuber. Spread them out to air-dry for 3-5 days, taking care that they do not freeze; only when the tubers have become slightly soft may you place them on the earthen floor indoors, standing with the tuber ends facing up in a single neat layer, then cover them well with slightly moist sandy soil;
Wounds on damaged dahlia tubers should be smeared with some charcoal powder or clean plant ash to prevent rot; the indoor temperature in winter should preferably be kept at 3-5°C. The sand used for storage must not be too dry, lest the buds dry up; nor too moist, lest rot occur. During storage, if any moldy or rotting tubers are found, remove them promptly.
Sprouting in early spring: Take the dahlia tubers that have been stored over winter and in February of the following spring place them in a greenhouse or on humus soil in the open, arranging the large clumps of tubers at regular intervals, covering them with moist sand or leaf mold, leaving only the root crown above the soil; for sprouting outdoors, also add plastic film to keep in moisture and protect against cold, spray water daily, and after 15 days they will sprout. When the shoots on the crown have grown to 2-3 cm, they can be divided and planted.
Division and planting out: After sprouting, the dahlia tuber clumps have many young shoots growing on the crown. Use a sharp knife to cut the tubers apart at the root crown so that each tuber has 1-3 buds, then plant them out in flower beds or borders, or use them for containers; generally plant 1-3 tubers per hole, and when covering with soil leave the buds on the crown exposed above the soil; if a "late spring cold snap" hits, straw can be spread over the planting holes to protect against cold, so as to prevent the tubers and young shoots from being damaged. That concludes the introduction to methods for propagating dahlia tubers.
How to plant dahlia tubers and when is the best time to plant them
The flowers that dahlias produce are large and big, extremely beautiful and very appealing. Dahlias are generally grown from tubers. Let's look at how to plant dahlia tubers and when is the best time to start planting dahlia tubers:
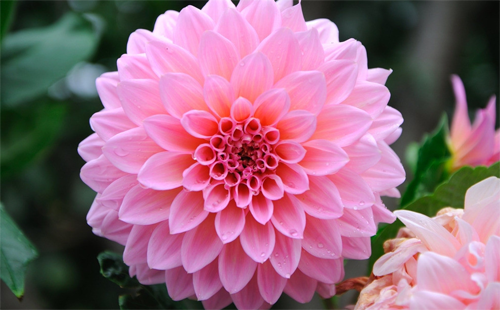
1. Prepare tools and materials:
Spade, small pruning knife, support stakes, watering can with a rose head, slow-release fertilizer, etc.
Choosing the time:
In April, once the ground begins to warm up again, take out the dahlia rhizomes stored in the storage room (if purchased that year, try to choose ones with healthy roots and plump flesh).
1. Remove the dried roots; if there are too many tubers they can be divided (separate them with a small pruning knife). Note that on each rhizome you should keep — adventitious buds and some lateral roots.
2. Dig — a hole about 20 cm deep, loosen the soil, and remove large stones and weed roots. If the soil is very sandy, enrich it with loam or compost
3. To provide the nutrition dahlias will need later, especially nitrogen, while hoeing the soil mix in slow-release fertilizer, taking care to apply the fertilizer according to the amount stated in the product instructions.
4. In order not to damage the tubers, before the dahlias root, set up — a support stake in a hole about 15 cm deep. Place the tuber flat on the bottom of the hole with the buds near the stake.
5. Fill the hole with crumbled soil; to make the tuber and soil come into full contact, gently firm the soil in the hole with your foot, then water the hole thoroughly like a light rain.
2. Setting up supports and pruning
In July, dahlias planted in early spring grow very fast, like bamboo shoots after rain, and it is time to set up supports if you did not do so at planting. To grow large, beautiful flowers, pruning is recommended.
6. Before the rhizome is weighed down by the leaves and flowers, set up a support stake at the foot of each dahlia. Take care not to damage the tuber.
7. The support should preferably be 5 cm from the rhizome; tie the rhizome and the support loosely together with plastic or raffia twine.
Note: do not pull the rhizome and support too tightly together.
8. To grow large flowers, use a sharp small pruning knife to remove the leaf axils growing under the leaves, keeping only the flower buds growing on the rhizome. At the same time remove small side branches.
9. Short dahlias do not need supports; their clumping foliage can support the flowers. However, to prevent bolting and reduce the burden on the tubers, take care to remove faded flowers promptly. Removing faded flowers promptly also effectively promotes the production of new flower buds.
3. Management after October
10. In October, when the dahlia season is over, use pruning shears or sharp scissors to cut off all the roots and stems 10 cm above the ground. Do not touch the leaves, except of course the withered ones.
11. Wait until the plant has completely withered before pulling up the dahlia. If pulled too early, its storage may be seriously damaged and future propagation affected.
12. When the plant has completely withered, use a long-handled fork and carefully pull it out, taking care not to damage its roots.
13. After air-drying in the open for several hours, remove the soil and dead leaves clinging to the tubers, cut off the excess roots and stems (leaving about 5 cm), note down the variety name and color, and attach a label.
14. Store them in a wooden box in a dry, ventilated place. If you are afraid of damage, you can store them in a mesh bag and hang it up. Take care to check their condition regularly.
15. In places where frost and freezing are rare, the dahlia tubers can be left in the ground. Cut off all withered branches and leaves 5 cm above the ground. Cover with 20-30 cm of dry leaves or straw.
4. Harvesting and storage of dahlia tubers
Dahlias are not cold-tolerant, mainly because the tubers cannot be frozen. Dahlia tubers begin dormancy at 0.5°C and are frost-damaged below 0°C, so they cannot overwinter outdoors in North China; in all regions the tubers should be harvested before the early frost arrives.
After frost, the plants and leaves wither and die back. The stems and leaves of the above-ground part should be cut off immediately, and the tubers dug up; container-grown plants can be removed from their pots or stored in their pots in a greenhouse. Before harvesting, check the varieties, selecting the best and discarding the inferior, to ensure varietal purity.
Notes:
Before storage, cut off all the withered stems and leaves about 15 cm from the root crown; to prevent twisting and injuring the root crown (the part that will sprout in future), the tubers should be dug out as whole clumps.
After digging up the tubers, first dry them in the sun for 2—3 days before storing. At night, to prevent frost, cover the tubers with reed curtains or straw or similar coverings. Wait until
the soil on the tubers has dried, then shake off the soil, sort them by variety, attach labels, and place them in a greenhouse at a temperature not exceeding about 5°C. At this time, maintaining a constant temperature of about 3-5°C and preventing excessively high temperatures is the key to preserving the tubers, because too high a temperature will make the basal shoots at the root crown sprout early, consuming water and nutrients and affecting the tubers, while too low a temperature will cause the tubers to freeze and rot.
5. Disinfection and sterilization
In addition, the storage site should be sterilized and disinfected. When arranging them, place the root crown facing up on the floor of the greenhouse; to prevent premature sprouting and heating that rots the roots, it is generally best to stack them 3-5 layers deep and bury them in slightly moist sandy soil.
During winter storage, check frequently and promptly cut off rotting and useless roots. If you find the burying sand is too dry, never water it directly; instead, take out the tubers, spray the sand moist, until it reaches a moist degree, then bury the tubers again. In addition, you can also cut off the withered stems and leaves of container-grown plants and put the original pots into a greenhouse at a temperature not exceeding 3-5°C, stack the pots up, and avoid direct strong light.
During storage, if the potting soil is too dry, water a little (never too much), keeping the soil slightly moist, so as to prevent the tubers from rotting. This method is relatively simple, but takes up a larger storage area. Another storage method is to divide the air-dried tubers together with the adventitious buds growing on the root crown.
After dividing, coat the cut surfaces with plant ash, put them in wooden troughs or wooden boxes, and fill the gaps with dry sand or wood shavings. Then place the wooden troughs or boxes under conditions of 3-5°C, good ventilation and no direct light for storage. During storage there is no need to turn them. This method is both easy to keep and convenient to take from, and can save storage space.
Some dahlia varieties have tubers that are harder to store, such as Heju, Huoshu Yinhua and so on.
When storing the tubers of these varieties, do not place them mixed together with other tubers. The air-dried tubers can be placed in a wooden box or flower pot, covered with a small amount of dry sand, and stored at 3-5°C.
A few days before the frost period arrives, the above-mentioned container-grown dahlias can be moved into a greenhouse at 5-10°C, the flowers and flower buds removed, and they can be cultivated for about 15-20 days so that the nutrients are fully concentrated in the tubers, after which the stems and leaves on the plants are removed and they are stored in their original pots or removed from the pots.
That is all for the introduction to how to plant dahlia tubers. If you really like them, then hurry up and plant one.
Harvesting and storage of dahlia tubers
Dahlias are not cold-tolerant, mainly because the tubers cannot be frozen. Dahlia tubers begin dormancy at 0.5°C and are frost-damaged below 0°C, so they cannot overwinter outdoors in North China; in all regions the tubers should be harvested before the early frost arrives.
After frost, the plants and leaves wither and die back. At this point, the stems and leaves of the above-ground part should be cut off immediately, and the tubers dug up; container-grown plants can be removed from their pots or stored in their pots in a greenhouse. Before harvesting, check the varieties, selecting the best and discarding the inferior, to ensure varietal purity. Before storage, cut off all the withered stems and leaves about 15 cm from the root crown; to prevent twisting and injuring the root crown (the part that will sprout in future), the tubers should be dug out as whole clumps. After digging up the tubers, first dry them in the sun for 2—3 days before storing. At night, to prevent frost, cover the tubers with reed curtains or straw or similar coverings. Wait until the soil on the tubers has dried, then shake off the soil, sort them by variety, attach labels, and place them in a greenhouse at a temperature not exceeding about 5°C. At this time, maintaining a constant temperature of about 3-5°C and preventing excessively high temperatures is the key to preserving the tubers, because too high a temperature will make the basal shoots at the root crown sprout early, consuming water and nutrients and affecting the tubers, while too low a temperature will cause the tubers to freeze and rot.
In addition, the storage site should be sterilized and disinfected. When arranging them, place the root crown facing up on the floor of the greenhouse; to prevent premature sprouting and heating that rots the roots, it is generally best to stack them 3-5 layers deep and bury them in slightly moist sandy soil.

During winter storage, check frequently and promptly cut off rotting and useless roots. If you find the burying sand is too dry, never water it directly; instead, take out the tubers, spray the sand moist, until it reaches a moist degree, then bury the tubers again.
In addition, you can also cut off the withered stems and leaves of container-grown plants and put the original pots into a greenhouse at a temperature not exceeding 3-5°C, stack the pots up, and avoid direct strong light. During storage, if the potting soil is too dry, water a little (never too much), keeping the soil slightly moist, so as to prevent the tubers from rotting. This method is relatively simple, but takes up a larger storage area. There is also another storage method: divide the air-dried tubers together with the adventitious buds growing on the root crown. After dividing, coat the cut surfaces with plant ash, put them in wooden troughs or wooden boxes, and fill the gaps with dry sand or wood shavings. Then place the wooden troughs or boxes under conditions of 3-5°C, good ventilation and no direct light for storage. During storage there is no need to turn them. This method is both easy to keep and convenient to take from, and can save storage space.