Causes and Solutions for Yellowing and Dropping Leaves of the Norfolk Island Pine
What to Do When Norfolk Island Pine Leaves Turn Yellow and Drop. When a Norfolk Island pine has been grown in a pot for too long, causing soil compaction, or has been kept indoors in poor light for a long time, often only the top 2-3 whorls of branches and leaves remain, while the lower leaves turn yellow and drop off, leaving the lower trunk completely bare or partly bare and losing its ornamental value. You can shorten and renew it to restore vigor, while also propagating it by air layering and cuttings. This not only rejuvenates and dwarfs the original plant, but also yields one large seedling with 2-3 whorls of branches and 3-5 small cutting-grown plantlets - truly multiple benefits in one go.
(1) Air layering and top cutting. Between March and April, when the temperature rises to around 15°C, move the bare-trunked plant outdoors. Make a ring-bark cut 2-3 whorls of branches below the top of the main trunk. The width of the debarked area should be about 3 times the diameter of the main trunk, and all the phloem should be removed. To speed up healing and rooting at the ring-barked area, apply a 100 mg/L solution of No. 1 ABT rooting powder or naphthaleneacetic acid (NAA) to the debarked spot. Wrap the wound with moist, loose, uncontaminated moss soil or humus soil, weighing about 1-2 kg. Wrap the soil ball on the outside with a piece of 30 cm x 30 cm thick plastic sheeting. Then tie the rope around both the plastic sheeting and the soil ball securely. Leave a slanted opening at the top of the plastic so that you can add water when the soil ball dries out or so it can catch rainwater, and keep the soil ball moist at all times. In late summer or early autumn, a complete root system will have grown inside the soil ball. At this point, cut it off from below the base of the soil ball, remove the lowest whorl of branches, take off the plastic sheeting, and plant it together with the soil ball in a flower pot. If the roots in the soil ball are not yet very numerous, you can wait a bit longer - be sure to wait until the roots are fully developed before cutting. Don't be too hasty.
(2) Encouraging sprouting from the old trunk. Take the Norfolk Island pine stump that was top-cut after air layering, remove it from the pot in late autumn, pick away some of the old soil, cut off dead and rotten roots, replace with fertile, loose potting soil, replant it, and place it indoors. In winter, do not let the potting soil get too wet, to avoid root rot. Wait until the temperature rises the following spring, then move it outdoors. The remaining stump should ideally be only about 30-40 cm tall. As the temperature gradually rises, the dormant buds on the upper part of the stump will break dormancy and send out shoots. At this time, apply additional fertilizer and increase light. By June-July, when the shoots have become woody or semi-woody, keep one of the most vigorous shoots as the main leader, and pull off the remaining shoots from the base to use as cuttings.
(3) Cutting propagation from shoots. Take the Norfolk Island pine shoots that were pulled off, trim 1-2 cm from the base, dip the cut ends in a 100 mg/L solution of No. 1 ABT rooting powder or naphthaleneacetic acid (NAA) for 5-10 seconds, let them dry slightly, then insert them for cuttings. Cover the pot opening tightly with plastic film, tie it securely with rope, and place it under a shade frame. After planting, open it to check every 3-5 days. If the medium has dried out, water it promptly. By late autumn or early winter, when the cuttings have grown good roots at the cut ends, move them indoors to overwinter, and repot them in separate pots the following year. Because Norfolk Island pine cuttings have very obvious polarity, plantlets propagated from the tips of ordinary side branches will show permanent lodging, whereas cuttings propagated from the tip of a topped trunk can always maintain an upright, vertical growth habit.
Norfolk Island Pine Norfolk Island Pine
Norfolk Island Pine Photo Album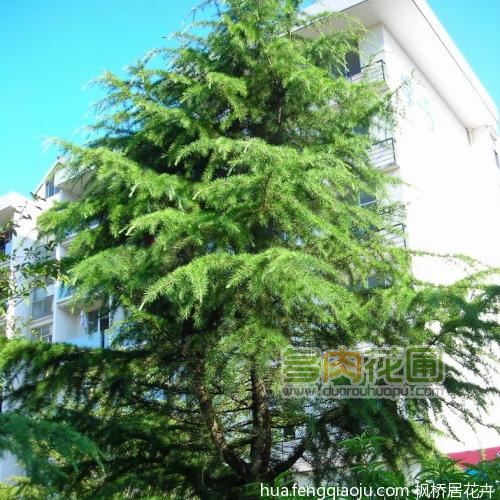 Norfolk Island Pine Basic Information
[Species Chinese Name]: Norfolk Island Pine
[Species Latin Name]: Araucaria cunninghamii Sweet
[Species Aliases]: Norfolk Island Pine, Small-leaved Norfolk Island Pine, Tower-shaped Norfolk Island Pine
[Family Chinese Name]: Araucariaceae
[Family Latin Name]: Araucariaceae
[Genus Chinese Name]: Araucaria
[Genus Latin Name]: Araucaria
The Norfolk Island pine prefers a warm climate, fresh and humid air, and soft, ample light. It is not cold-tolerant and dislikes drought. In winter it needs plenty of sunlight, and in summer it should be protected from intense direct sun. It fears the dry gales of northern spring and the scorching sun of midsummer. It grows best under conditions of 25°C-30°C and relative humidity above 70%. For pot culture, it requires a loose, fertile potting soil with high humus content and strong drainage and aeration.
Norfolk Island Pine Morphological Characteristics
Tree, in its native habitat reaching 60-70 m tall, with a diameter at breast height of over 1 m. Bark grayish-brown or dark gray, coarse, with transverse fissures. Large branches spreading horizontally or slanting upward. Young tree crown is spire-shaped, becoming flat-topped when old. Lateral branchlets densely borne, drooping, nearly pinnately arranged. Leaves dimorphic: leaves on young trees and lateral branches loosely arranged, spreading, cone-shaped, needle-shaped, sickle-shaped or triangular, 7-17 mm long, about 2.5 mm wide at the base, slightly curved, slightly four-angled or with the ridge on the upper (ventral) surface inconspicuous. Upper surface with numerous stomatal lines; lower surface with irregular stomatal lines or nearly without stomatal lines. Upper part gradually narrowing, apex with a tapering or slightly acute point. Leaves on large branches and flowering and fruiting branches closely arranged and overlapping, extending obliquely upward, slightly curved upward, ovate, triangular-ovate or triangular, without an obvious keel or with a longitudinal ridge on the lower surface, 6-10 mm long. Cones ovoid or ellipsoid, 6-10 cm long, about 4 cm wide, broad at the base, gradually narrowing or slightly rounded at the upper part, apex acute or obtuse, midrib obvious or not obvious, upper surface grayish-green, with white powder, with numerous stomatal lines; lower surface green, with irregular sparse stomatal lines only in the middle and lower parts. Male cones solitary at the tips of branches, cylindrical. Cones ovate or ellipsoid, 6-10 cm long, 4.5-7.5 cm in diameter. Cone scales cuneate-obovate, with thin wings on both sides, broad and thick at the apex, with a sharp ridge, and a sharply pointed long tail-like apex in the center, the apex markedly recurved backward; the apex of the seed scale is thin, not fleshy. Seeds ellipsoid, with membranous wings on both sides that are fused with the seed.
Norfolk Island Pine Cultivation:
Seedling Transplanting
The Norfolk Island pine likes warmth and humidity, is shade-tolerant, and is not cold-tolerant. Seed-grown seedlings have a long taproot and few fibrous roots. Seedlings are prone to dying during transplanting. To improve the survival rate of Norfolk Island pine seedling transplants, the following key technical points should be followed.
1. Root Protection
Because Norfolk Island pine seedlings have few lateral roots and fine fibrous roots, they will wither and dry out if not handled carefully. Therefore, protecting the seedling root system is very important. First, transport them with the pot and soil, and keep the original potting soil moist. Second, plant the seedlings immediately after buying them. If you cannot plant them right away, place them in a cool, humid place and do not expose them to the sun, so as to keep the seedlings, especially the roots, fresh and alive. In addition, when winter temperatures are low, the roots are prone to freezing during transport, so attention should be paid to keeping them warm.
2. Careful Planting
When planting, keep as much of the original soil around the seedling as possible. The planting soil should be loose and fine. Do not press the soil around the roots too hard. After planting, water thoroughly to settle the roots. In addition, seed-grown Norfolk Island pine seedlings have a long taproot, so they should be planted somewhat deep to prevent the root system from being exposed and the seedling from lodging, which would affect survival.
3. Keeping Warm
The Norfolk Island pine is not cold-tolerant. If you buy seedlings and plant them in winter or early spring, besides protecting against freezing during transport, you should also take warmth-retention measures after planting, such as growing them in a greenhouse or covering them with an arched plastic film.
4. Shading
The Norfolk Island pine is a shade-tolerant ornamental plant, and seedlings are even more afraid of direct sun exposure. Therefore, shade them immediately after planting.
5. Handling of Broken Seedlings
Norfolk Island pine seedlings are tender and easily broken. The following methods can be used to remedy this. For seedlings with broken roots, wash them with clean water and insert them in pure sand. At a suitable temperature, they will re-root from the cut surface in 1-2 weeks. After the root system is well developed, plant them. For seedlings with broken buds or stems but still bearing leaves, plant them as usual. After they survive, they will sprout new buds after a certain period of time.
Cultivation Key Points
When Norfolk Island pine leaves turn yellow, there are the following reasons:
1. Insufficient light. When the Norfolk Island pine is maintained in a well-lit place, it grows well. If kept in a low-light place for a long time, it will show leaf yellowing accompanied by leaf drop. It needs to be gradually moved to a place with better light, otherwise the plant's condition will worsen further.
2. Overwatering. The watering principle for the Norfolk Island pine is to alternate between dry and wet. Never water too much or too often. Do not water if the potting soil is not dry, otherwise the roots will rot when they cannot get oxygen, making it difficult to absorb water and nutrients, and the plant will show symptoms of distress.
3. Damage from low or high temperatures (this is generally unlikely nowadays). When the temperature drops below 5°C, Norfolk Island pine leaves will turn yellow and a small amount will drop off. During high-temperature periods, if the air humidity is also low, a large number of yellow leaves will appear.
4. Acute leaf dehydration caused by air humidity being too low or wind being too strong. This requires placing it in gentle wind, or frequently spraying or sprinkling water to increase air humidity.
5. Infection by diseases. Generally, preventive spraying with carbendazim, chlorothalonil, etc. is needed.
When Norfolk Island pine drops leaves and leaves turn yellow, there are the following reasons:
1. Insufficient light. When the Norfolk Island pine is maintained in a well-lit place, it grows well. If kept in a low-light place for a long time, it will show leaf yellowing accompanied by leaf drop. It needs to be gradually moved to a place with better light, otherwise the plant's condition will worsen further.
2. Overwatering. The watering principle for the Norfolk Island pine is to alternate between dry and wet. Never water too much or too often. Do not water if the potting soil is not dry, otherwise the roots will rot when they cannot get oxygen, making it difficult to absorb water and nutrients, and the plant will show symptoms of distress.
3. Damage from low or high temperatures (this is generally unlikely nowadays). When the temperature drops below 5°C, Norfolk Island pine leaves will turn yellow and a small amount will drop off. During high-temperature periods, if the air humidity is also low, a large number of yellow leaves will appear.
4. Acute leaf dehydration caused by air humidity being too low or wind being too strong. This requires placing it in gentle wind, or frequently spraying or sprinkling water to increase air humidity.
5. Infection by diseases. Generally, preventive spraying with carbendazim, chlorothalonil, etc. is needed.
How to Grow Norfolk Island Pine
The Norfolk Island pine prefers a humid or semi-dry climate environment and requires the relative air humidity of the growing environment to be 50-70%. When the relative air humidity is too low, the lower leaves turn yellow and drop off, and the upper leaves lose their luster.
It is not demanding about temperature, but north of the Yangtze River it cannot overwinter outdoors.
Light management: It has strong adaptability to light. When kept indoors, place it in a bright spot as much as possible, such as a well-lit living room, bedroom, or study. After keeping it indoors for a period (about one month), move it outdoors to a shaded place (with warmth-retention conditions in winter) for a period (about one month), and alternate back and forth this way.
Fertilizer and water management: For potted plants, in addition to adding organic fertilizer when potting, proper fertilizer and water management should also be carried out during routine care.
Spring, summer, and autumn: These three seasons are the peak growing seasons for the Norfolk Island pine. Fertilizer and water management follows the cycle of "Hua Bao" - clear water - "Hua Bao" - clear water, with an interval of about 1-4 days. On sunny days or during high temperatures, the interval is shorter; on rainy days or during low temperatures, the interval is longer or no watering is done. During the winter dormancy period, the main task is to control fertilizer and water. Fertilizer and water management follows the cycle of "Hua Bao" - clear water - clear water - "Hua Bao" - clear water - clear water, with an interval of about 3-7 days. On sunny days or during high temperatures, the interval is shorter; on rainy days or during low temperatures, the interval is longer or no watering is done.
For field-planted plants, in spring and summer, apply fertilizer and water 2-4 times according to drought conditions: first dig a small circular trench 30-100 cm outside the root crown (the larger the plant, the farther from the root crown), with the trench width and depth both 20 cm. Scatter 25-50 jin of organic fertilizer or 1-5 liang of granular compound fertilizer (chemical fertilizer) into the trench, then water thoroughly. After the beginning of winter and before the beginning of spring, apply fertilizer once more by the above method, but do not water.
Pruning: In winter, when the plant enters dormancy or semi-dormancy, cut off weak, diseased, pest-infested, dead, and overly dense branches. You can also tidy up the branches in conjunction with taking cuttings.
Repotting: As long as it is cared for properly, it will grow very quickly. When it grows to a certain size, consider giving it a larger pot so it can continue to grow vigorously. The potting soil and component ratios for repotting can be one of the following: vegetable garden soil : cinder = 3:1; or garden soil : medium-coarse river sand : sawdust (mushroom residue) = 4:1:2; or one of paddy soil, pond mud, or leaf mold.
Removing from the pot: Place the plant to be repotted on the ground. First, gently pat the sides of the pot with your palm to shock the root system and separate it from the pot wall. Turn the pot upside down on your left hand, gently grip the plant between your left index and middle fingers, with your wrist and fingertips braced against the pot rim. Pat the bottom of the pot with your right hand, then use your thumb to push the root ball downward through the drainage hole, letting the plant come out. After it comes out, gently pat the root ball with both palms to let excess soil fall away.
Norfolk Island Pine Potted Management
Loosening Soil and Watering
After planting, water promptly and loosen the surface soil to reduce water evaporation. Normally, water moderately. During the growing season, water frequently, 2-3 times a week, with the water penetrating 10-15 cm deep. As the seedling grows, reduce the frequency of watering. Keep the potting soil and surrounding environment moist at all times, and strictly guard against drought and waterlogging. During hot, dry periods, frequently spray or mist the leaves and surrounding environment to increase air humidity and keep the soil moist. Avoid the potting soil being too dry in summer or the water volume being too large in winter; both too dry and too wet can easily cause the lower leaves to droop and soften. In summer, avoid intense direct sun; place it in a shaded spot under a canopy and sprinkle water frequently to maintain relatively high air humidity.
Norfolk Island Pine Shaping Management
The Norfolk Island pine is valued for its upright, straight plant form. In the second year of a cutting-grown plant, or when a seed-grown plant reaches about 50 cm, a stick should be set up and wrapped around it for support to prevent the plant from becoming twisted and affecting its ornamental effect. Young trees should be repotted once a year or every other spring. Plants over five years old should have their pots and soil changed once every two or three years, combined with spraying chlormequat to control the height of the Norfolk Island pine. In northern regions, move it outdoors at the end of April or early May and place it in a wind-sheltered, sunny spot for care. In midsummer, provide appropriate shade. During the growing season, turn the pot in a timely manner to prevent the tree shape from growing lopsided and affecting its ornamental value. The Norfolk Island pine is not tolerant of severe cold. In northern regions, move it indoors at the end of September or early October (Cold Dew), place it in a sunny, well-ventilated spot, stop fertilizing and control watering, and the room temperature must not be lower than 8°C.
Frequent Fertilizer Application
For potted Norfolk Island pines, use a mix of leaf mold, peat soil, pure river sand, and a small amount of decomposed organic fertilizer. The potting soil is best made of 3 parts loam, 1 part leaf mold, 1 part coarse sand, and a small amount of plant ash. The depth of the soil layer should be such that the rooting buds on the upper layer are just exposed at the soil surface. Starting from the sprouting of new buds in spring, apply 1-2 times a month of decomposed, dilute organic liquid fertilizer and calcium fertilizer to keep the plant fresh and the leaves glossy.
Norfolk Island Pine
Norfolk Island Pine Basic Information
[Species Chinese Name]: Norfolk Island Pine
[Species Latin Name]: Araucaria cunninghamii Sweet
[Species Aliases]: Norfolk Island Pine, Small-leaved Norfolk Island Pine, Tower-shaped Norfolk Island Pine
[Family Chinese Name]: Araucariaceae
[Family Latin Name]: Araucariaceae
[Genus Chinese Name]: Araucaria
[Genus Latin Name]: Araucaria
The Norfolk Island pine prefers a warm climate, fresh and humid air, and soft, ample light. It is not cold-tolerant and dislikes drought. In winter it needs plenty of sunlight, and in summer it should be protected from intense direct sun. It fears the dry gales of northern spring and the scorching sun of midsummer. It grows best under conditions of 25°C-30°C and relative humidity above 70%. For pot culture, it requires a loose, fertile potting soil with high humus content and strong drainage and aeration.
Norfolk Island Pine Morphological Characteristics
Tree, in its native habitat reaching 60-70 m tall, with a diameter at breast height of over 1 m. Bark grayish-brown or dark gray, coarse, with transverse fissures. Large branches spreading horizontally or slanting upward. Young tree crown is spire-shaped, becoming flat-topped when old. Lateral branchlets densely borne, drooping, nearly pinnately arranged. Leaves dimorphic: leaves on young trees and lateral branches loosely arranged, spreading, cone-shaped, needle-shaped, sickle-shaped or triangular, 7-17 mm long, about 2.5 mm wide at the base, slightly curved, slightly four-angled or with the ridge on the upper (ventral) surface inconspicuous. Upper surface with numerous stomatal lines; lower surface with irregular stomatal lines or nearly without stomatal lines. Upper part gradually narrowing, apex with a tapering or slightly acute point. Leaves on large branches and flowering and fruiting branches closely arranged and overlapping, extending obliquely upward, slightly curved upward, ovate, triangular-ovate or triangular, without an obvious keel or with a longitudinal ridge on the lower surface, 6-10 mm long. Cones ovoid or ellipsoid, 6-10 cm long, about 4 cm wide, broad at the base, gradually narrowing or slightly rounded at the upper part, apex acute or obtuse, midrib obvious or not obvious, upper surface grayish-green, with white powder, with numerous stomatal lines; lower surface green, with irregular sparse stomatal lines only in the middle and lower parts. Male cones solitary at the tips of branches, cylindrical. Cones ovate or ellipsoid, 6-10 cm long, 4.5-7.5 cm in diameter. Cone scales cuneate-obovate, with thin wings on both sides, broad and thick at the apex, with a sharp ridge, and a sharply pointed long tail-like apex in the center, the apex markedly recurved backward; the apex of the seed scale is thin, not fleshy. Seeds ellipsoid, with membranous wings on both sides that are fused with the seed.
Norfolk Island Pine Cultivation:
Seedling Transplanting
The Norfolk Island pine likes warmth and humidity, is shade-tolerant, and is not cold-tolerant. Seed-grown seedlings have a long taproot and few fibrous roots. Seedlings are prone to dying during transplanting. To improve the survival rate of Norfolk Island pine seedling transplants, the following key technical points should be followed.
1. Root Protection
Because Norfolk Island pine seedlings have few lateral roots and fine fibrous roots, they will wither and dry out if not handled carefully. Therefore, protecting the seedling root system is very important. First, transport them with the pot and soil, and keep the original potting soil moist. Second, plant the seedlings immediately after buying them. If you cannot plant them right away, place them in a cool, humid place and do not expose them to the sun, so as to keep the seedlings, especially the roots, fresh and alive. In addition, when winter temperatures are low, the roots are prone to freezing during transport, so attention should be paid to keeping them warm.
2. Careful Planting
When planting, keep as much of the original soil around the seedling as possible. The planting soil should be loose and fine. Do not press the soil around the roots too hard. After planting, water thoroughly to settle the roots. In addition, seed-grown Norfolk Island pine seedlings have a long taproot, so they should be planted somewhat deep to prevent the root system from being exposed and the seedling from lodging, which would affect survival.
3. Keeping Warm
The Norfolk Island pine is not cold-tolerant. If you buy seedlings and plant them in winter or early spring, besides protecting against freezing during transport, you should also take warmth-retention measures after planting, such as growing them in a greenhouse or covering them with an arched plastic film.
4. Shading
The Norfolk Island pine is a shade-tolerant ornamental plant, and seedlings are even more afraid of direct sun exposure. Therefore, shade them immediately after planting.
5. Handling of Broken Seedlings
Norfolk Island pine seedlings are tender and easily broken. The following methods can be used to remedy this. For seedlings with broken roots, wash them with clean water and insert them in pure sand. At a suitable temperature, they will re-root from the cut surface in 1-2 weeks. After the root system is well developed, plant them. For seedlings with broken buds or stems but still bearing leaves, plant them as usual. After they survive, they will sprout new buds after a certain period of time.
Cultivation Key Points
When Norfolk Island pine leaves turn yellow, there are the following reasons:
1. Insufficient light. When the Norfolk Island pine is maintained in a well-lit place, it grows well. If kept in a low-light place for a long time, it will show leaf yellowing accompanied by leaf drop. It needs to be gradually moved to a place with better light, otherwise the plant's condition will worsen further.
2. Overwatering. The watering principle for the Norfolk Island pine is to alternate between dry and wet. Never water too much or too often. Do not water if the potting soil is not dry, otherwise the roots will rot when they cannot get oxygen, making it difficult to absorb water and nutrients, and the plant will show symptoms of distress.
3. Damage from low or high temperatures (this is generally unlikely nowadays). When the temperature drops below 5°C, Norfolk Island pine leaves will turn yellow and a small amount will drop off. During high-temperature periods, if the air humidity is also low, a large number of yellow leaves will appear.
4. Acute leaf dehydration caused by air humidity being too low or wind being too strong. This requires placing it in gentle wind, or frequently spraying or sprinkling water to increase air humidity.
5. Infection by diseases. Generally, preventive spraying with carbendazim, chlorothalonil, etc. is needed.
When Norfolk Island pine drops leaves and leaves turn yellow, there are the following reasons:
1. Insufficient light. When the Norfolk Island pine is maintained in a well-lit place, it grows well. If kept in a low-light place for a long time, it will show leaf yellowing accompanied by leaf drop. It needs to be gradually moved to a place with better light, otherwise the plant's condition will worsen further.
2. Overwatering. The watering principle for the Norfolk Island pine is to alternate between dry and wet. Never water too much or too often. Do not water if the potting soil is not dry, otherwise the roots will rot when they cannot get oxygen, making it difficult to absorb water and nutrients, and the plant will show symptoms of distress.
3. Damage from low or high temperatures (this is generally unlikely nowadays). When the temperature drops below 5°C, Norfolk Island pine leaves will turn yellow and a small amount will drop off. During high-temperature periods, if the air humidity is also low, a large number of yellow leaves will appear.
4. Acute leaf dehydration caused by air humidity being too low or wind being too strong. This requires placing it in gentle wind, or frequently spraying or sprinkling water to increase air humidity.
5. Infection by diseases. Generally, preventive spraying with carbendazim, chlorothalonil, etc. is needed.
How to Grow Norfolk Island Pine
The Norfolk Island pine prefers a humid or semi-dry climate environment and requires the relative air humidity of the growing environment to be 50-70%. When the relative air humidity is too low, the lower leaves turn yellow and drop off, and the upper leaves lose their luster.
It is not demanding about temperature, but north of the Yangtze River it cannot overwinter outdoors.
Light management: It has strong adaptability to light. When kept indoors, place it in a bright spot as much as possible, such as a well-lit living room, bedroom, or study. After keeping it indoors for a period (about one month), move it outdoors to a shaded place (with warmth-retention conditions in winter) for a period (about one month), and alternate back and forth this way.
Fertilizer and water management: For potted plants, in addition to adding organic fertilizer when potting, proper fertilizer and water management should also be carried out during routine care.
Spring, summer, and autumn: These three seasons are the peak growing seasons for the Norfolk Island pine. Fertilizer and water management follows the cycle of "Hua Bao" - clear water - "Hua Bao" - clear water, with an interval of about 1-4 days. On sunny days or during high temperatures, the interval is shorter; on rainy days or during low temperatures, the interval is longer or no watering is done. During the winter dormancy period, the main task is to control fertilizer and water. Fertilizer and water management follows the cycle of "Hua Bao" - clear water - clear water - "Hua Bao" - clear water - clear water, with an interval of about 3-7 days. On sunny days or during high temperatures, the interval is shorter; on rainy days or during low temperatures, the interval is longer or no watering is done.
For field-planted plants, in spring and summer, apply fertilizer and water 2-4 times according to drought conditions: first dig a small circular trench 30-100 cm outside the root crown (the larger the plant, the farther from the root crown), with the trench width and depth both 20 cm. Scatter 25-50 jin of organic fertilizer or 1-5 liang of granular compound fertilizer (chemical fertilizer) into the trench, then water thoroughly. After the beginning of winter and before the beginning of spring, apply fertilizer once more by the above method, but do not water.
Pruning: In winter, when the plant enters dormancy or semi-dormancy, cut off weak, diseased, pest-infested, dead, and overly dense branches. You can also tidy up the branches in conjunction with taking cuttings.
Repotting: As long as it is cared for properly, it will grow very quickly. When it grows to a certain size, consider giving it a larger pot so it can continue to grow vigorously. The potting soil and component ratios for repotting can be one of the following: vegetable garden soil : cinder = 3:1; or garden soil : medium-coarse river sand : sawdust (mushroom residue) = 4:1:2; or one of paddy soil, pond mud, or leaf mold.
Removing from the pot: Place the plant to be repotted on the ground. First, gently pat the sides of the pot with your palm to shock the root system and separate it from the pot wall. Turn the pot upside down on your left hand, gently grip the plant between your left index and middle fingers, with your wrist and fingertips braced against the pot rim. Pat the bottom of the pot with your right hand, then use your thumb to push the root ball downward through the drainage hole, letting the plant come out. After it comes out, gently pat the root ball with both palms to let excess soil fall away.
Norfolk Island Pine Potted Management
Loosening Soil and Watering
After planting, water promptly and loosen the surface soil to reduce water evaporation. Normally, water moderately. During the growing season, water frequently, 2-3 times a week, with the water penetrating 10-15 cm deep. As the seedling grows, reduce the frequency of watering. Keep the potting soil and surrounding environment moist at all times, and strictly guard against drought and waterlogging. During hot, dry periods, frequently spray or mist the leaves and surrounding environment to increase air humidity and keep the soil moist. Avoid the potting soil being too dry in summer or the water volume being too large in winter; both too dry and too wet can easily cause the lower leaves to droop and soften. In summer, avoid intense direct sun; place it in a shaded spot under a canopy and sprinkle water frequently to maintain relatively high air humidity.
Norfolk Island Pine Shaping Management
The Norfolk Island pine is valued for its upright, straight plant form. In the second year of a cutting-grown plant, or when a seed-grown plant reaches about 50 cm, a stick should be set up and wrapped around it for support to prevent the plant from becoming twisted and affecting its ornamental effect. Young trees should be repotted once a year or every other spring. Plants over five years old should have their pots and soil changed once every two or three years, combined with spraying chlormequat to control the height of the Norfolk Island pine. In northern regions, move it outdoors at the end of April or early May and place it in a wind-sheltered, sunny spot for care. In midsummer, provide appropriate shade. During the growing season, turn the pot in a timely manner to prevent the tree shape from growing lopsided and affecting its ornamental value. The Norfolk Island pine is not tolerant of severe cold. In northern regions, move it indoors at the end of September or early October (Cold Dew), place it in a sunny, well-ventilated spot, stop fertilizing and control watering, and the room temperature must not be lower than 8°C.
Frequent Fertilizer Application
For potted Norfolk Island pines, use a mix of leaf mold, peat soil, pure river sand, and a small amount of decomposed organic fertilizer. The potting soil is best made of 3 parts loam, 1 part leaf mold, 1 part coarse sand, and a small amount of plant ash. The depth of the soil layer should be such that the rooting buds on the upper layer are just exposed at the soil surface. Starting from the sprouting of new buds in spring, apply 1-2 times a month of decomposed, dilute organic liquid fertilizer and calcium fertilizer to keep the plant fresh and the leaves glossy.